
Lab 7-1: Configuring the Phone Directory
Labs in previous chapters established the ability to call between phones in a company and to the public switched telephone network (PSTN). The next step is to add features that improve the functioning of the system and enhance the users’ experience. CUCME, as a small to mediumbusiness solution, has numerous features that provide functionality comparable to a full-fledged PBX. We will focus on just three features: the local directory, call forwarding, and the system reporting capabilities of call detail records (CDR) and call accounting.
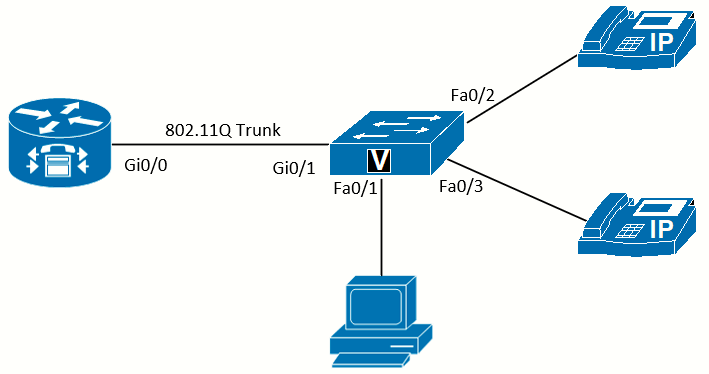 Topology diagram
Scenario
Jimenez Research Inc. (JRI) wants to get rid of its photocopied company directory and use a directory that is easy to update whenever there is a change at the office. Using the phone directory on the phone display will allow this.
Equipment Required
- Cisco 2821 router
- Cisco 3560 switch
- Lab configuration from Lab 6-5.
- Two or more IP Phones
Objectives
- Create a directory of phone users.
- Configure the directory to show on the phone display.
Task 1: Load Prior Configurations
This lab is based on the configuration from Lab 6-5. If necessary, load the configuration for both the switch and router. Connect a PC to the switch and verify that it can ping the router and switch management addresses.
This lab will show both the CLI and Cisco Configuration Professional (CCP) software methods to complete the tasks.
Task 2: Populate the Directory
There are two methods to add names to the CUCME user directory. The first method is by using the name command when configuring each ephone-dn. This is the best method to add user names to the directory, as it also build the caller ID information for calls.
The second method is to manually add names and numbers to the directory. This is useful to add items to the directory for devices that don't use ephone-dns (for example, a fax machine connected to an FXS port) or even users outside of the system (for example, adding contractors to the directory).
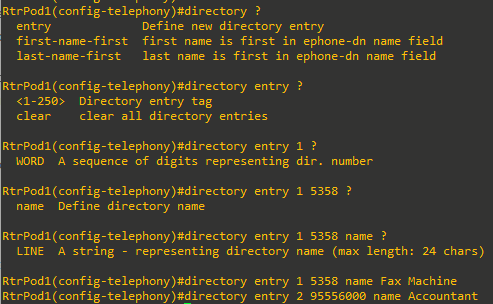
JRI would like to add the phone number for the fax machine (use the number assigned in the FXS #1 column from the Pod 1 addressing table) and the contracted accountant (at phone number 555-6000) to the company directory.
Manually Adding Directory Entries Using the CLI
The directory entry command in telephony-service configuration mode allows. you to manually add entries to the directory. Each entry has a tag number, the directory number associated with the name, the name keyword, and the actual name for the entry. A common mistake is forgetting that the command requires the name keyword prior to the actual name. Don’t forget that if you are dialing an outside number, you need to include the outside line access digit, the same as if you were dialing on a phone.
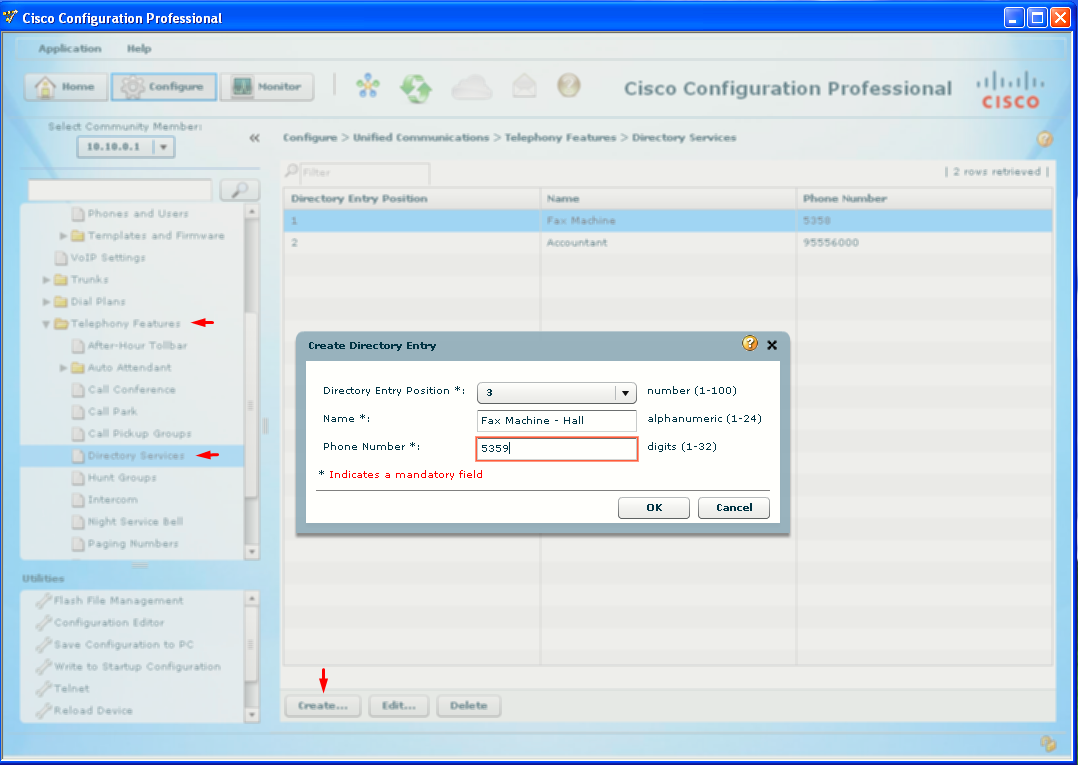
Manually Adding Directory Entries Using CCP
- Go to Unified Communications > Telephony Features > Directory Services.
- Click Create. The Create Directory Entry dialog box opens. The Directory Entry Position drop-down list will default to the next usable number. Fill up a sample entry and deliver the config.
Enabling the Local Directory on the Phone Display
For the local directory to show on the phones, three things are needed:
- Directory entries.
- HTTP service enabled on the router.
- Each ephone needs to have the model type configured.
The more current IOS versions have unneeded services disabled by default for improved security (including HTTP service). The directory on the phone uses HTTP to communicate with the router to get the directory information. If using CCP, the HTTP service has already been enabled. If necessary, turn on the service using the ip http server command.
The type command identifies the features of the phone model to CUCME, and is required for the Directories button on the phone to show the local directory. This was configured in Lab 5-2 or Lab 5-3 (CCP required you to select the model before adding a phone).
With those steps complete, press the Directories button on the phone to see the various services, such as Missed Calls, Received Calls, Speed Dials, and so on.
If the Local Directory does not show on the phone, verify the firmware on the IP Phone is correct for the version of CUCME. If the phones have their firmware updated by CUCM 8.6 the updated firmware will not show the Local Directory for CUCME version 7.1. In this case, it would be necessary to downgrade the firmware to the correct version before CUCME shows the Local Directory on the phone.
Use the navigation buttons (or press the number to the left of the name) to select Local Directory. You can press the Submit softkey to see the first 32 directory entries, or use the keypad on the phone to enter part of a first or last name to search for it. Use he navigation buttons (or press the number to the left of the name) to select the entry you want. The entry can be called by pressing the Dial softkey.