
Lab 7-3: Guest WLAN Configuration
Topology
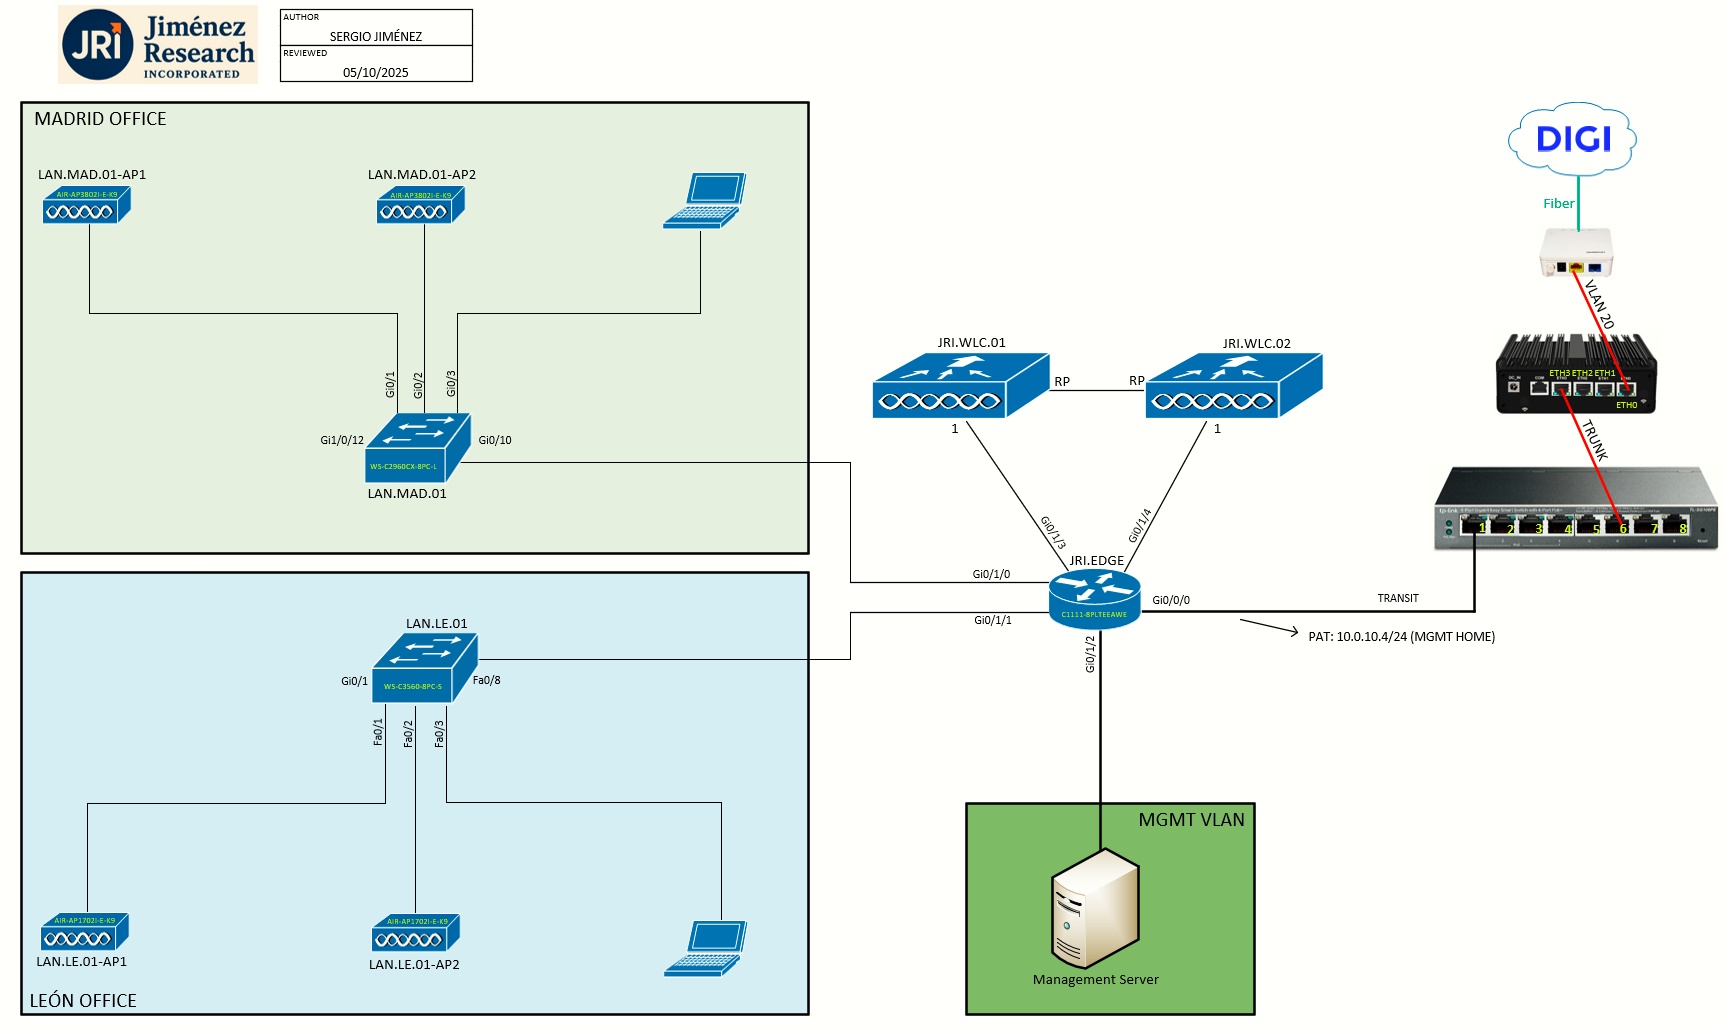
Task 1: Prepare the Wired Infrastructure (JRI.EDGE)
Before touching the WLC, I'll be creating the VLAN guest on JRI.EDGE. Recalling from lab 1-1:
- GUEST_NETWORK: 192.168.99.0/24 (L3 VLAN 99)
So the steps would be:
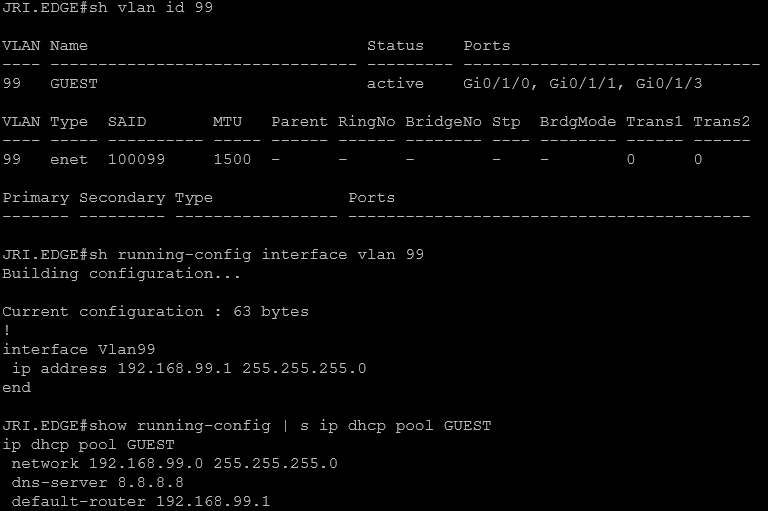
- VLAN creation: Create VLAN 99 on JRI.EDGE
- Trunk allowance: Already allowed (no VLANs filtered on the trunk port Gi0/1/3 to JRI.WLC.01)
- L3 gateway: Create SVI on JRI.EDGE for VLAN 99 with IP 192.168.99.1
- DHCP: Create a DHCP pool on JRI.EDGE for this VLAN
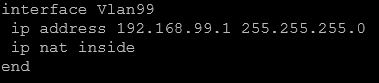
Also, we want to make sure the VLAN 99 L3 interface has the ip nat inside command applied, otherwise users on the guest network won't be able to browse the internet. And as part of this adjustment, I will add routing configuration so I can reach the WLC mgmt. IP from my home user's network (10.0.40.0/24) which is outside of this lab network.

With this last command, I mapped 10.0.10.4:8443 to 192.168.100.2:443, I had to use the port 8443 because the HTTPS server on the C1111 is using port 443. The extendable keyword is required here because we are doing PAT within a static NAT statement (1-to-1 maps one full IP to another full IP, but with the extendable keyword we are telling IOS to map specific ports of that IP, not the whole thing). This allows the router to create multiple specific entries (e.g., one for port 8443, another for port 80) for the same internal IP address without a configuration error. We also could move the C1111 https server to another port so we could repurpose the 443.
I could have solved this via routing instead of NAT. On the OPNsense (my home router) I would just configure a gateway with IP 10.0.10.4 (JRI.EDGE, the C1111) and a static route to the 192.168.100.0/24 (WLC management) with 10.0.10.4 as next-hop. Optionally a rule on MGMT for allowing traffic originating on the 192.168.100.0/24 destined to USERS net.
Task 2: Create an ACL on the WLC
First step on the WLC will be configuring an ACL to apply to this guest network. I'll do it on the Security > Access Control Lists section:

- Allows the internet to talk back to the guest users, and allow them to talk to the 192.168.99.1 gateway.
- Block RFC1918 Class A
- Block RFC1918 Class B (includes private networks of JRI!)
- Block RFC1918 Class C (safe, because we permitted 192.168.99.0/24 on ACE nº1)
- Allows all outbound requests to the Internet (DNS, HTTP, HTTPS, etc.) and DHCP broadcasts.
This could be further tuned.
Task 3: Creating the Dynamic Interface
Create a dynamic interface for the guest network:
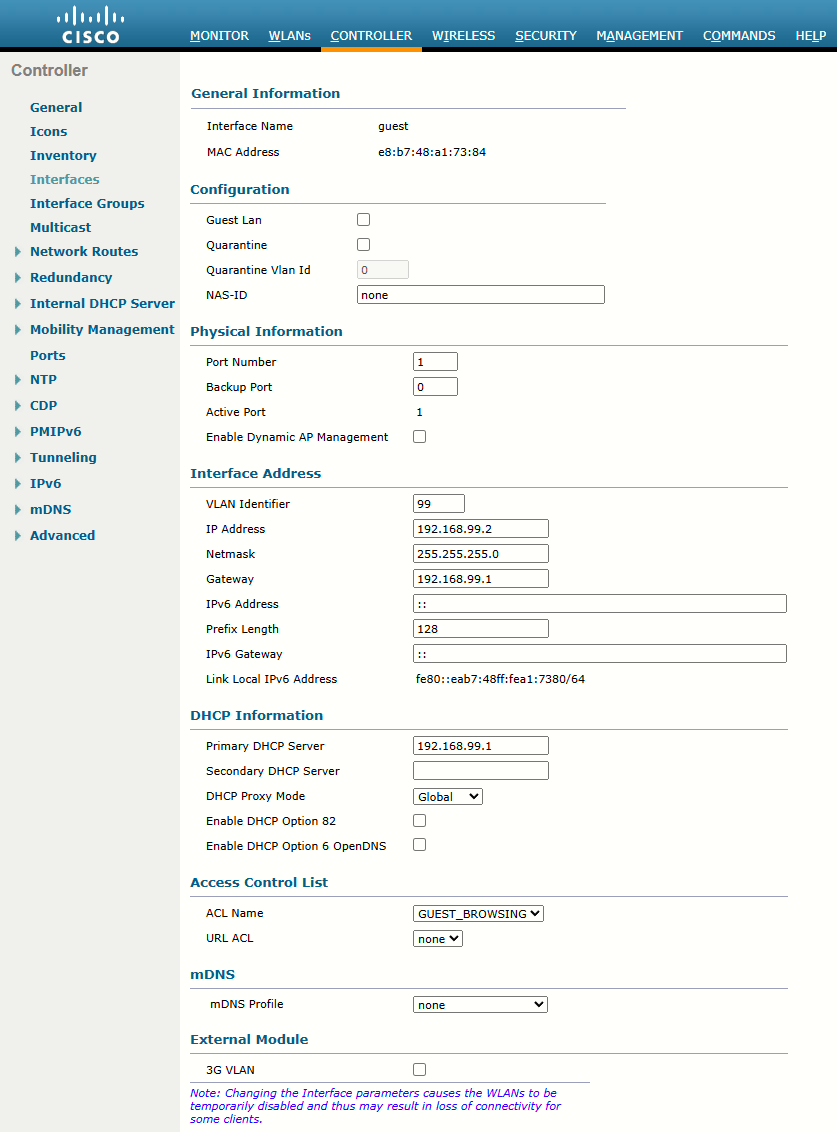
Note the ACL we just created is applied at the interface level (GUEST_BROWSING). NOT to be confused with the Pre-authentication ACL which is applied at a WLAN level.
Task 4: Creating the Guest WLAN
Creating the guest WLAN is no different that creating a normal WLAN, we'll just go to the WLAN menu and add a new WLAN:
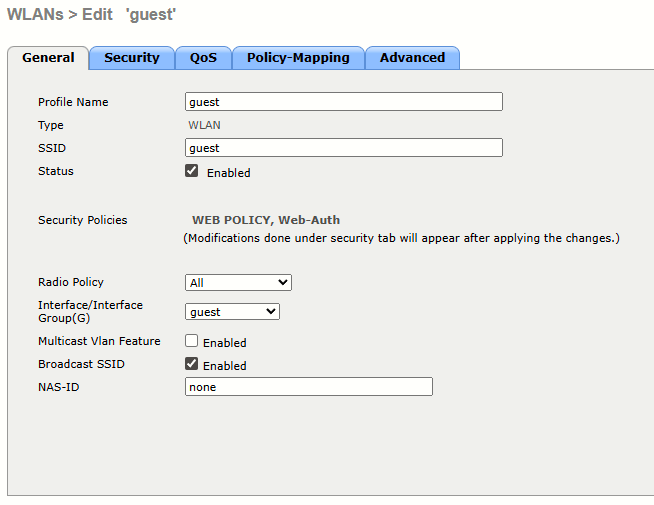
Now, on the Security tab we'll keep L2 security as None so users can associate right away with the WLAN (Open Authentication). But the key point is that we'll be requiring L3 Web Authentication (WebAuth)
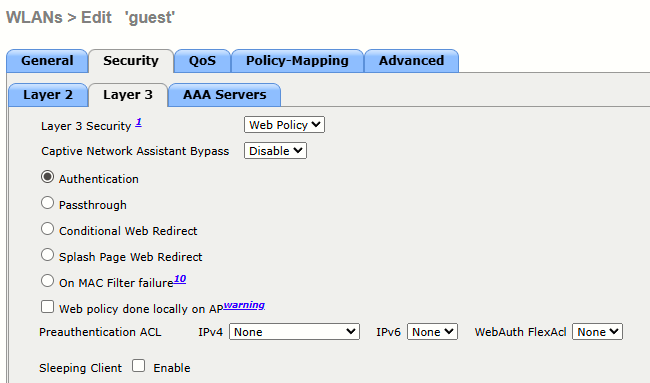
A few options to document here:
Captive Network Assistant Bypass
Many clients will attempt to determine whether their wireless network connection is being intercepted by Layer 3 security, in order to improve the user interaction experience. For example: Windows 10, Apple iOS, Firefox. Such a software interface is known as a Captive Network Assistant (CNA). In rare cases, the functionality of a CNA can cause problems with Layer 3 security; in such a situation, you can enable Captive Network Assistant Bypass (CNAB). With CNAB, the controller tries to trick the CNA into thinking that it is fully connected to the Internet, thus requiring the client to Layer-3 authenticate using a full browser session. Enabling CNAB does not guarantee that all CNAs will fail to detect the Captive Portal because CNA implementations are continually refining their Captive Portal detection heuristics.
The CNA would basically be that mini-browser that automatically appears (triggered) on most devices when connecting to an open authentication network with L3 security in place. Setting this option to Enable, is like telling those devices to bypass that mini-browser because the WLC will not to send a specific Cisco-proprietary "hint" that a portal exists. Problem is that most modern devices don't rely on that hint, specially Android devices. They manually try to fetch a web page (Android-defined) the moment they connect to Wi-Fi. If they get anything other than a "204 No Content" response, they launch the mini-browser regardless of the WLC bypass setting. Moreover, iOS devices require this to be disabled! We'll keep it on Disable.
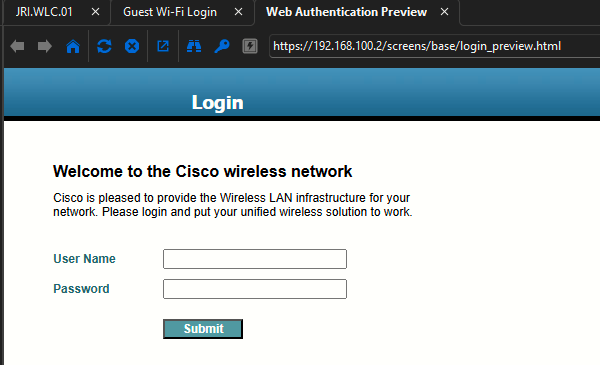
Default Cisco CNA splash page (as seen on a PC):
L3 WebAuth methods
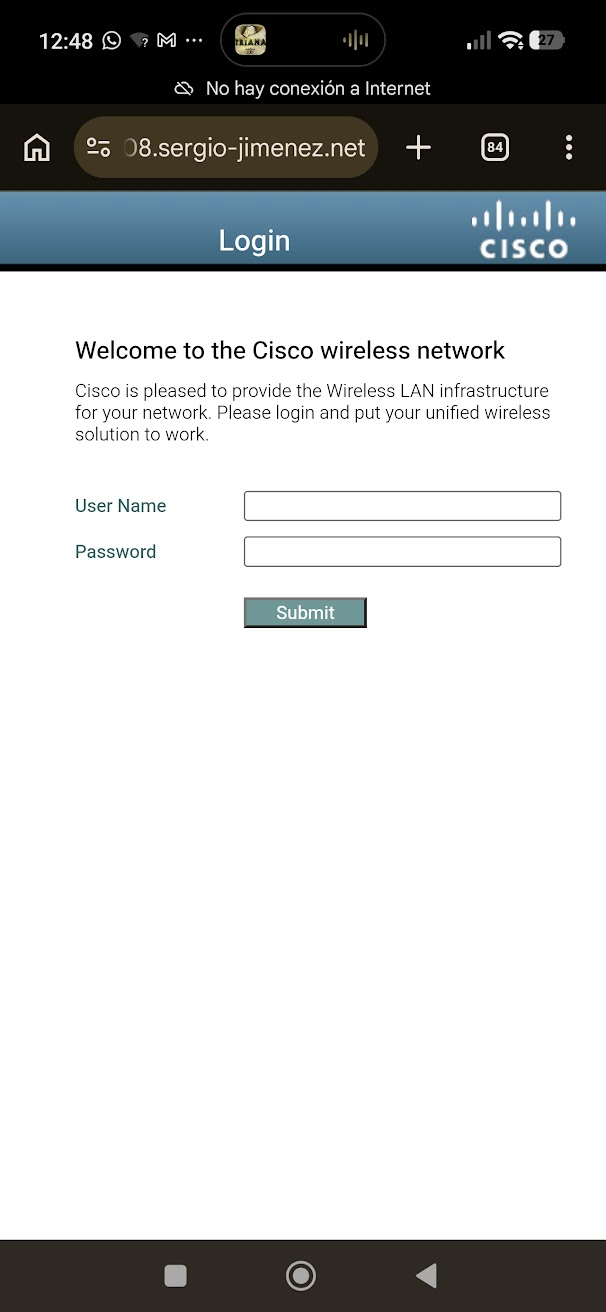
Authentication
WebAuth is L3 security. It allows user-friendly security that works on any station that runs a browser. Can be combined with any PSK L2 security policy, although the combination of WebAuth and PSK reduces the user-friendly portion (that's why we kept L2 security on None before). PSK+WebAuth could encrypt client traffic though (WebAuth is an authentication method without encryption).
The 802.11 authentication process is open, so you can authenticate and associate without any problem. After that, you are associated, but not in the WLC RUN state. With web authentication enabled, you are kept in WEBAUTH_REQD where you cannot access any network resource. You must receive a DHCP IP address with the address of the DNS server in the options.
In the case the CNA is not triggered, type a valid URL in your browser (MUST BE HTTP!!! like http://neverssl.com). The client resolves the URL through the DNS protocol. The client then sends its HTTP request to the IP address of the website. The WLC intercepts that request and returns the webauth login page, which mimics the website IP address.
To watch another port instead of port 80, use config network web-auth-port <port number> to create a redirect on this port also.
In summary, the WLC allows the client to resolve the DNS and get an IP address automatically in WEBAUTH_REQD state.
Note about HTTPS Redirection: By default, the WLC did not redirect HTTPS traffic. This means that if you type an HTTPS address into your browser, nothing happens. You must type an HTTP address in order to get redirected to the login page which was served in HTTPS.
In Version 8.0 and later, you can enable redirection of HTTPS traffic with the CLI command config network web-auth https-redirect enable.
This uses a lot of resources for the WLC in cases where many HTTPS requests are sent. It is not advisable to use this feature before WLC version 8.7 where the scalability of this feature was enhanced. Also note that a certificate warning is unavoidable in this case. If the client requests any URL (such as https://www.cisco.com), the WLC still presents its own certificate issued for the virtual interface IP address. This never matches the URL/IP address requested by client and the certificate is not trusted unless the client forces the exception in their browser.
Indicative performance drop of WLC software release before 8.7 measured :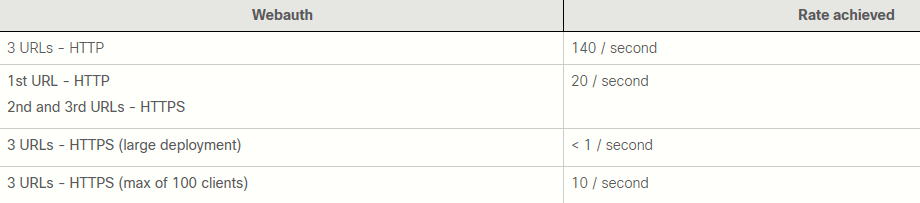
In this performance table, the 3 URLs are referred to as:
- The original URL entered by the end-user.
- The URL to which the WLC redirects the browser.
- The final credentials submission.
The performance table gives the WLC performance in case all 3 URLs are HTTP, in case all 3 URLs are HTTPS, or if the client moves from HTTP to HTTPS (typical).
|
|
|
|

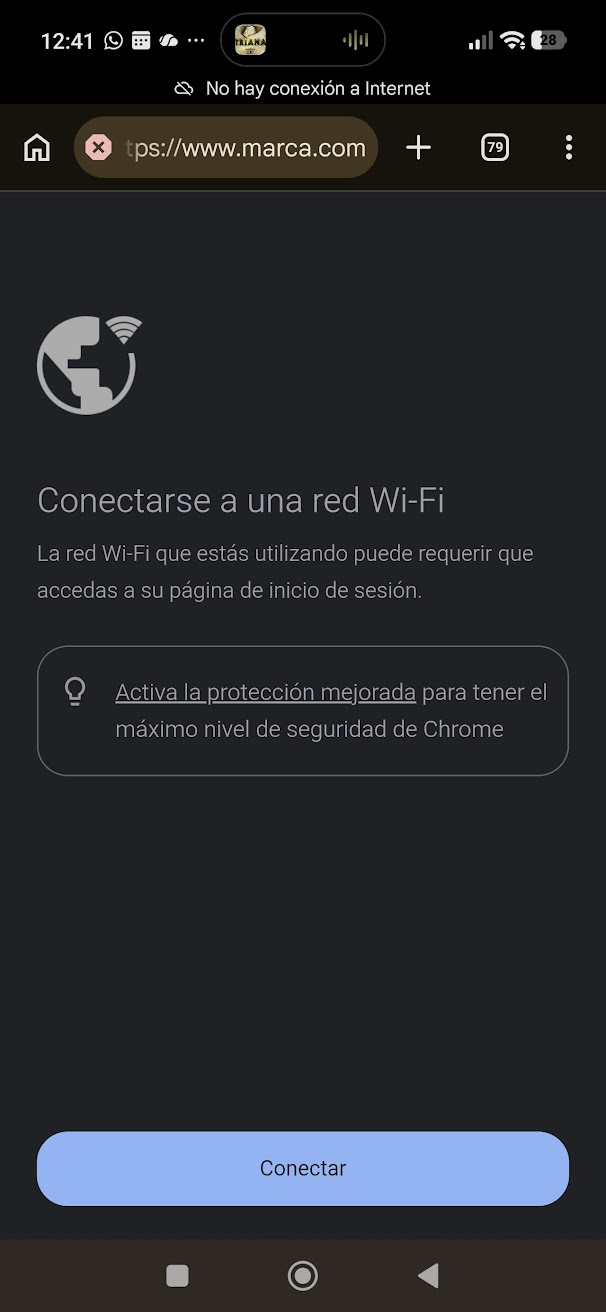
Android: First two images show HTTPS interception, the user would click "Connect" at the bottom, get redirected to http://connectivitycheck.gstatic.com/generate_204 (HTTP), which would trigger the splash page after intercepted by the WLC:
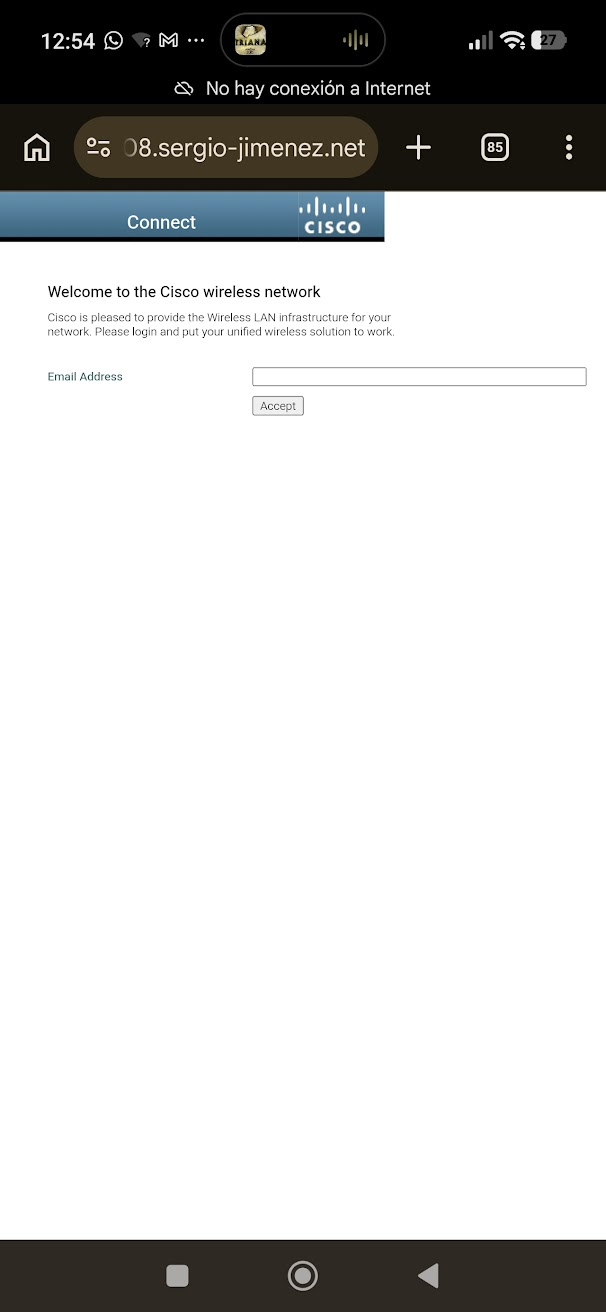
Passthrough
Web Passthrough is a variation of the internal web authentication. It just displays a page with a warning or an alert statement, but does not prompt for credentials. The user then clicks ok. Enable email input and the user can enter their email address which becomes their username. When the user is connected, check your active clients list and verify that user is listed with the email address they entered as the username. To enable Email input we must check this box:

We'll move on with the Authentication option, as I want users to login with a predefined user/password (we'll see how to create them later).
Task 5: Upload a Certificate for the Controller Web Authentication
Since we are using a local lab with a Virtual IP of 192.0.2.1, guest will see a certificate warning in their browser when the login page pops up. This is normal for a lab environment without a publicly signed SSL certificate assigned to the WLC.
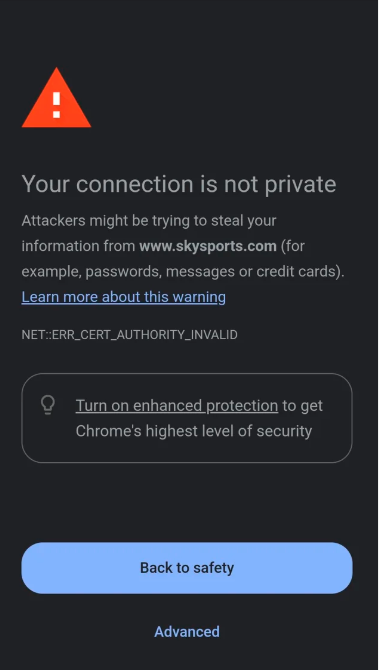
The reason for this popup is the WLC currently using a self-signed certificate issued to the IP address 192.168.0.1:
Clients won't recognize "Cisco Systems Inc." as a trusted CA. Also, certificates shouldn't be issued to IP addresses, so the client browser will block it for security.
To have a clean login experience with HTTPS, we must replace the self-signed certificate with one from a trusted provider.
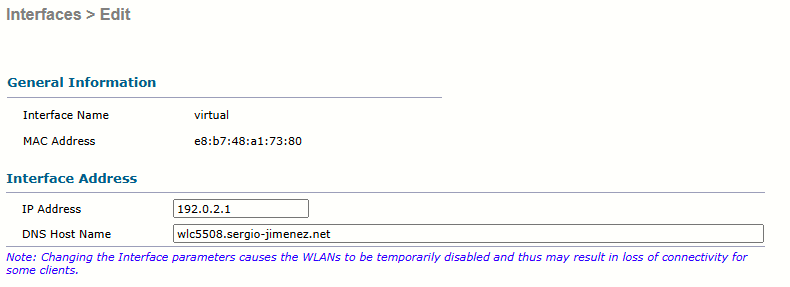
Step 0: We'll begin by assigning a DNS hostname to the WLC. We cannot get a valid SSL certificate for a private IP address. We must use an FQDN:
Step 1: The fact that I own the sergio-jimenez.net domain on Cloudflare makes obtaining the certificate for wlc5508.sergio-jimenez.net significantly easier because Cloudflare has a robust API that allows Let's Encrypt (free certificates) to verify the ownership automatically without the WLC ever being exposed to the internet.
I'll generate the certificate using the tool acme.sh from the Pi where I have hosted this BookStack (easier, Linux):
curl https://get.acme.sh | shStep 2: Integration with Cloudflare. From acme.sh instructions, there are 3 methods. I'll use method 1 (User token), because I already had that token created:
---
It is recommended that you restrict the permissions of the token as much as possible to minimize the consequences of a compromised token.
At a minimum, a token used by acme.sh requires:
- the "Zone > DNS > Edit" permission;
- permission for the specific zones/domains within which you need to perform ACME DNS challenges;
- for the IP address of the host machine running acme.sh to be allowed by "Client IP Address Filtering" (if used); and
- for the token to be active (i.e.: unexpired).
To create a User Token, go to Cloudflare Profile -> User API Tokens.
Once you have the token, you must provide it to acme.sh by setting the environment variable CF_Token to its value.
You must also specify the ID of a single zone (via CF_Zone_ID) (if issuing a certificate for a single domain).
# EXAMPLE For a single domain
export CF_Token="zfNp-Xm0VhSaCNun7dkLzwnw0UN7FNjaMurUZ8vf"
export CF_Zone_ID="3cc91d809a6ff7a93eb48877bf0ec3ef"
./acme.sh --issue --dns dns_cf -d example.com -d '*.example.com'
To issue the certificate:
./acme.sh --issue --dns dns_cf -d example.com -d '*.example.com'Any environment variables that were set and used when issuing the certificate will be saved in ~/.acme.sh/account.conf so that they can be automatically reused in future when issuing new certificates or renewing existing certificates using dns_cf.
---
Step 3: With this instructions at hand, I will export the two variables CF_Token and CF_Zone_ID, then proceed to change from default ZeroSSL CA to Let's Encrypt:
acme.sh --set-default-ca --server letsencryptWe don't want ECC certificate here (the WLC 5508 won't recognize it). We'll switch to RSA 2048, which can be done with the --keylength 2048 switch when executing the command the issues the certificate.
I'll also use the --dns dns_cf switch to use Cloudflare API as discussed above.

Step 4: The final command used to issue the cert:
acme.sh --issue --dns dns_cf -d wlc5508.sergio-jimenez.net --keylength 2048 --force --preferred-chain "ISRG Root X1"
After running the command, acme.sh generates a Certificate Signing Request (CSR), a Key, and a TXT record. It sends the TXT record and the CSR to Let’s Encrypt, also adding the TXT record to the specified Cloudflare zone via the DNS API. Subsequently, Let’s Encrypt servers check the TXT record by resolving the appropriate DNS record for the domain (including ‘_acme-challenge’ prefixes and the TXT record itself). If the TXT record matches, Let’s Encrypt responds with the certificate (‘cert.pem’ and ‘fullchain.pem’) to the acme.sh client-side.
The resulting files:
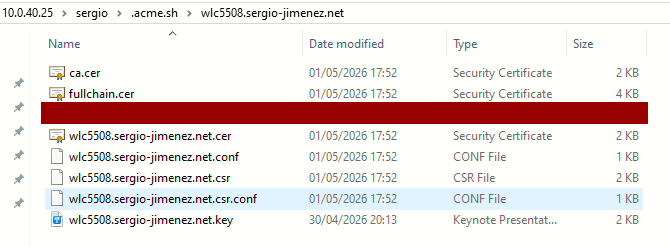
Step 4: Joning the fullchain and the private key in a .pem file. The order is vital:
cat wlc5508.sergio-jimenez.net.cer ca.cer wlc5508.sergio-jimenez.net.key > webauth.pemStep 5: Fixing the ISRG Root CA problem
Using this tool https://tools.keycdn.com/ssl, we can see that the fullchain.cer includes the cert itself and the intermediate CA, but does not include Root CA:
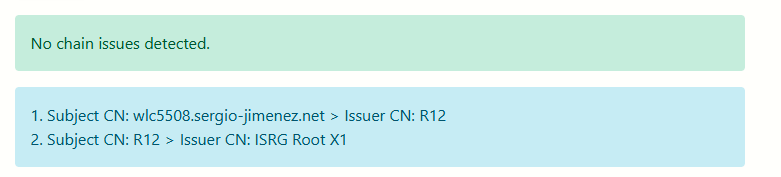
The root certificate is typically omitted because there is an assumption that on modern devices, it must already be present in the trust store. By design, ACME includes the domain cert and the intermediate cert only.
Since the WLC 5508 requires the root CA, we must download the ISRG Root X1 certificate and concatenate it to the webauth.pem (fullchain.cer + wlc5508.key). Link to the cert
Download it to the folder with wget:
wget https://letsencrypt.org/certs/isrgrootx1.pemConcatenate the files again, this time including the root CA:
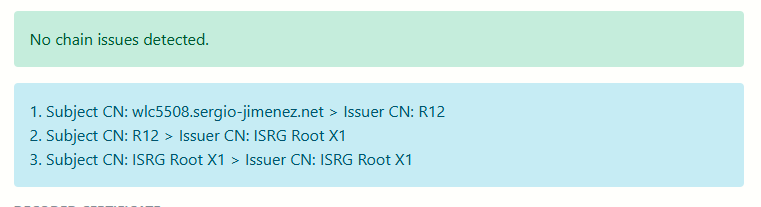
cat wlc5508.sergio-jimenez.net.cer ca.cer isrgrootx1.pem wlc5508.sergio-jimenez.net.key > webauth.pemThis is the result of the certificate checker for the resulting webauth.pem. we can see the ISRG Root X1 has been successfully added to the chain.
Step 6: Uploading the certificate to the WLC. (the official Cisco guide)
This section provides the processes to put your own certificate on the WebAuth page, or to hide the 192.0.2.1 WebAuth URL and display a named URL.
In order to be rid of the warning "this certificate is not trusted", enter the certificate of the CA that issued the WLC certificate on the WLC. Then the WLC presents both certificates (the WLC certificate and its CA certificate). The CA certificate must be a trusted CA or has the resources to verify the CA. You can actually build a chain of CA certificates that lead to a trusted CA on top. Place the entire chain in the same file. The file then contains content such as this example:
BEGIN CERTIFICATE ------
device certificate*
END CERTIFICATE ------
BEGIN CERTIFICATE ------
intermediate CA certificate*
END CERTIFICATE ------
BEGIN CERTIFICATE ------
Root CA certificate*
END CERTIFICATE ------
Whether it is a certificate created with your certificate authority (CA) or a third-party official certificate, it must be in .pem format. You must also enter the key of the certificate.
We actually did this on step 5 when we built the webauth.pem as a concatenation of device+intermediate+root+key, this is just for reference. Now on to the webauth.pem upload. I'll do it via CLI.
First I setup a TFTP server on my Mgmt Server PC (Win 10), and create rules on the Windows Firewall in order to make it accessible from the WLC. I set the TFTP root folder to the one that contains the webauth.pem file. Then via CLI on the WLC:
(JRI.WLC.01) transfer download mode tftp
(JRI.WLC.01) transfer download datatype webauthcert  <-- CRITICAL
(JRI.WLC.01) transfer download server 172.20.10.10   <-- MGMT. SERVER IP
(JRI.WLC.01) transfer download filename webauth.pem
(JRI.WLC.01) transfer download start![2026-04-30 20_26_48-Remote Desktop Manager [JRI.WLC.01].png](https://sergio-jimenez.net/uploads/images/gallery/2026-05/x0ozIC0RjckDzQDo-2026-04-30-20-26-48-remote-desktop-manager-jri-wlc-01.png)
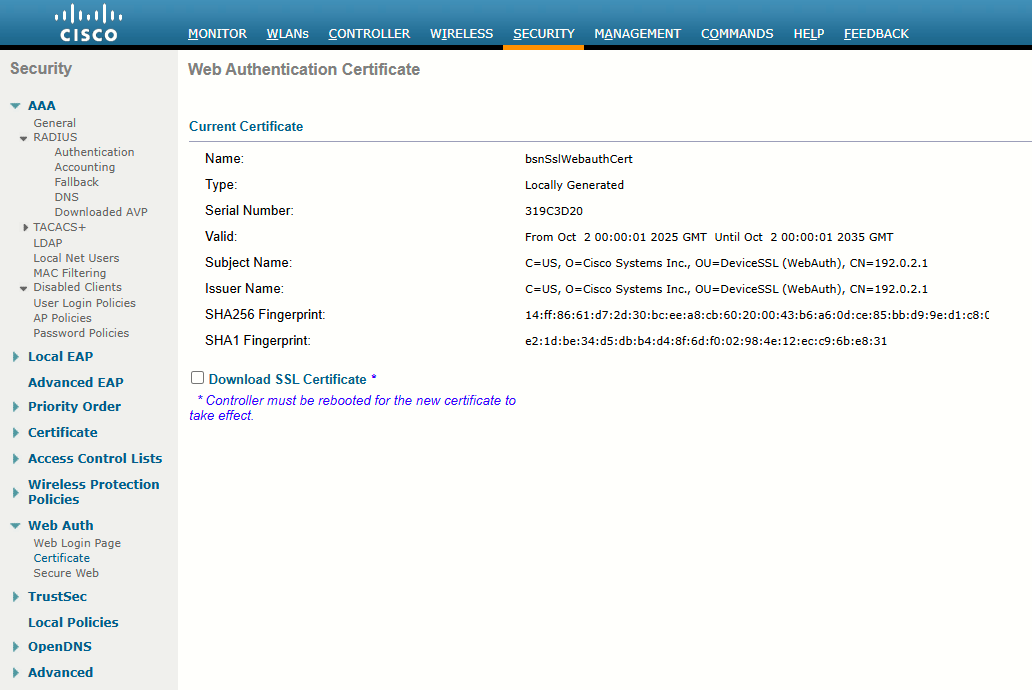
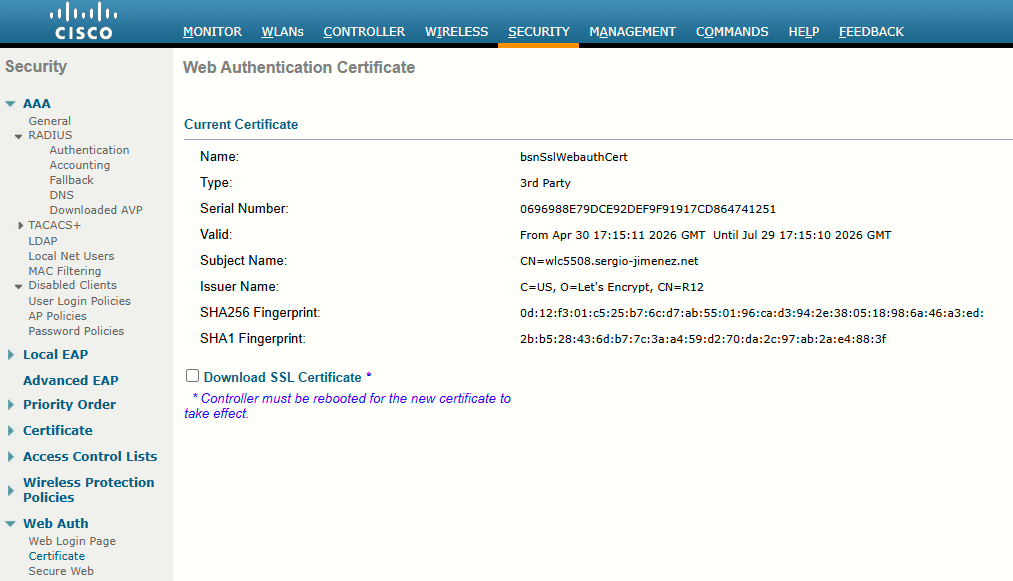
After the upload, a reboot is required in order for the certificate to be in place. Once rebooted, go to the WebAuth certificate page in the GUI to find the details of the certificate you uploaded (validity and so on). The important field is the common name (CN), which is the name issued to the certificate:
Step 7: Cause the certificate to match the URL.
The WebAuth URL is set to 192.0.2.1 in order to authenticate yourself and the certificate is issued (this is the CN field of the WLC certificate).
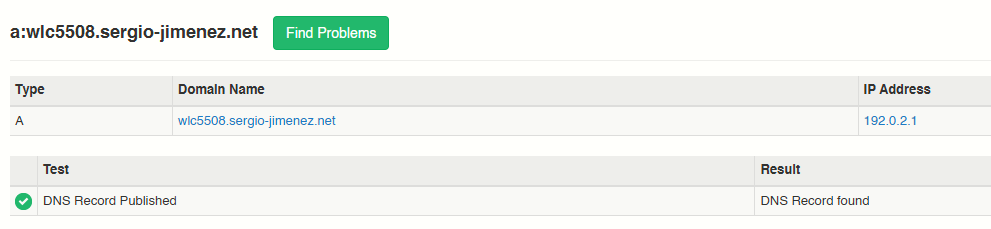
On step 0 we changed the WebAuth URL to wlc5508.sergio-jimenez.net. This name must be resolvable. Problem: the DHCP pool for the guest network serves a public DNS (best practice), which happens to be the Google public DNS (8.8.8.8). What this means is that clients wont be able to resolve the FQDN if the DNS record is not published on Cloudflare!. This name must resolve as 192.0.2.1. This means that if you also use a name for the management of the WLC, use a different name for WebAuth.
If I used wlc5508.sergio-jimenez.net mapped to the WLC management IP address, I must use a different name for the WebAuth, such as wlc5508-webauth.sergio-jimenez.net.
To solve this, I created the proper A record on Cloudflare, and set the type to DNS only:

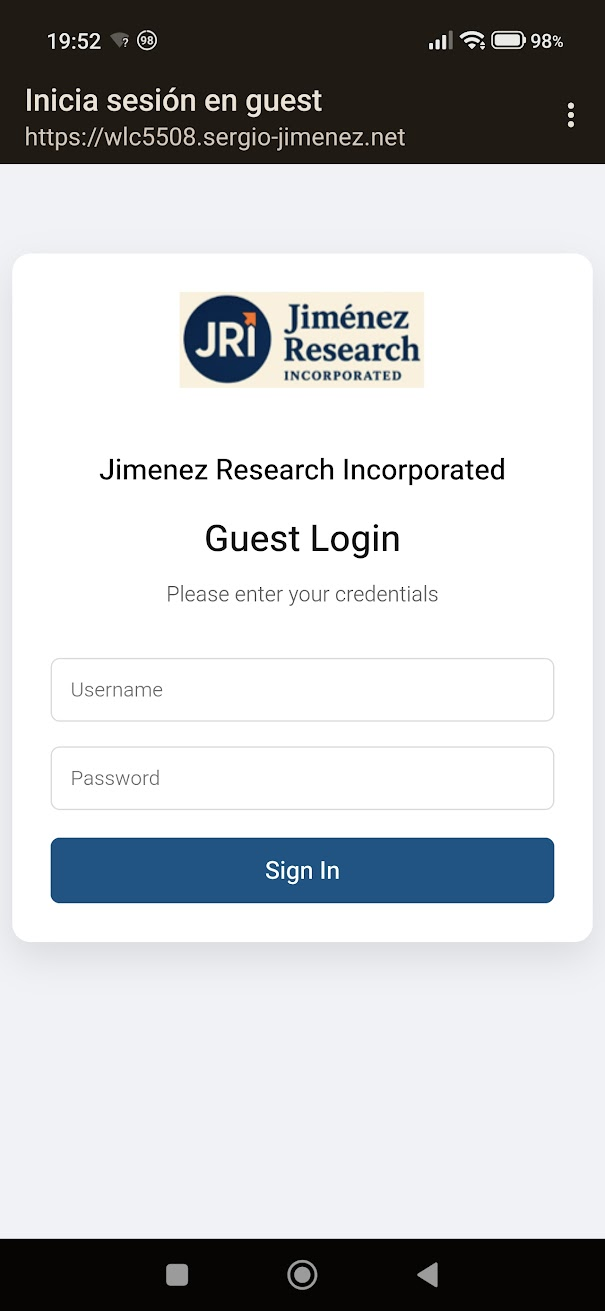
Task 6: Using a Custom Splash Page
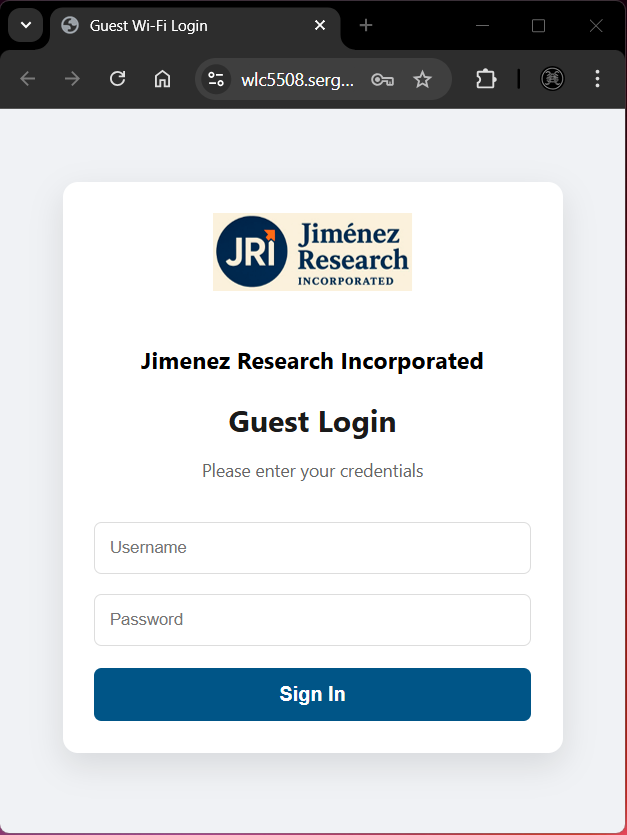
As seen before, this is the default login page users are presented with when connecting to the guest network:
We can change this page with a default one on Security > Web Auth > Web Login Page:
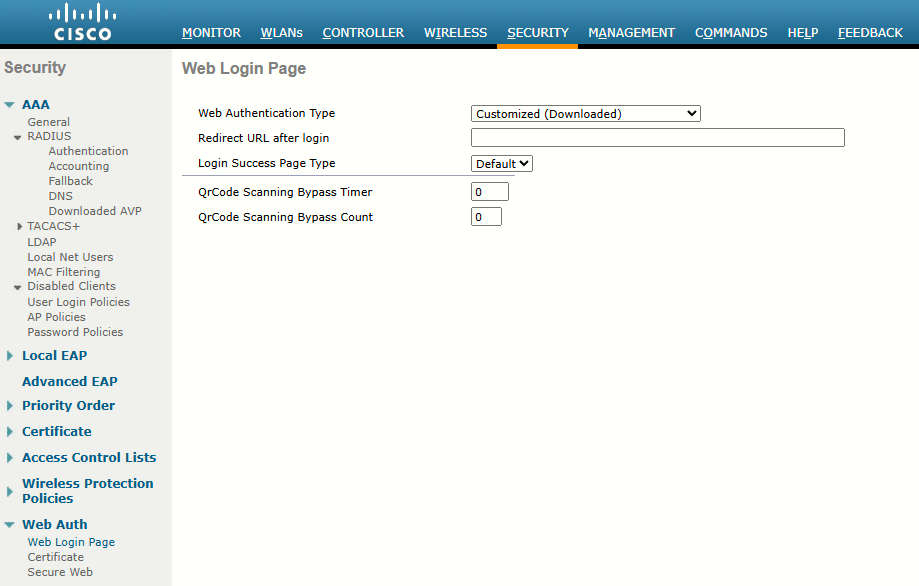
Setting Web Authentication Type to Customized (Downloaded) is the first step.
The custom feature allows you to use a custom HTML page instead of the default login page. Upload your html and image files bundle to the controller.
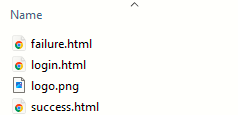
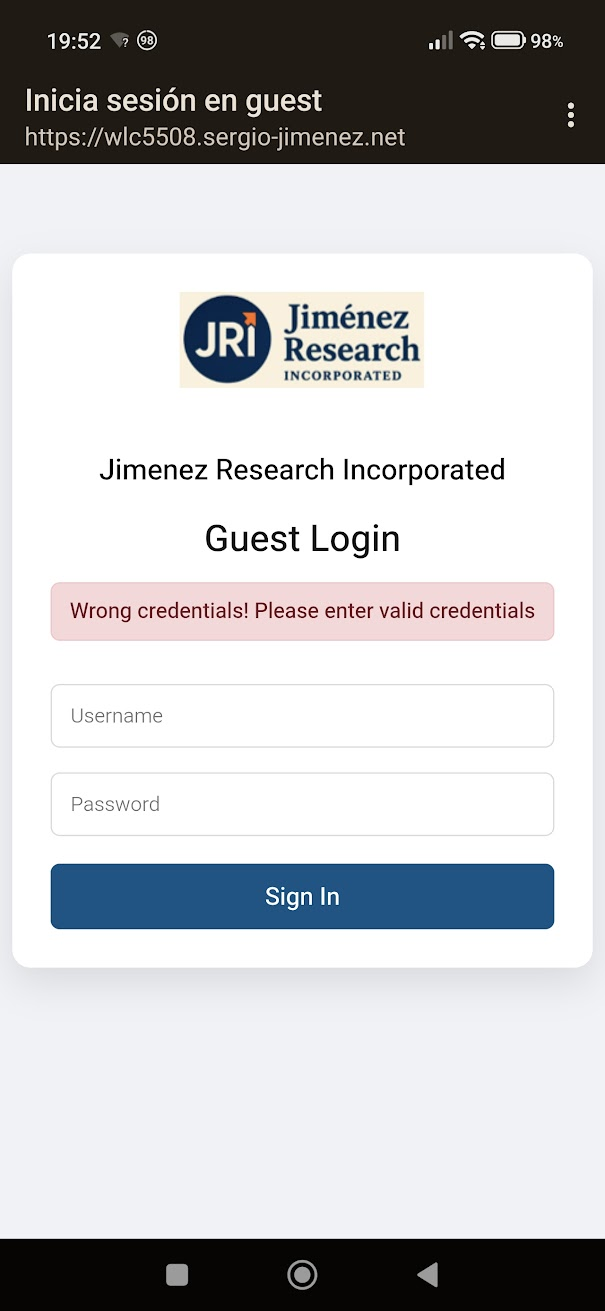
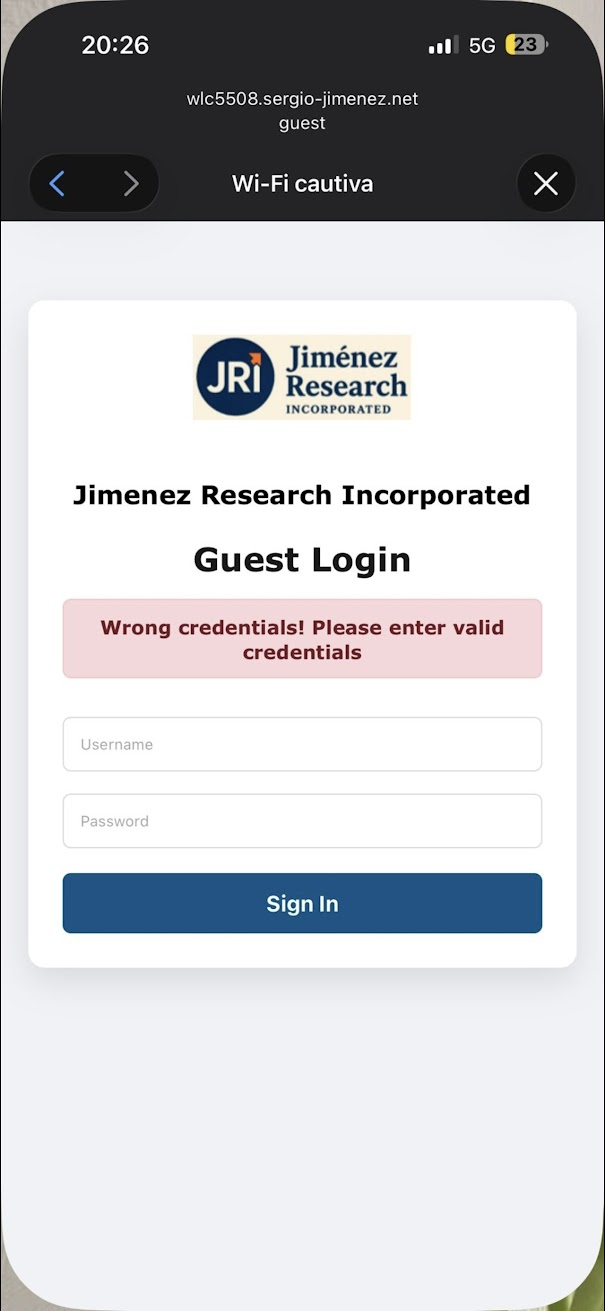
We are talking here about the WebAuth bundle, which simply is a .tar file that contains the login.html along with other pages like failure.html (what the users get when entering wrong user/pass), a success.html page that shows after successful authentication, and a logo.png with the image of the company:
login.html
<!DOCTYPE html>
<html>
<head>
    <title>Guest Wi-Fi Login</title>
    <meta name="viewport" content="width=device-width, initial-scale=1.0">
    <style>
        body { font-family: 'Segoe UI', Tahoma, Geneva, Verdana, sans-serif; background-color: #f0f2f5; text-align: center; padding-top: 50px; }
        .login-card { background: white; max-width: 350px; margin: auto; padding: 25px; border-radius: 12px; box-shadow: 0 10px 25px rgba(0,0,0,0.1); }
        .logo { max-width: 160px; height: auto; margin-bottom: 20px; }
        h2 { color: #1a1a1a; margin-bottom: 5px; }
        p { color: #666; margin-bottom: 25px; font-size: 14px; }
        input[type="text"], input[type="password"] { width: 100%; padding: 12px; margin: 8px 0; border: 1px solid #ddd; border-radius: 6px; box-sizing: border-box; }

        /* Changed slightly to apply to a generic button rather than just a submit input */
        .btn-submit { background-color: #005587; color: white; border: none; padding: 12px; border-radius: 6px; cursor: pointer; width: 100%; font-weight: bold; margin-top: 10px; transition: background 0.3s; font-size: 16px;}
        .btn-submit:hover { background-color: #003d61; }
    </style>

    <!-- This script is the missing link the WLC requires -->
    <script>
        function submitAction() {
            var form = document.getElementById("wlcLogin");
            form.buttonClicked.value = 4; // 4 tells the WLC "Here are credentials, process them!"
            form.submit();
        }
    </script>
</head>
<body>
    <div class="login-card">
        <!-- Logo file must be in the root of the .tar bundle -->
        <img src="logo.png" alt="Logo" class="logo">
        <h3>Jimenez Research Incorporated</h3>
        <h2>Guest Login</h2>
        <p>Please enter your credentials</p>

        <!-- Action must point to your Virtual IP/Hostname -->
        <form id="wlcLogin" method="post" action="/login.html">
            <!-- This starts at 0, but the JS changes it to 4 on click -->
            <input type="hidden" name="buttonClicked" value="0">
			<input type="hidden" name="redirect_url" value="https://wlc5508.sergio-jimenez.net/fs/customwebauth/success.html">
            <input type="hidden" name="err_flag" value="0">

            <!-- Use 'username' and 'password' exactly as lowercase -->
            <input type="text" name="username" placeholder="Username" required>
            <input type="password" name="password" placeholder="Password" required>

            <!-- We replaced the submit input with a button that triggers the JS -->
            <button type="button" class="btn-submit" onclick="submitAction();">Sign In</button>
        </form>
    </div>
</body>
</html>
failure.html
<!DOCTYPE html>
<html>
<head>
    <title>Guest Wi-Fi Login</title>
    <meta name="viewport" content="width=device-width, initial-scale=1.0">
    <style>
        body { font-family: 'Segoe UI', Tahoma, Geneva, Verdana, sans-serif; background-color: #f0f2f5; text-align: center; padding-top: 50px; }
        .login-card { background: white; max-width: 350px; margin: auto; padding: 25px; border-radius: 12px; box-shadow: 0 10px 25px rgba(0,0,0,0.1); }
        .logo { max-width: 160px; height: auto; margin-bottom: 20px; }
        h2 { color: #1a1a1a; margin-bottom: 5px; }
        p { color: #666; margin-bottom: 25px; font-size: 14px; }
        input[type="text"], input[type="password"] { width: 100%; padding: 12px; margin: 8px 0; border: 1px solid #ddd; border-radius: 6px; box-sizing: border-box; }

        /* Changed slightly to apply to a generic button rather than just a submit input */
        .btn-submit { background-color: #005587; color: white; border: none; padding: 12px; border-radius: 6px; cursor: pointer; width: 100%; font-weight: bold; margin-top: 10px; transition: background 0.3s; font-size: 16px;}
        .btn-submit:hover { background-color: #003d61; }
		.error-text {
			color: #721c24;            /* Dark red text */
			background-color: #f8d7da; /* Light pink/red background */
			border: 1px solid #f5c6cb; /* Reddish border */
			padding: 10px;             /* Space around the text */
			border-radius: 6px;        /* Rounded corners */
			font-weight: bold;         /* Make it pop */
			margin-bottom: 20px;       /* Space before the next element */
		}
    </style>

    <!-- This script is the missing link the WLC requires -->
    <script>
        function submitAction() {
            var form = document.getElementById("wlcLogin");
            form.buttonClicked.value = 4; // 4 tells the WLC "Here are credentials, process them!"
            form.submit();
        }
    </script>
</head>
<body>
    <div class="login-card">
        <!-- Logo file must be in the root of the .tar bundle -->
        <img src="logo.png" alt="Logo" class="logo">
        <h3>Jimenez Research Incorporated</h3>
        <h2>Guest Login</h2>
        <p class="error-text">Wrong credentials! Please enter valid credentials</p>

        <!-- Action must point to your Virtual IP/Hostname -->
        <form id="wlcLogin" method="post" action="/login.html">
            <!-- This starts at 0, but the JS changes it to 4 on click -->
            <input type="hidden" name="buttonClicked" value="0">
			<input type="hidden" name="redirect_url" value="https://wlc5508.sergio-jimenez.net/fs/customwebauth/success.html">
            <input type="hidden" name="err_flag" value="0">

            <!-- Use 'username' and 'password' exactly as lowercase -->
            <input type="text" name="username" placeholder="Username" required>
            <input type="password" name="password" placeholder="Password" required>

            <!-- We replaced the submit input with a button that triggers the JS -->
            <button type="button" class="btn-submit" onclick="submitAction();">Sign In</button>
        </form>
    </div>
</body>
</html>
success.html
<!DOCTYPE html>
<html>
<head>
    <title>Connected - Guest Wi-Fi</title>
    <meta name="viewport" content="width=device-width, initial-scale=1.0">
    <style>
        body { font-family: 'Segoe UI', Tahoma, Geneva, Verdana, sans-serif; background-color: #f0f2f5; text-align: center; padding-top: 50px; }
        .login-card { background: white; max-width: 350px; margin: auto; padding: 25px; border-radius: 12px; box-shadow: 0 10px 25px rgba(0,0,0,0.1); }
        .logo { max-width: 160px; height: auto; margin-bottom: 20px; }
        h2 { color: #28a745; margin-bottom: 5px; } /* Changed to a success green color */
        h3 { color: #1a1a1a; margin-bottom: 20px; }
        p { color: #666; margin-bottom: 25px; font-size: 14px; }

        /* Styling for the buttons */
        .btn { display: block; background-color: #005587; color: white; border: none; padding: 12px; border-radius: 6px; cursor: pointer; width: 100%; font-weight: bold; margin-top: 10px; text-decoration: none; box-sizing: border-box; transition: background 0.3s; font-size: 16px;}
        .btn:hover { background-color: #003d61; }

        /* Specific styling for the logout button to make it distinct */
        .btn-logout { background-color: #dc3545; margin-top: 15px; }
        .btn-logout:hover { background-color: #c82333; }
    </style>
</head>
<body>
    <div class="login-card">
        <img src="logo.png" alt="Logo" class="logo">
        <h3>Jimenez Research Incorporated</h3>

        <h2>Connection Successful!</h2>
        <p>You are now connected to the guest network.</p>

        <!-- Button to close the portal and go to Google -->
        <a href="https://google.es" class="btn">Continue to Internet</a>

        <!-- The specific Logout Link using the relative path -->
        <a href="/logout.html" class="btn btn-logout">Log Out / Disconnect</a>
    </div>
</body>
</html>
There are some limitations with this bundle that vary with versions and bugs.
- the .tar file size (no more than 5MB)
- the number of files in the .tar
- the filename length of the files (no more than 30 characters)
Creating the .tar bundle:
|
|
|

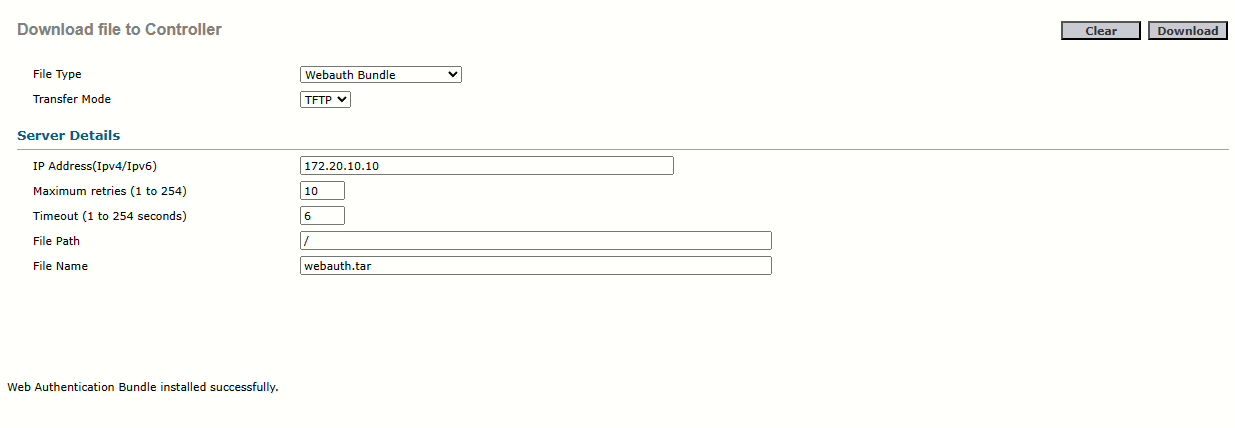
To upload the Webauth bundle I'll go to Commands > Download File, select Webauth Bundle from the dropdown and use TFTP. Click Download on the upper right:
Back to Security > Web Auth > Web Login Page, I'll set the Redirect URL after login to:
https://wlc5508.sergio-jimenez.net/fs/customwebauth/success.html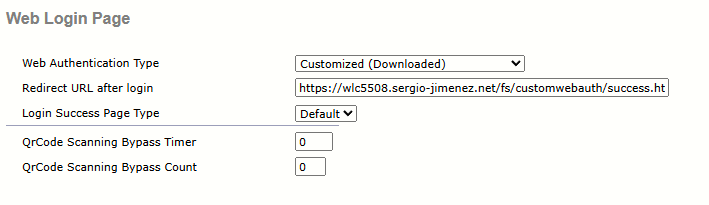
Note this are global settings. Now, to reinforce the concept I'll override this settings at WLAN level, going to WLANs > guest > Security > Layer 3:
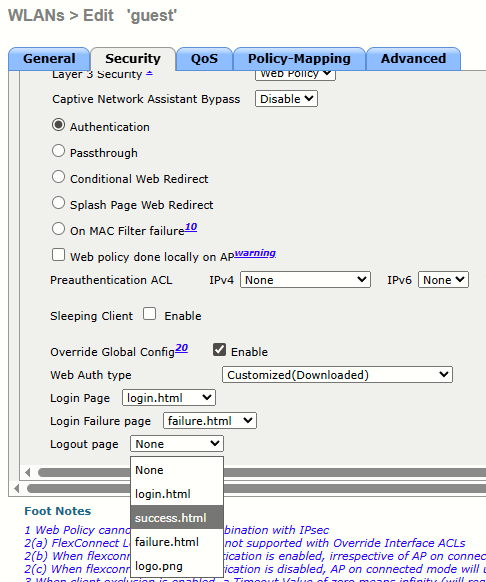
Check Override Global Config (Enable), which enables the following options:
- Web Auth type (set it to Customized(Downloaded)
- Login Page: login.html
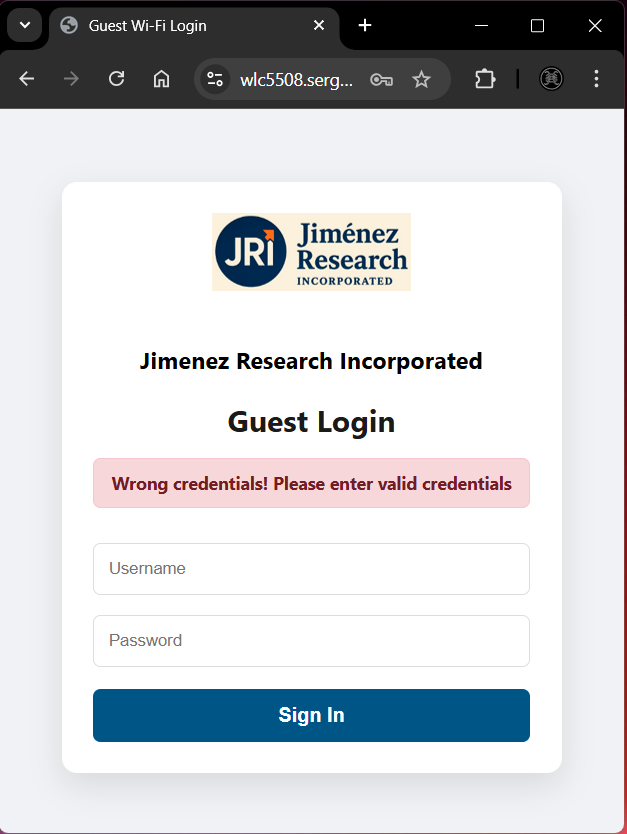
- Login Failure: failure.html
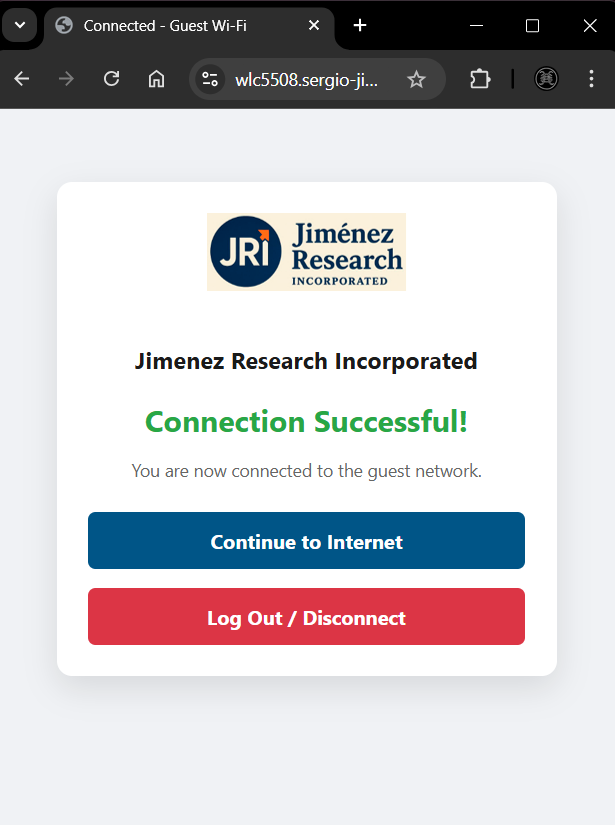
- Logout page: success.html
Note how the files included in the uploaded bundle were successfully uploaded (as they are correctly detected by the WLC).
Task 7: Using a Lobby Ambassador Account to Manage Guest Users Locally
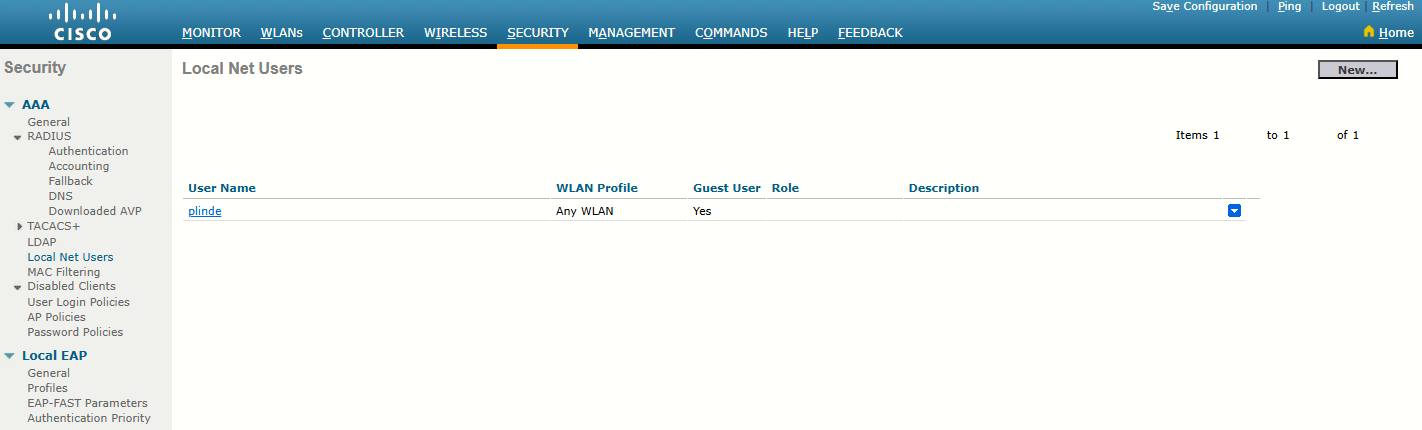
Since I will use Authentication as the login method (and we crafted the html of the splash page for it), now we need the users! If there are no users, then no one can access the guest network. I could create the users manually from the WLC GUI going to Security > AAA > Local Net Users:
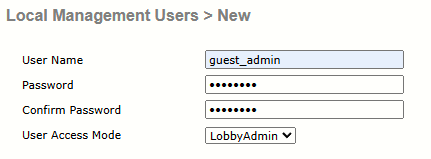
But what we'll do is create a lobby administrator, aka lobby ambassador of a WLC. This is a user that can create and manage guest user accounts on the Wireless LAN Controller (WLC). The lobby ambassador has limited configuration privileges and can access only the web pages used to manage the guest accounts. The lobby ambassador can specify the amount of time that the guest user accounts remain active. After the specified time elapses, the guest user accounts expire automatically. In order to create a guest user account on the WLC, you need to login to the controller as a lobby administrator.
To create this account, go to Management > Local Management Users and add a user with the role LobbyAdmin (this option enables the lobby ambassador to create guest user accounts):
The whole purpose of this, is to simulate a non-administrator to be able to create guest user accounts on demand. The lobby ambassador has limited configuration privileges and has access only to the web pages used to manage the guest user accounts. The lobby ambassador can specify the amount of time that the guest user accounts remain active. After the specified time elapses, the guest user accounts expire automatically.
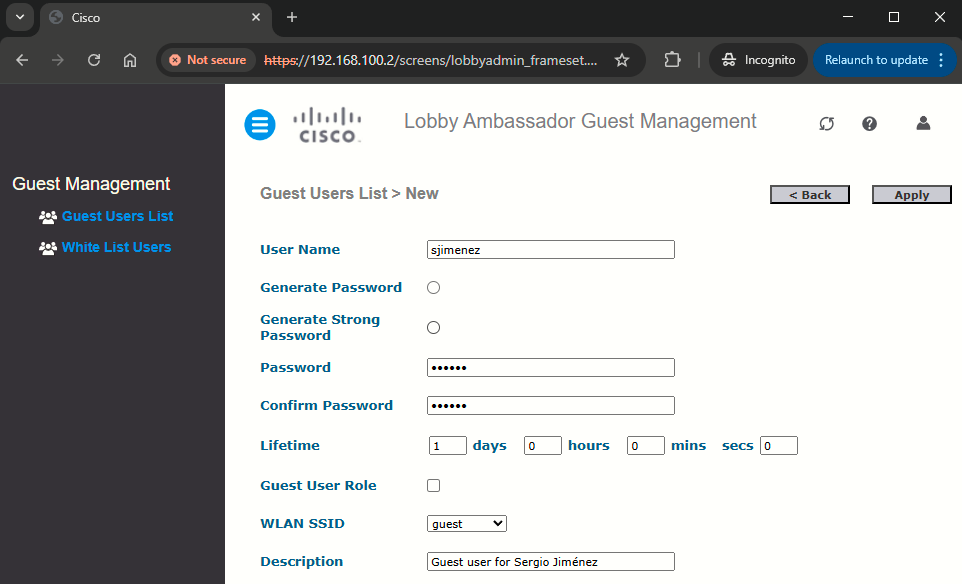
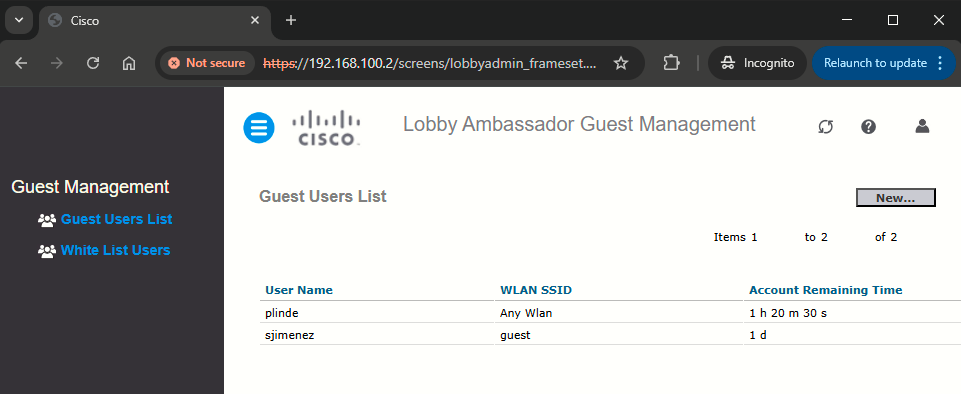
The process is simple, the lobby ambassador would access the WLC mgmt. web page (https://192.168.100.2) and login. Then he would be presented with this page:

To create a new user, click New... and fill the fields as follows:
Now there is only testing left!
Task 8: Testing from Android, iOS, and Windows
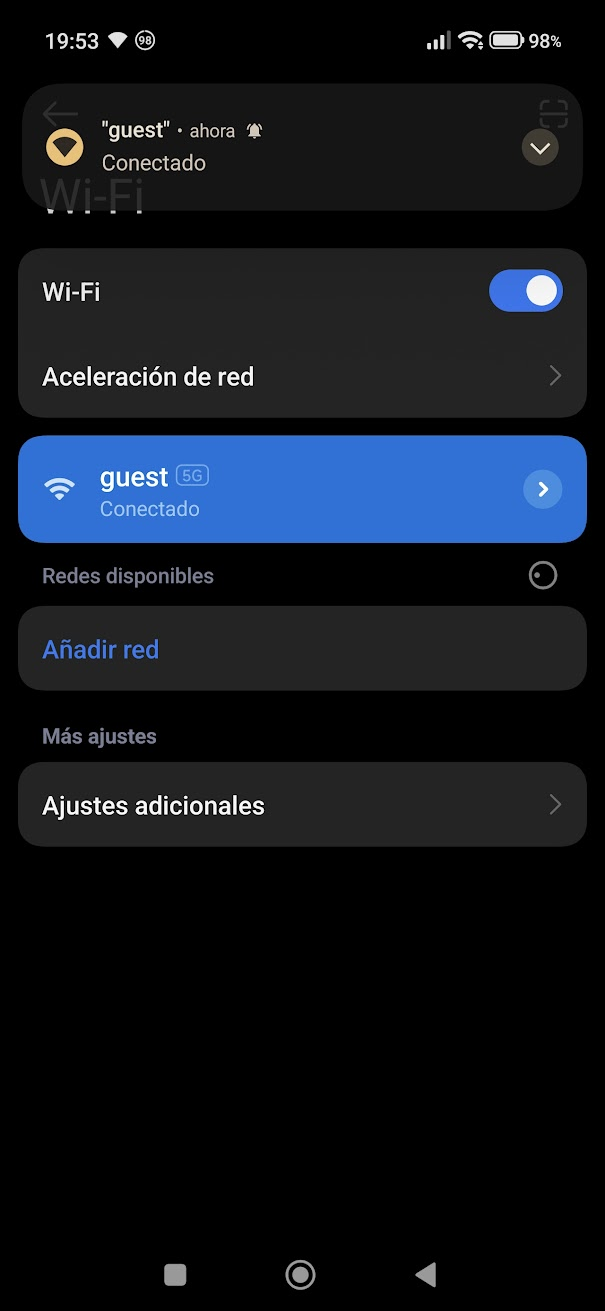
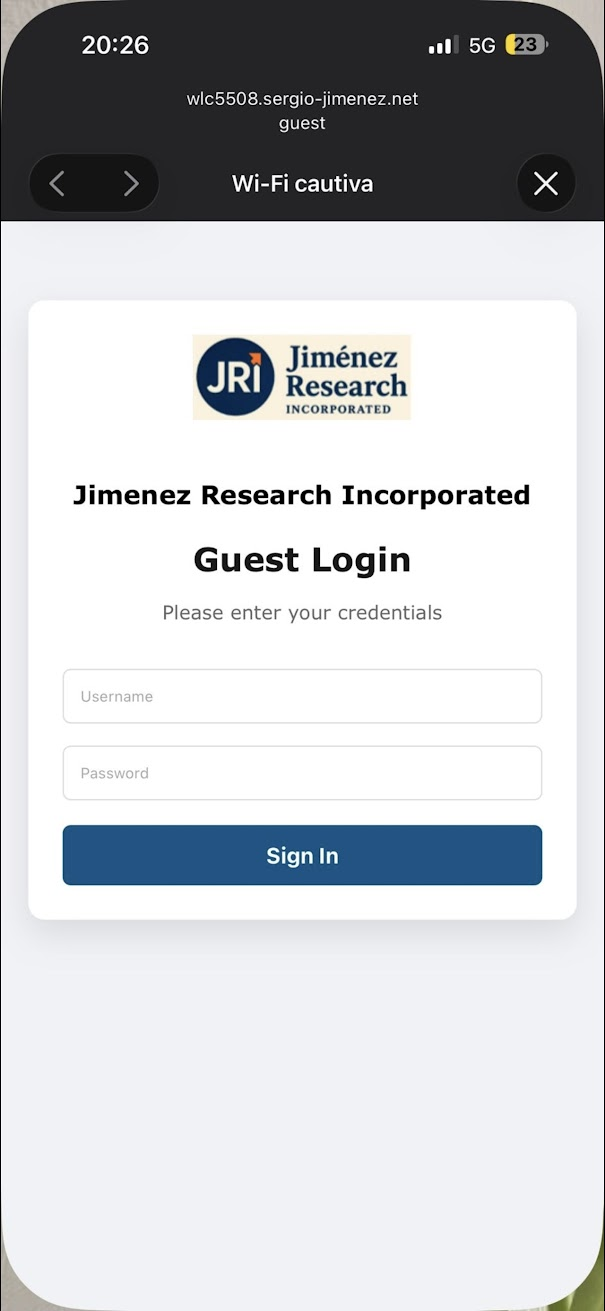
Android
Initial CNA pop-up (1), failure page (2), and resulting screen after success which is CNA closing (no success page redirect, as on newer Android the CNA browser closes the moment it detects connectivity on the network).
|
|
|
|
iOS
iOS devices behave differently than Android, not closing the CNA browser after successful connection but redirecting the user to the success page:
|
|
|
|
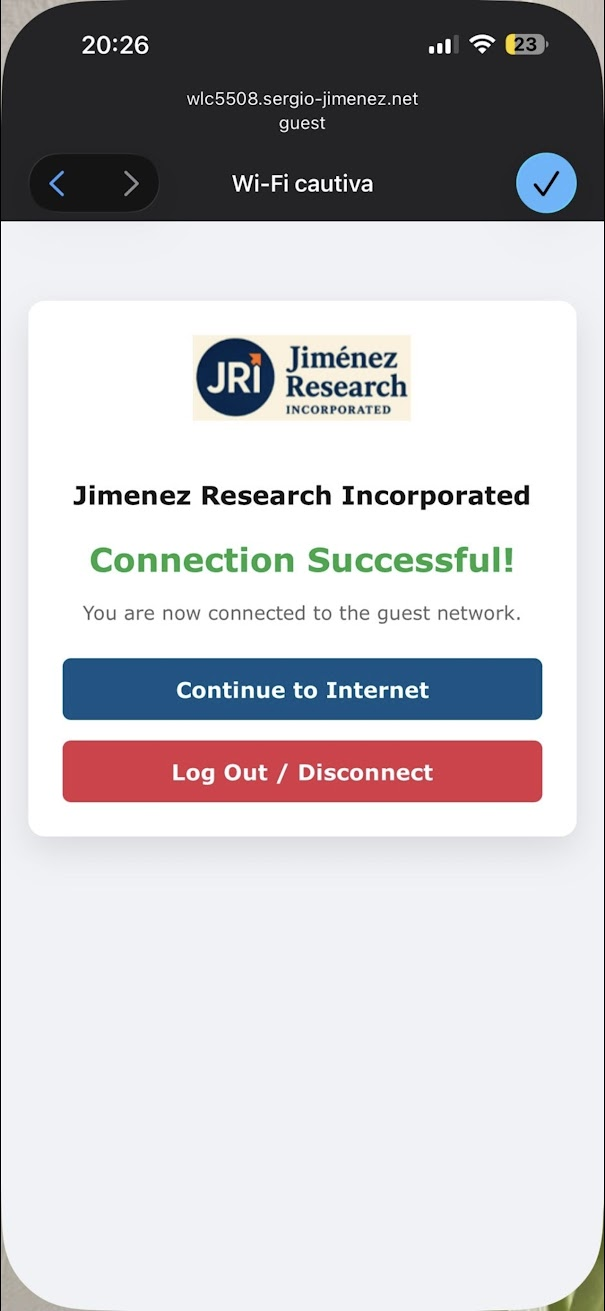
The Continue to Internet button also works, redirecting the iOS user to Google (as configured), and even prompting to use Safari to open the page.
Windows
The behavior is similar as iOS:
|
|
|
|
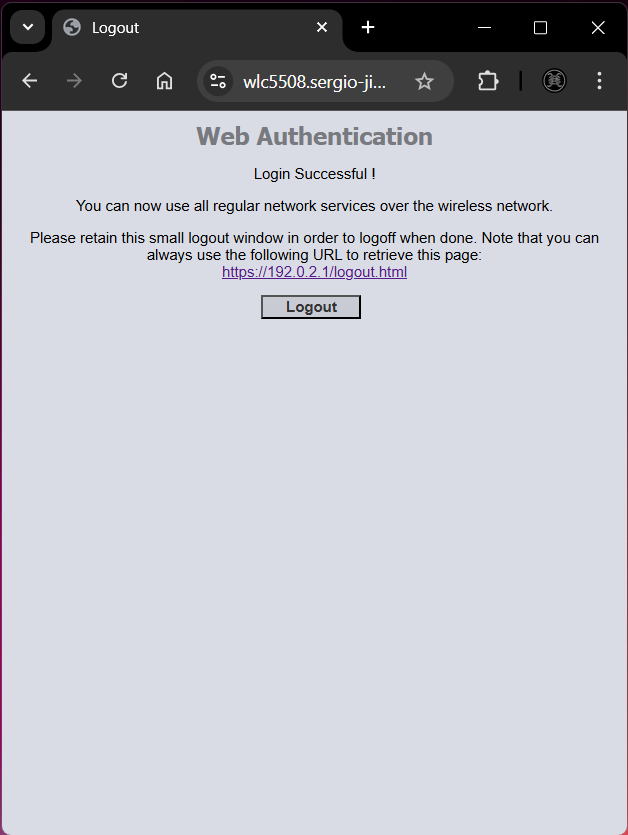
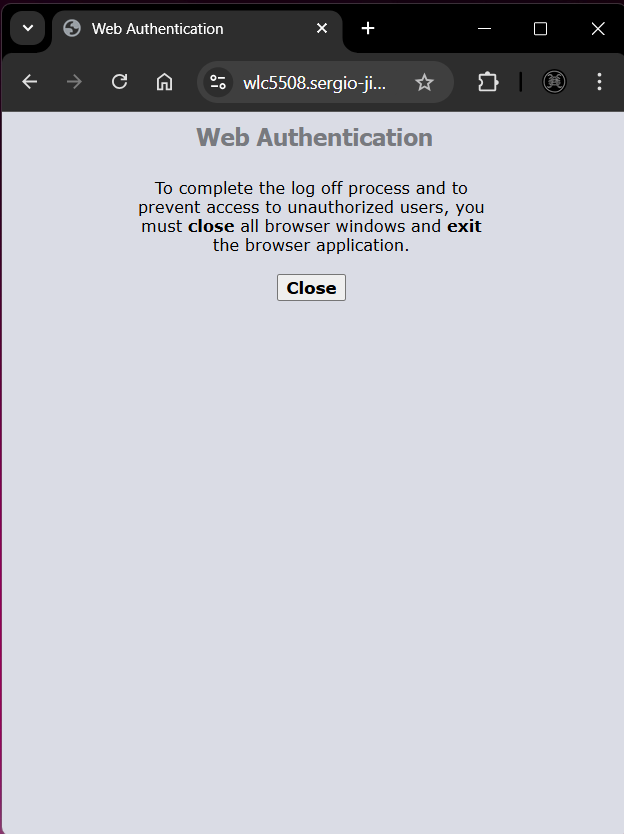
We could have customized the logout page (future task) - when clicking Log Out / Disconnect on the success.html page, we are redirected to the default logout.html page:
|
|
|
Sources
Cisco Wireless Controller Configuration Guide, Release 8.5, Chapter: Managing Certificates
https://www.cisco.com/c/en/us/td/docs/wireless/controller/8-5/config-guide/b_cg85/managing_certificates.html
WLC – Web Authentication
https://mrncciew.com/2013/03/21/wlc-web-authentication/
Certificate Checker
https://tools.keycdn.com/ssl
Cisco Wireless Controller Configuration Guide, Release 8.5, Chapter: WLAN Security
https://www.cisco.com/c/en/us/td/docs/wireless/controller/8-5/config-guide/b_cg85/wlan_security.html#ID943
Configuración de la Autenticación Web Externa con WLC
https://meraki-go.xgslb-v3.cisco.com/c/es_mx/support/docs/wireless-mobility/wlan-security/71881-ext-web-auth-wlc.pdf
webauth_bundle-1.0.2.zip
https://github.com/grengojbo/adsuawifi/blob/master/webauth_bundle-1.0.2.zip
redirect guests to url after success on guest login
https://community.cambiumnetworks.com/t/redirect-guests-to-url-after-success-on-guest-login/65487
Any way to force web auth to open on apple devices?
https://community.cisco.com/t5/network-access-control/any-way-to-force-web-auth-to-open-on-apple-devices/td-p/4009638
Understand Web Authentication on AireOS Wireless LAN Controllers
https://www.cisco.com/c/en/us/support/docs/wireless-mobility/wlan-security/115951-web-auth-wlc-guide-00.html#toc-hId-1042429
GitHub - acmesh-official/acme.sh: A pure Unix shell script ACME client for SSL / TLS certificate automation · GitHub
https://github.com/acmesh-official/acme.sh
Building a Resilient SSL Infrastructure: Let’s Encrypt (acme.sh), Cloudflare, and HashiCorp Vault
https://medium.com/@tamersay/building-a-resilient-ssl-infrastructure-lets-encrypt-acme-sh-cloudflare-and-hashicorp-vault-d7a5141d9747
Cisco Wireless LAN Controller Configuration Guide, Release 7.4
https://fcc.report/FCC-ID/LDK102087P/2323187.pdf
Configure AireOS Wireless LAN Controller Web Authentication
https://www.cisco.com/c/en/us/support/docs/wireless-mobility/wlan-security/71881-ext-web-auth-wlc.html
Cisco Wireless Controller Configuration Guide, Release 8.5, Chapter: Managing Users
https://www.cisco.com/c/en/us/td/docs/wireless/controller/8-5/config-guide/b_cg85/managing_users.html#id_45792
Authentication of Wireless LAN Controller's Lobby Administrator via RADIUS Server
https://www.cisco.com/c/en/us/support/docs/wireless-mobility/wlan-security/97073-auth-lobbyadmin-radius.html
ISRG Root X1 - Root CA
https://letsencrypt.org/certs/isrgrootx1.pem