
Lab 2-1: WLC Basic Setup and Management Interface
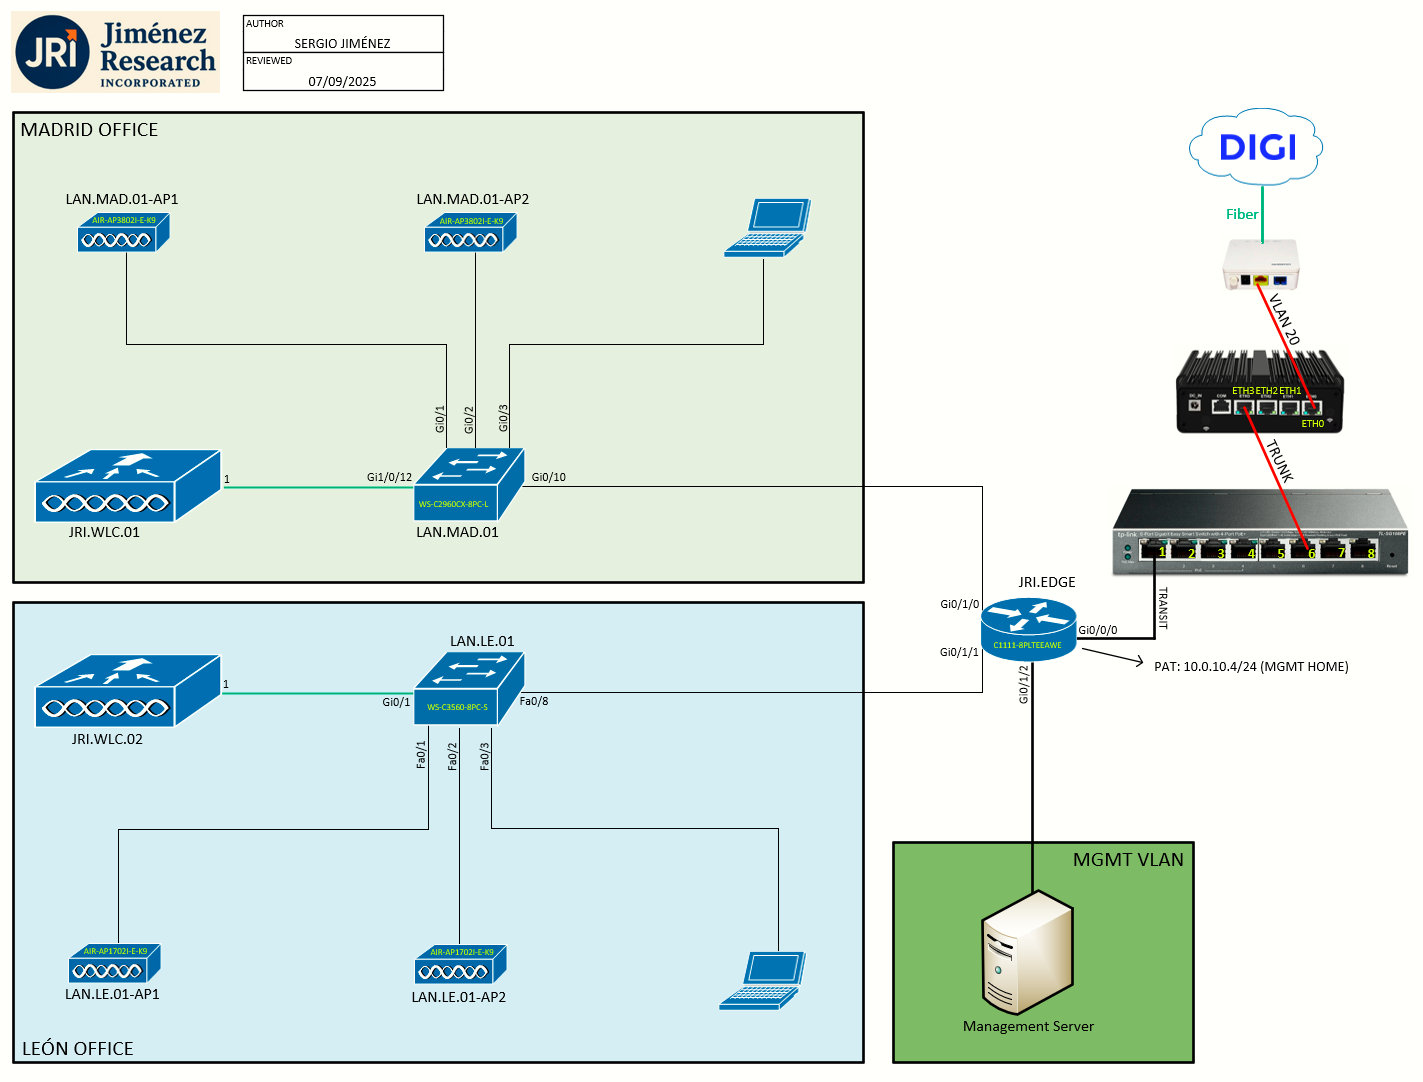
Topology
Task 1: JRI.WLC.01 Bootup, Factory Reset
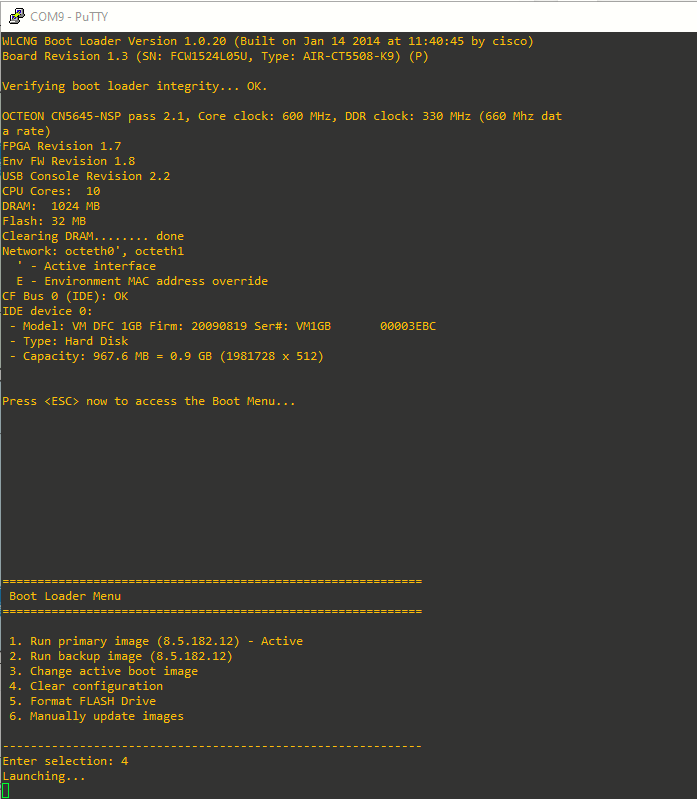
First task is to bring the JRI.WLC.01 5508 WLC up and have it factory reset. The controller bootloader (ppcboot) must be accessed by pressing Esc key during the boot process on the WLC. We are prompted to choose an option from the following, where we'll choose 4. Clear configuration:
Task 2: Cisco WLAN Express Setup
Cisco WLAN Express Setup is a simplified, out-of-the-box installation and configuration interface for Cisco Wireless Controllers. There are two methods:
- Wired method
- Wireless method
With this, there are three ways to set up a controller:
- Cisco WLAN Express Setup.
- Traditional CLI through serial console.
- Updated method using network connection directly to the controller GUI setup wizard.
Cisco WLAN Express Setup can be used only for the first time in out-of-the-box installations or when controller configuration is reset to factory defaults.
Preparing for Setup Using Cisco WLAN Express
- Do not auto-configure the controller or use the wizard for configuration.
- Do not use console interface; the only connection to the controller should be client connected to service port.
- Configure DHCP or assign static IP 192.168.1.X to laptop interface connected to service port.
Actually, I had a console connection due to the need to factory reset the controller. After the WLC has been factory reset and the bootup process is finished, it asks whether or not to terminate autoinstall. According to the previous instructions we will answer yes to this.
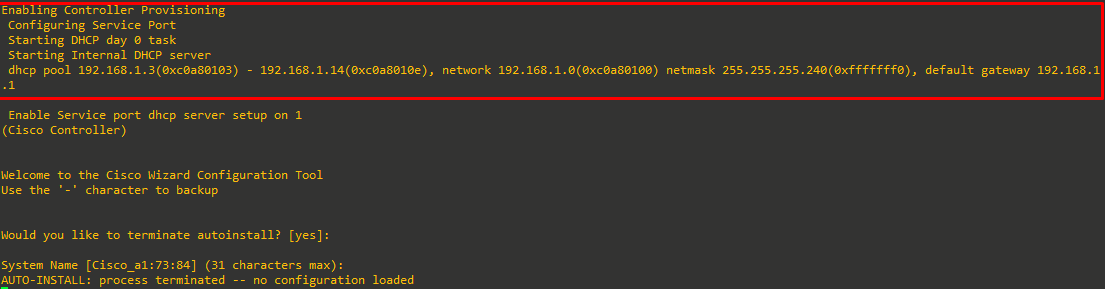
As we can see on the output, the AUTO-INSTALL process has been terminated. Also, we can see the controller has enabled internal DHCP on the service port (for the Cisco WLAN Express setup).
We won't continue with the setup via CLI (ignore the System Name prompt).
Setting up Cisco Wireless Controller using Cisco WLAN Express (Wired Method)
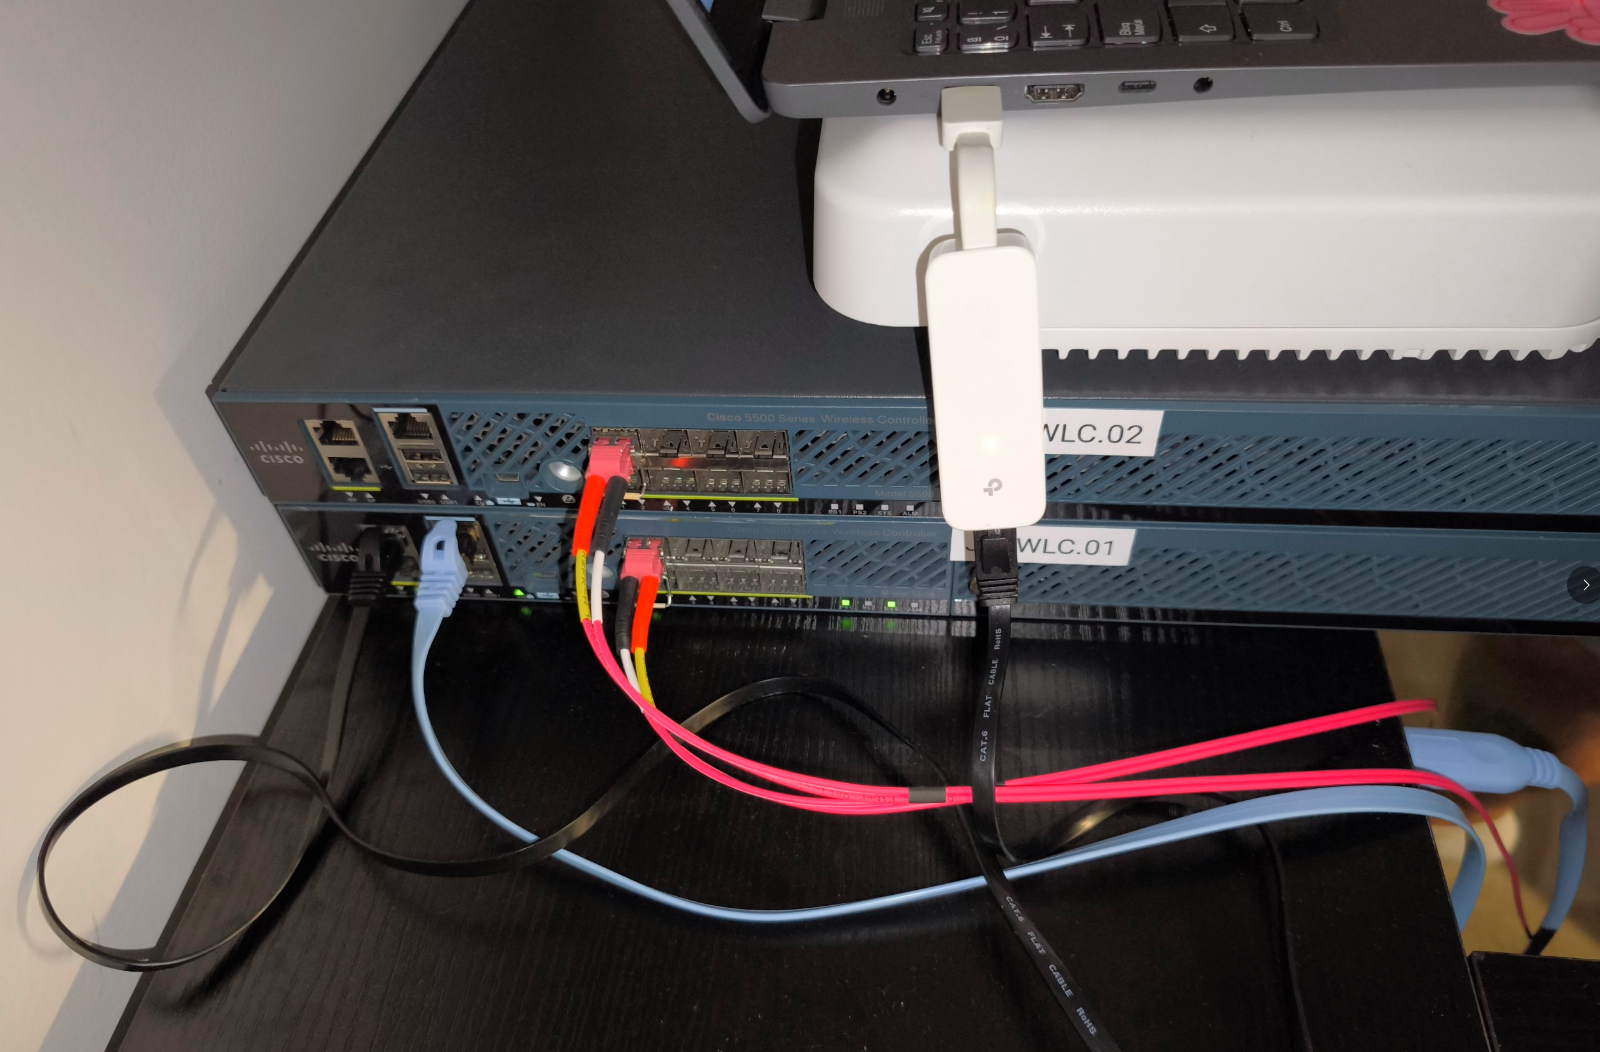
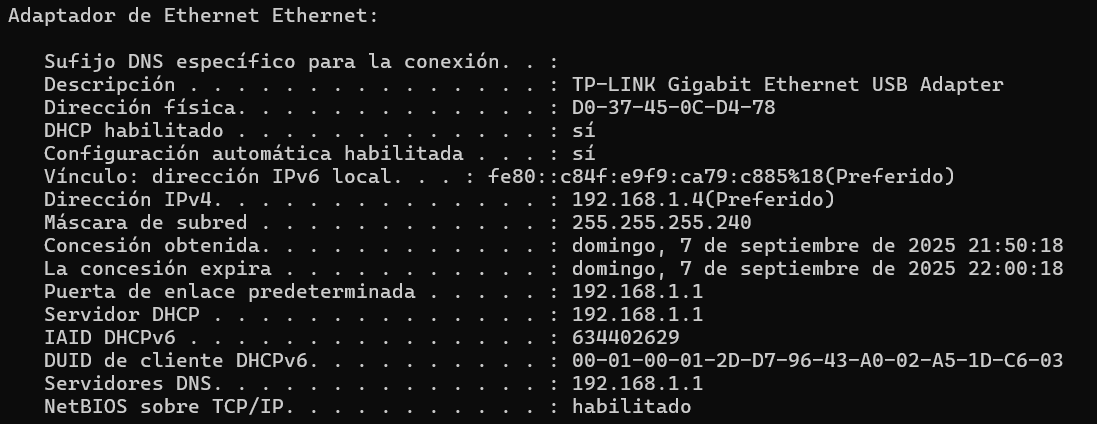
Step 1: Connect a laptop's wired Ethernet port directly to the Service port of the controller.
Step 2: Enable DHCP on the laptop network adapter that is connected to the Service Port. This assigns an IP address to the laptop from the controller Service Port 192.168.1.X range.
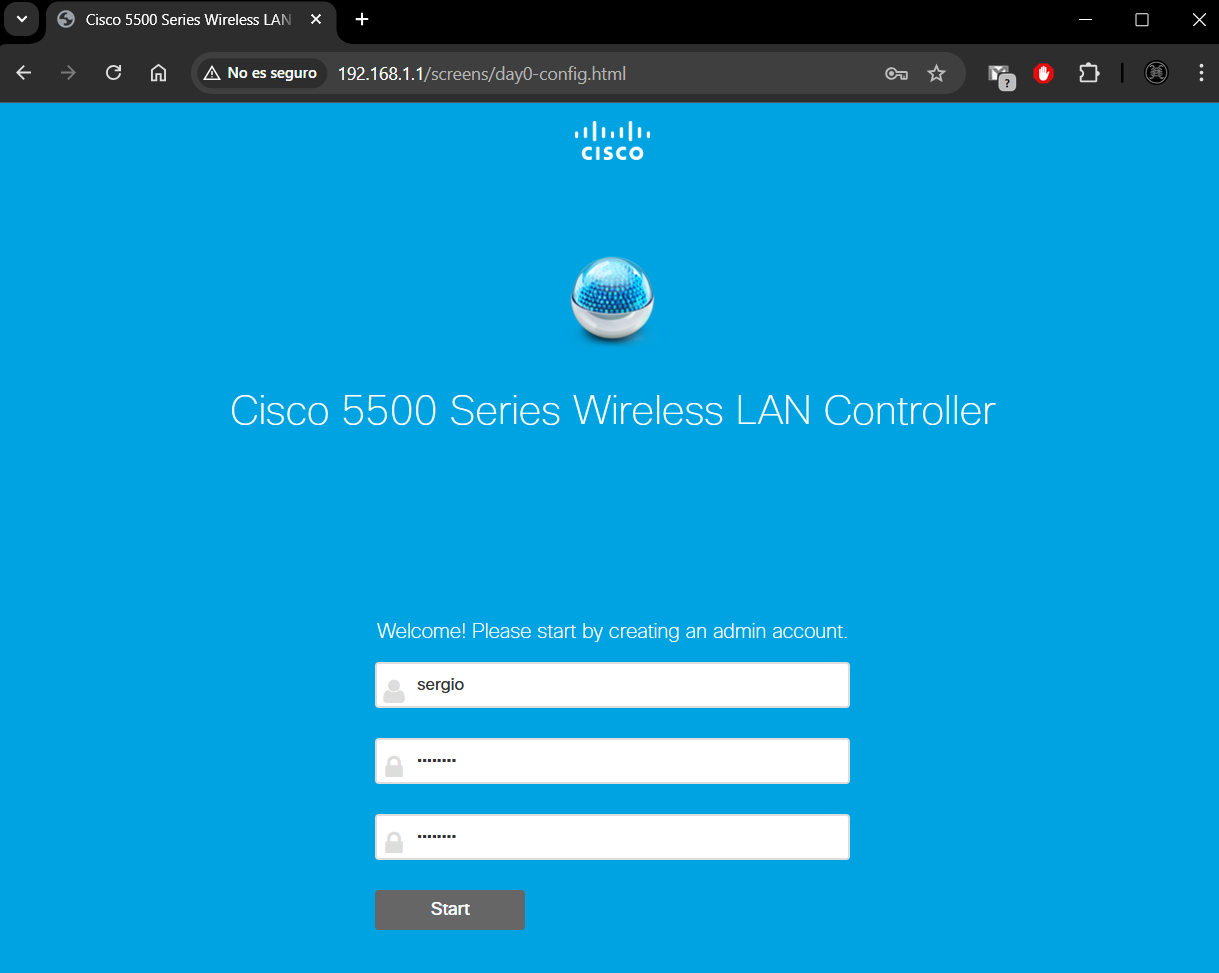
Step 3: Open a web browser and type http://192.168.1.1. Create an administrator account by providing the name and password.
Step 4: In the Set Up Your Controller box, I will enter the following details:
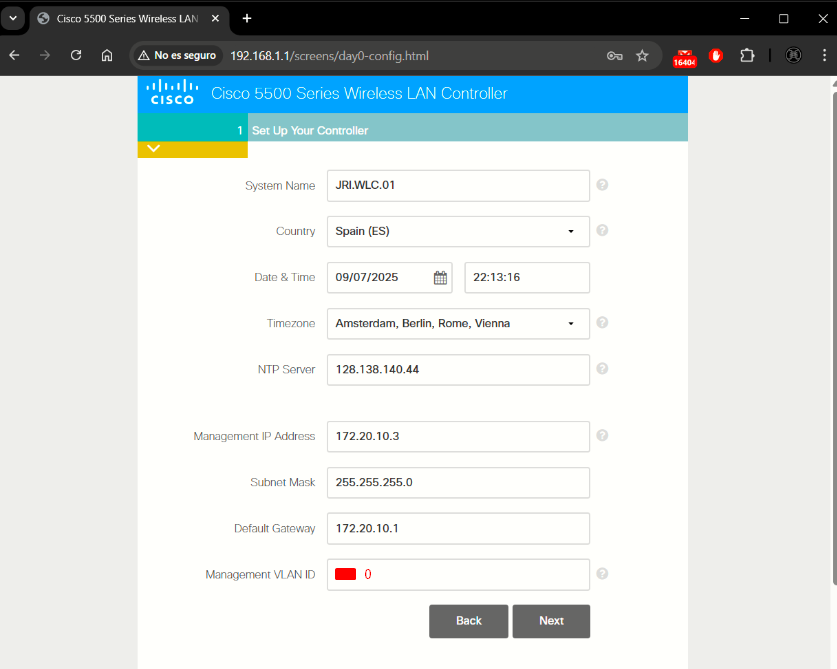
- The NTP server must be an IP address. APs do not support FQDN in a day 0 scenario.
- Management VLAN ID: Leave 0 for untagged or 210 for tagged (MADRID_MGMT)? If 210 is configured, WLC will tag all the packets going out of the management interface with that VLAN. If the switch has 210 as native VLAN on the corresponding switch port trunk, the switch will expect frames in the native VLAN 210 to come without any tag. If it is kept as 0, the WLC will send out the frame without any VLAN tag, and the switch will recognize the frame as in VLAN 210 (if native VLAN 210 is configured).
Hence two possible solutions here: either configure 210 as the mgmt. VLAN on the WLC, and don't configure any VLAN as native on the switch port trunk, or leave 0 as the VLAN ID at the WLC and configure the switch port trunk native VLAN ID as 210 (in this way we could use any IP address from the MADRID_MGMT subnet and the WLC traffic will be sent to the switch without any tag. Once that traffic reaches the switchport then it will put the traffic in the native VLAN configured (210).
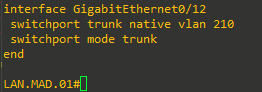
I will use this last method: 0 at the WLC, 210 as native on the switch port trunk.
The setup attempts to import the clock information (date and time) from the computer via JavaScript. It is recommended to confirm this before continuing. APs rely on correct clock settings to be able to join the controller.
Step 5: In the Create Your Wireless Networks box, in the Employee Network area, I will fill the following data:
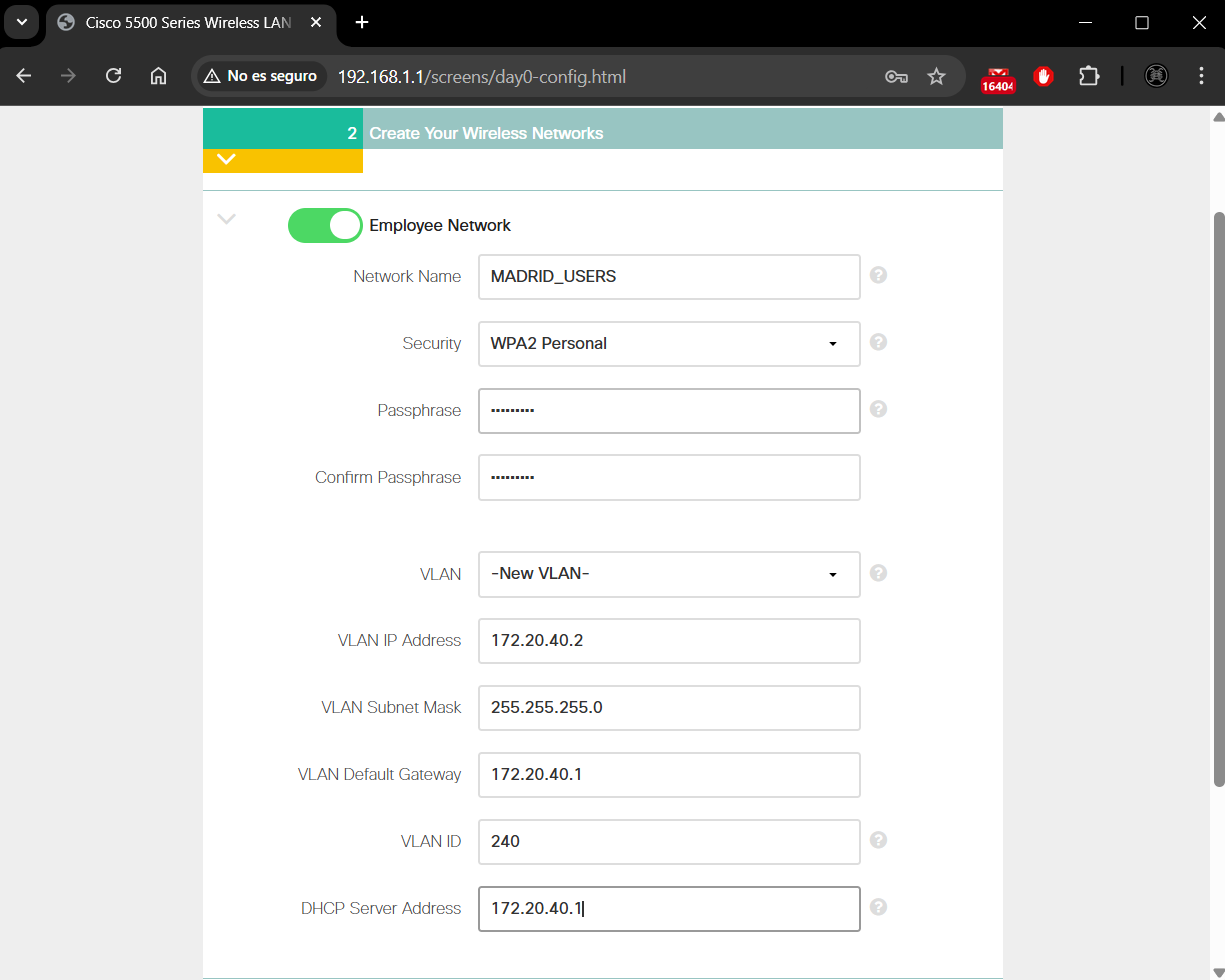
- VLAN: I will specify here the MADRID_USERS VLAN (for now, this VLAN will serve both wired and wireless users).
- VLAN IP Address: IP on the MADRID_USERS network.
- VLAN ID: 240 (MADRID_USERS VLAN).
- DHCP Server Address: I will enter the IP of the gateway JRI.EDGE (DHCP will be configured here later).
I won't configure the Guest Network now.
Step 6: In the Advanced Setting box, in the RF Parameter Optimization area, I'll leave everything as default except changing the client density to low:
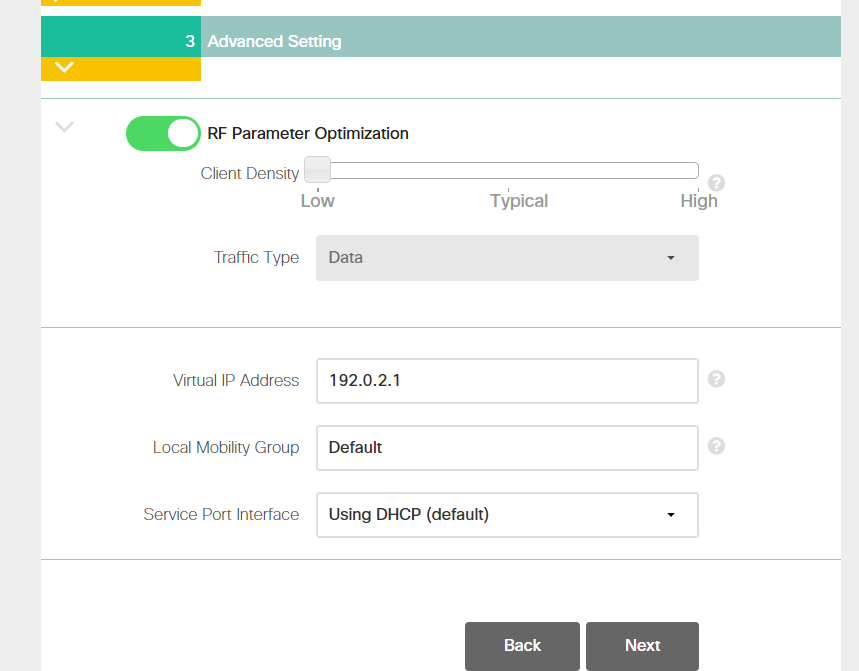
After this, a summary page appears. If everything is correct, I'll apply. Then, the controller reboots automatically.
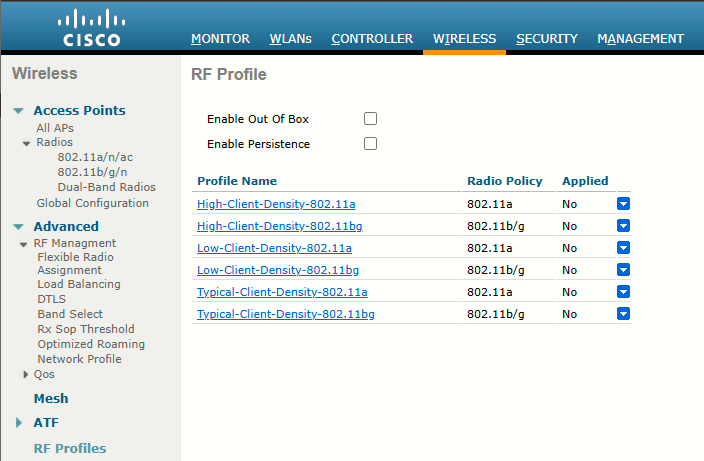
RF Profile Configurations
After a successful login as an administrator at https://172.20.10.3, verify at Wireless > RF Profiles that Cisco WLAN Express features are enabled by checking that the predefined RF profiles are created on this page (they are):
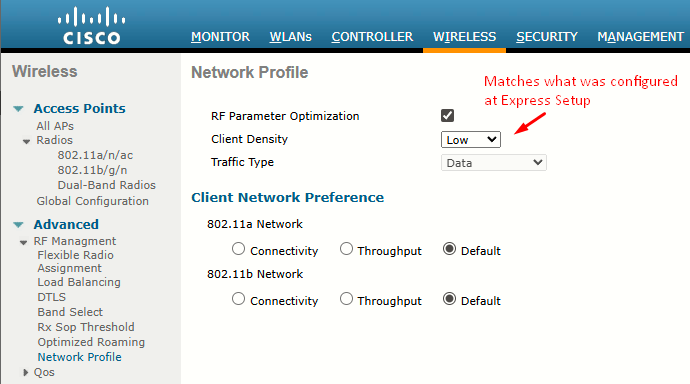
At Wireless > Advanced > Network Profile, verify the client density and traffic type details:
Task 3: List of Default Configurations
When you configure the WLC using Express Setup, the following parameters are enabled or disabled:
| Parameters in New Interface | Default Setting |
|---|---|
| Aironet IE | Disabled |
| DHCP Address Assignment (Guest SSID) | Enabled |
| Client Band Select | Enabled |
| Local HTTP and DHCP Profiling | Enabled |
| Guest ACL | Applied. NOTE: Guest ACL denies traffic to the management subnet. |
| CleanAir | Enabled |
| EDRRM | Enabled |
| EDRRM Sensitivity Threshold |
|
| Channel Bonding (5 GHz) | Enabled |
| DCA Channel Width | 40 MHz |
| mDNS Global Snooping | Enabled |
| Default mDNS profile |
Two new services added:
|
| AVC (only AV) | Enabled only with following prerequisites:
|
| Management |
|
| Virtual IP Address | 192.0.2.1 |
| Multicast Address | Not configured |
| Mobility Domain Name | Name of employee SSID |
| RF Group Name | Default |
References
Administration of Controller
https://www.cisco.com/c/en/us/td/docs/wireless/controller/8-5/config-guide/b_cg85/administration_of_cisco_wlc.html
native VLAN on WLC
https://community.cisco.com/t5/wireless/native-vlan-on-wlc/td-p/1749271