Lab 7-1: Configuring a WLAN
Topology
Task 0: Cleaning MADRID_USERS
First, I will begin cleaning up the existing WLAN MADRID_USERS I had to create on the setup of the WLC, and its associated dynamic interface, so we start clean in this lab:
Task 1: Creating a Dynamic Interface for the LEON_USERS net
Before creating a new WLAN, think about the following parameters it will need to have:
- SSID
- Controller interface and VLAN number
- Type of wireless security needed
A dynamic interface is used to connect the WLC to a VLAN on the wired network. When you create a WLAN, you will bind the dynamic interface (and VLAN) to a wireless network).
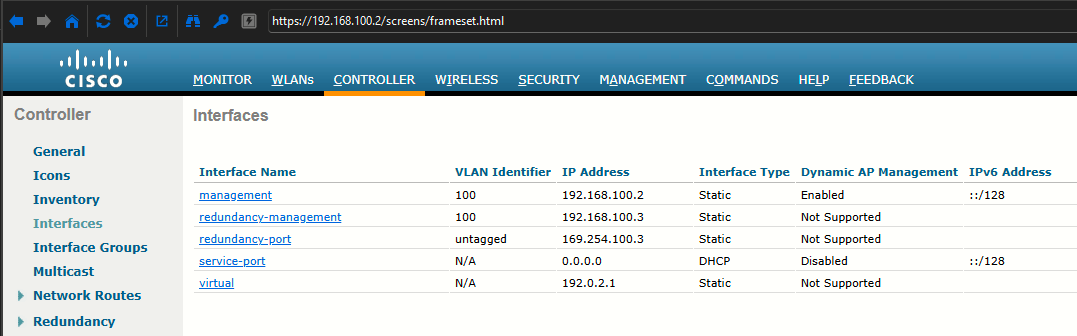
To create a new dynamic interface on the WLC go to Controller > Interfaces and click New on the upper right:
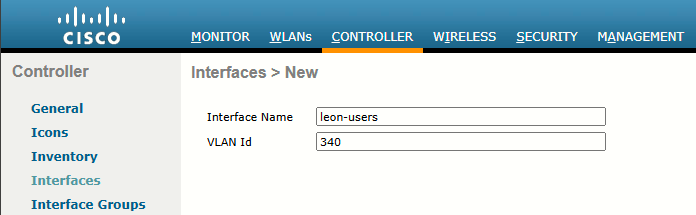
From lab 1-1, LEON-USERS net is VLAN 340, so we fill the fields accordingly. Click Apply and we are presented with the interface edit page where again, I'll fill the field according to the addressing defined earlier:
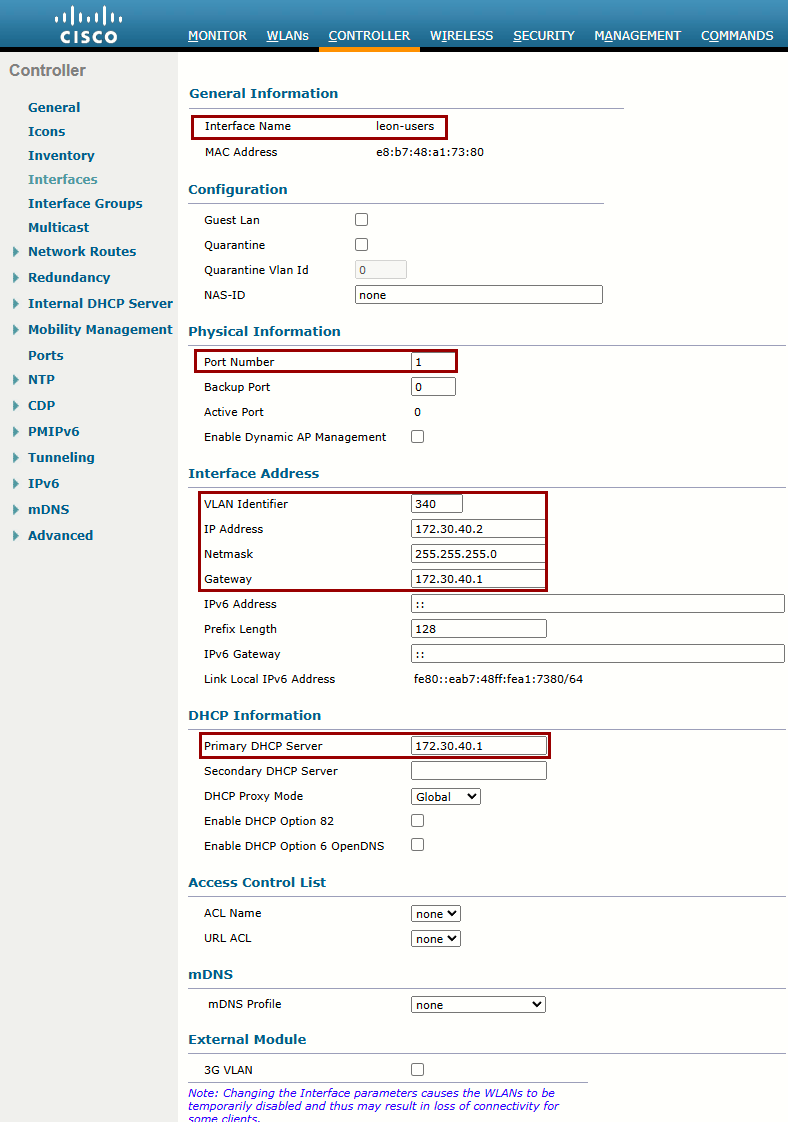
Port Numer = 1:
Task 2: Creating a WLAN
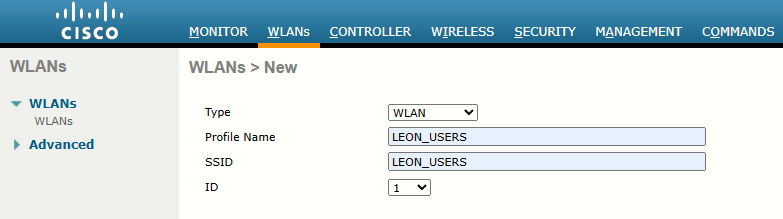
The ID number becomes useful when you use templated in PI to configure WLANs on multiple WLCs at the same time. WLAN templates are applied to specific WLAN ID numbers on WLCs. The WLAN ID is only locally significant and is not passed between WLCs. As a rule, you should keep the sequence of WLAN names and IDs consistent across multiple WLCs so that any configuration templates you use in the future will be applied to the correct WLANs.
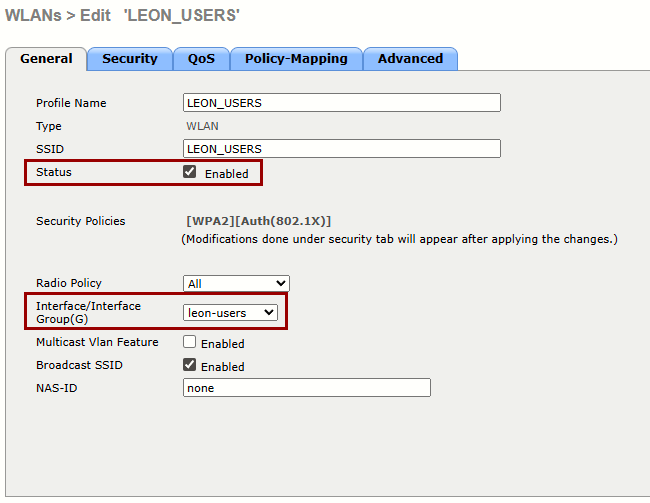
After hitting Apply we are presented with the WLAN editing page. On the General tab we must check the Enabled status checkbox and select the WLC interface that will be bound to this WLAN.
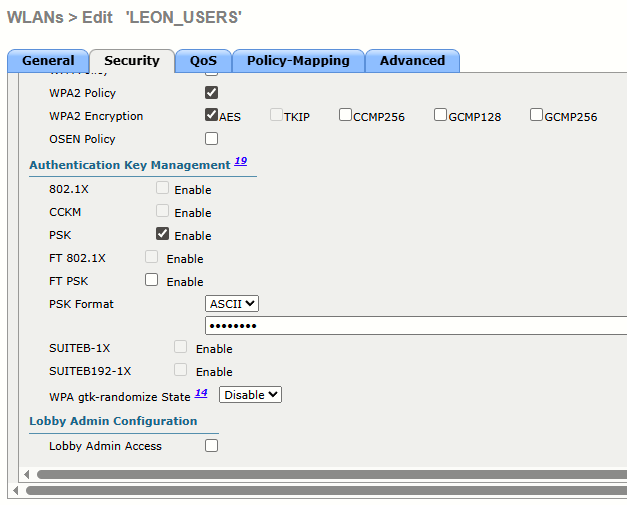
On the Security tab, I'll change the Authentication Key Management method from 802.1X to PSK (because I want this network to be WPA2-Personal):
We'll skip the QoS and Policy-Mapping tabs for now, and go to the Advanced page.
Although most of the advanced settings are beyond the scope of the CCNA Wireless level, you should be aware of a few default that might affect your wireless clients.
- By default, client sessions with the WLAN are limited to 1800 seconds (30 min). Once that session timer expires, a client will be required to reauthenticate. This setting is controlled by the Enable Session Timeout checkbox and the Timeout field.
- An WLC maintains a set of security policies that are used to detect potentially malicious wireless clients. If a client exihibits a certain behavior, the WLC can exclude it from the WLAN for a period of time. By default, all clients are subject to the policies configured under Security > Wireless Protection Policies > Client Exclusion Policies. These policies include excessive 802.11 association failures, 802.11 authentication failures, 802.1x authentication failures, web authentication failures, and IP address theft or reuse. Offending clients will be automatically excluded or blocked for 1 minute, as a deterrent to attacks on the wireless network.
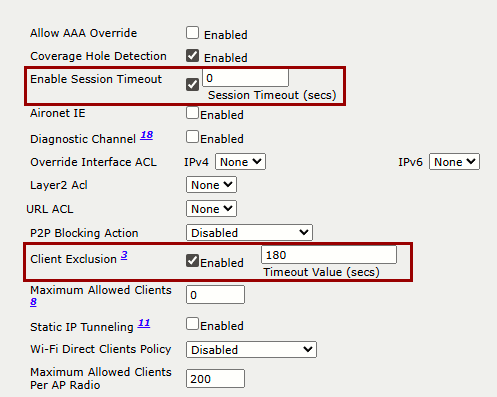
On the image above, the Client Exclusion is set to 2 minutes instead of 1 minute, and the Enable Session Timeout to 0 (which basically disables session timeout).
Task 3: Finalizing WLAN Configuration
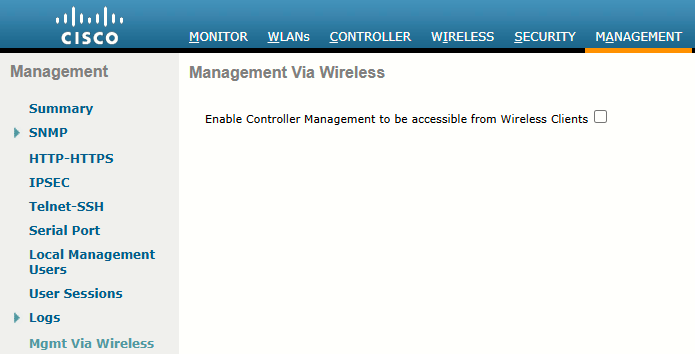
Be aware that by default, a WLC will not allow management traffic that is initiated from a WLAN. That means you (or anybody else) cannot access the controller GUI or CLI from a wireless device that is associated to the WLAN. This is considered to a be a good security practice because the WLC is kept isolated from networks that might be easily accessible or where someone might eavesdrop on the management session traffic. Instead, you can access the WLC through its wired interfaces.
However, this can be changed on a global basis (all WLANs) by selecting Management > Mgmt Via Wireless: