
Getting an Spanish SIP number from Flash Telecom and using it for dial-up connectivity
Introduction
In preparation for another lab (Configuring a modem on the AUX port of a Cisco router for EXEC dial-in connectivity), I needed a second Spanish "fixed" phone number. I actually have one from my ISP company, but needed another one for the mentioned lab.
Since I cannot get another number from my ISP, I searched for another provider and found Flash Telecom. This provider offers SIP numbers starting at 2.50€/month. The most basic package includes the following:
- SIP account
- Spanish phone number
- Can be used only one device (no simultaneity)
- 200min of incoming calls
- Outgoing calls at a cost of 0,01€/min
These benefits were enough for me to complete the mentioned lab, so I went ahead and ordered a phone number from Flash Telecom (the most simple package which they call "Línea IP Simple"). More info here.
Ordering the SIP number
The ordering process is very simple. Just go to https://panelv4.fmeuropa.com/alta/voip and select the desired plan:
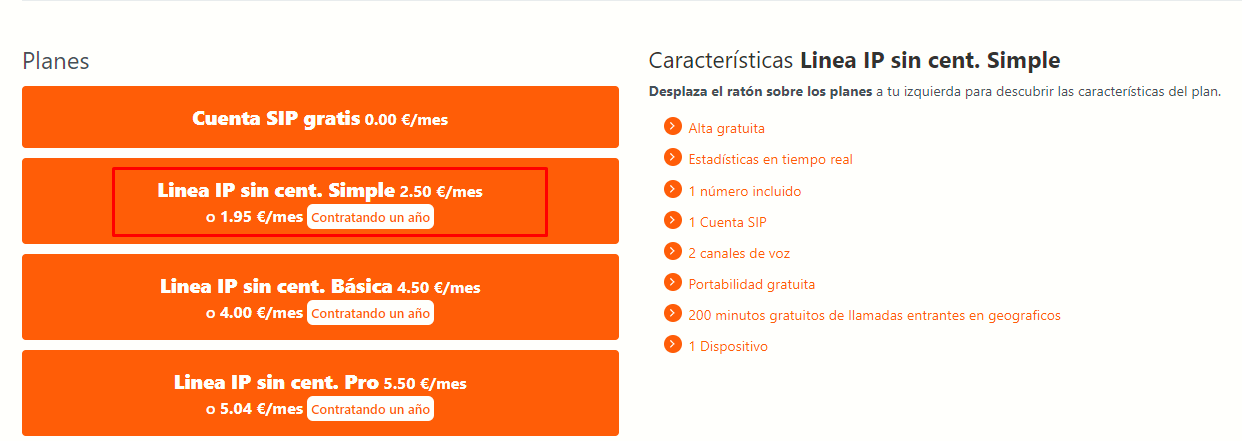
In my case, the plan is "Linea IP sin cent. Simple" and its features (which I had previously highlighted) can be see on the right.
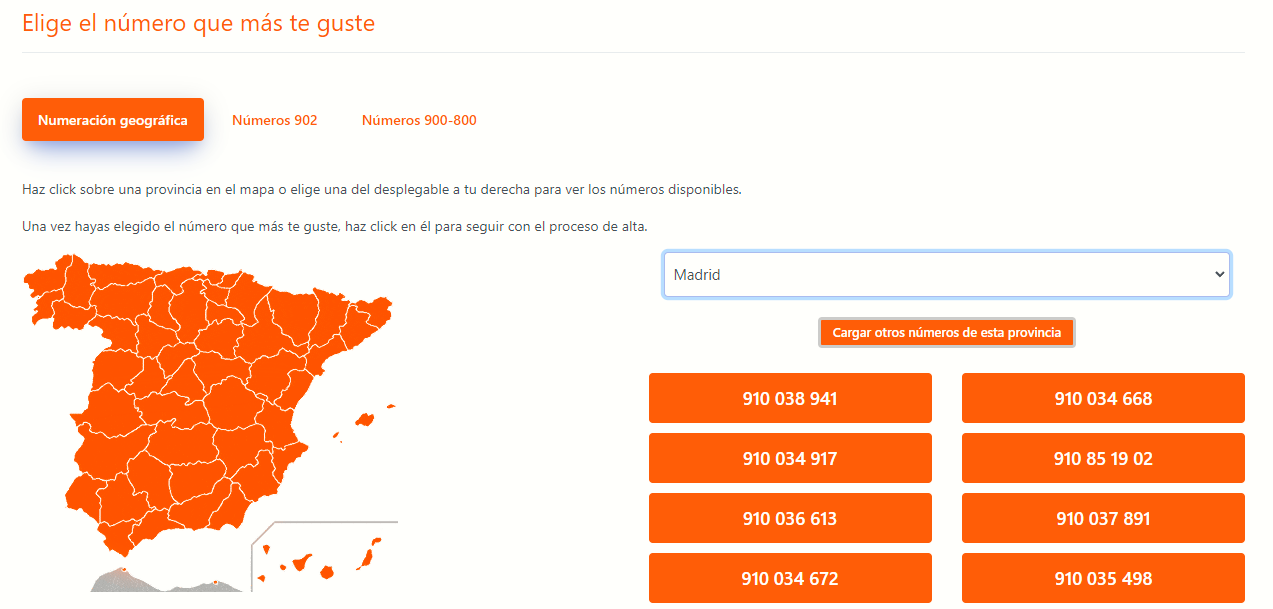
The next step is to select the Spanish province you want the number from. I selected a number from Madrid:
As you can see at the summary in the following screen, the ordering fee is 0€ and the mensual fee is 2.50€:

Managing the SIP account and number from Flash Telecom
After ordering the SIP account and Spanish number, we can access the member area at https://panel.flashtelecom.es/.
We will receive an email with the SIP account details like this one:

We will not be able to make outgoing calls until our national ID card has been verified (this is part of the sign up and ordering process where we need to upload a photo of our ID). Incoming calls are however enabled right away.
This is how the Flash Telecom's control panel (member area) looks like:
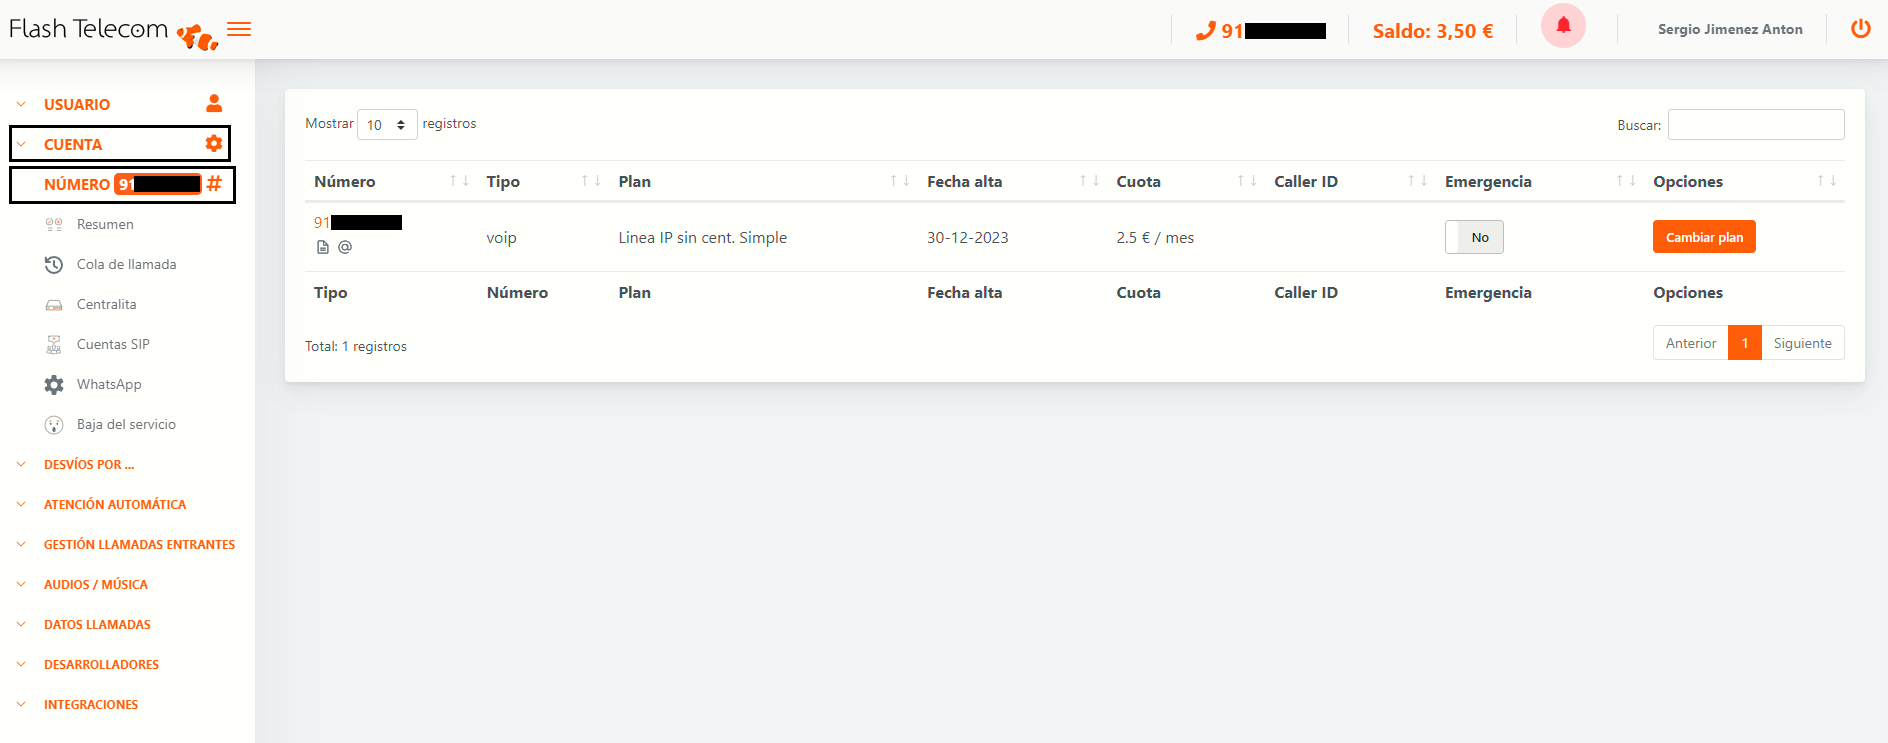
Since I have ordered the most basic package I will only be using the "Cuenta" (Account) and "Número" (Number) sections to manage everything related with the SIP account and number as related to the labs.
The most interesting things are under the SIP account menu:
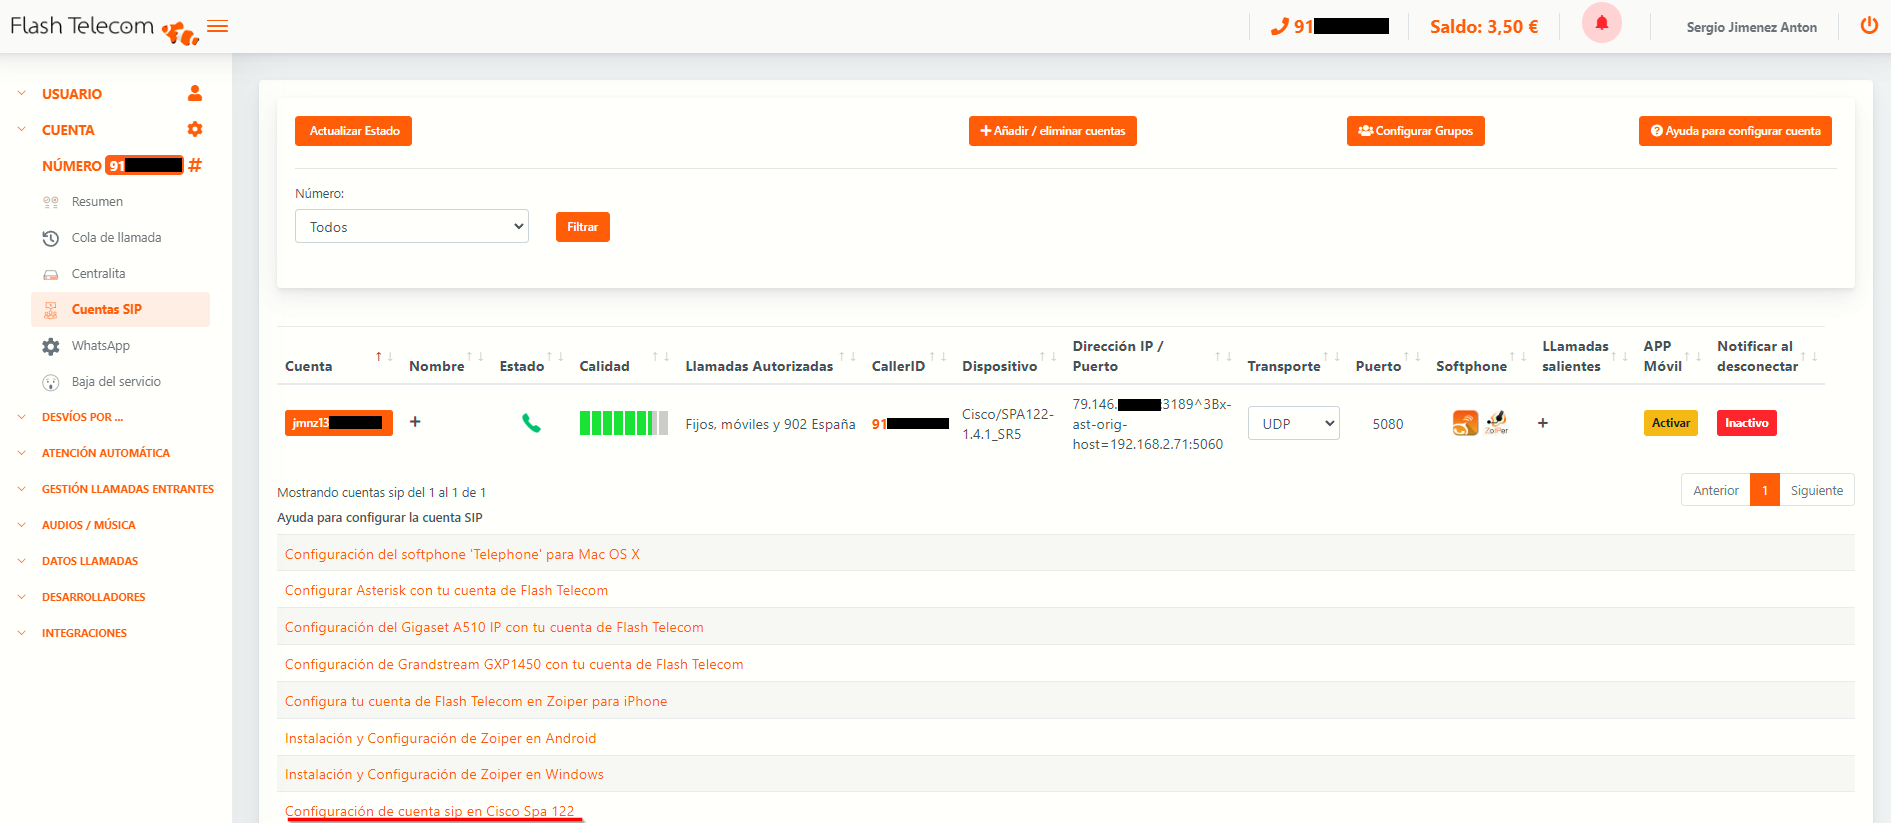
Few things to note here:
- Look at how the device used is detected as an Cisco SPA122 (I will explain later how to configure the SIP account on it).
- The IP address and port used which match my WAN IP address and outgoing port and the internal NATed IP which happens to be 192.168.2.71 (the LAN IP of the SPA122), port 5060 (SIP port).
- Note how at the bottom of the screenshot we have a link to the docs page of Flash Telecom where it explains how to configure the SIP account on the SPA122.
How to configure the Flash Telecom SIP account on a Cisco SPA122
We will follow the tutorial from Flash Telecom at https://flashtelecom.es/configuracion-de-cuenta-sip-en-cisco-spa-112/.
The parameters to be configured on the SPA122 are the following:
Under Voice > Line 1 (if using Line 1) > NAT Settings:
- NAT Mapping Enable: Yes
- NAT Keep Alive Enable: Yes
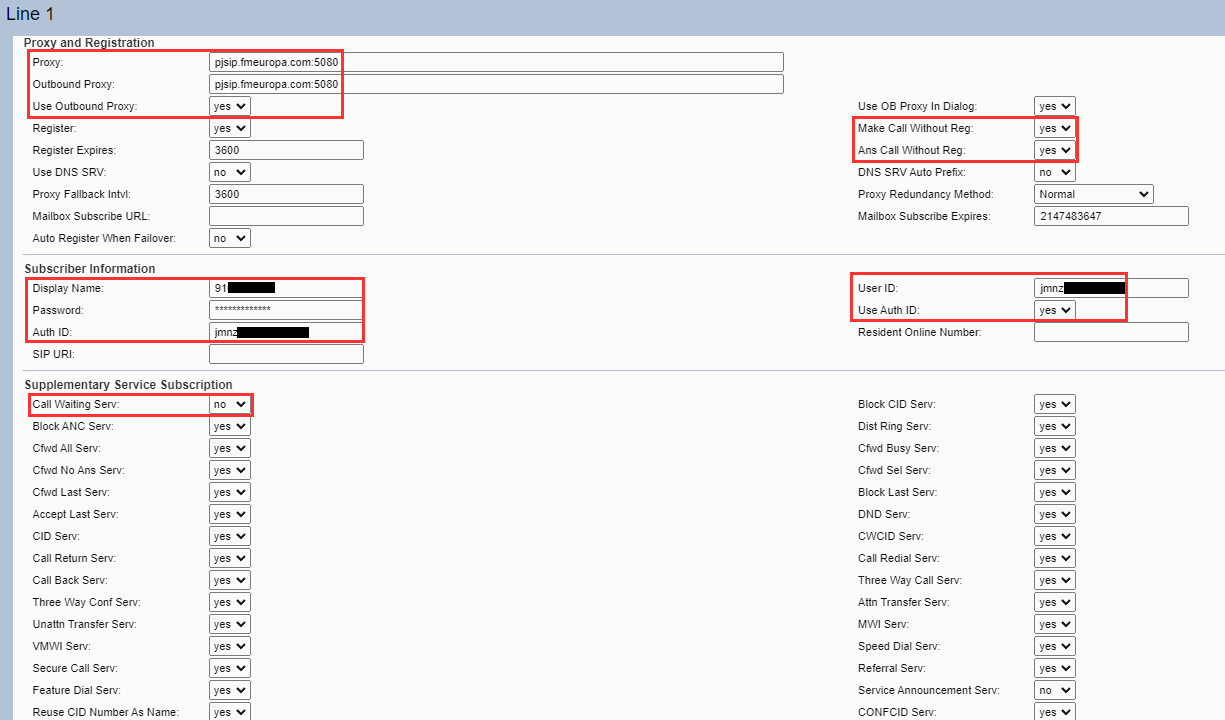
Under Voice > Line 1 (if using Line 1) > Proxy and Registration:
- Proxy: pjsip.fmeuropa.com:5080
- Outbound Proxy: pjsip.fmeuropa.com:5080
- Use Outbound Proxy: Yes
- Make Call Without Reg: Yes (needed for a later lab with a dial-up modem, not required if not using a dial-up modem)
- Ans Call Without Reg: Yes (needed for a later lab with a dial-up modem, not required if not using a dial-up modem)
Under Voice > Line 1 (if using Line 1) > Subscriber Information:
- Display Name: the ordered Spanish number
- User ID: SIP account username
- Password: SIP account password
- Auth ID: SIP account username
- Use Auth ID: Yes
Additional enhancements for later use with a dial-up modem (an analog phone still works with these settings):
Under Voice > Line 1 (if using Line 1) > Network Settings:
- Jitter Buffer Adjustment: No
Under Voice > Line 1 (if using Line 1) > Supplementary Service Subscription:
- Call Waiting Serv: No
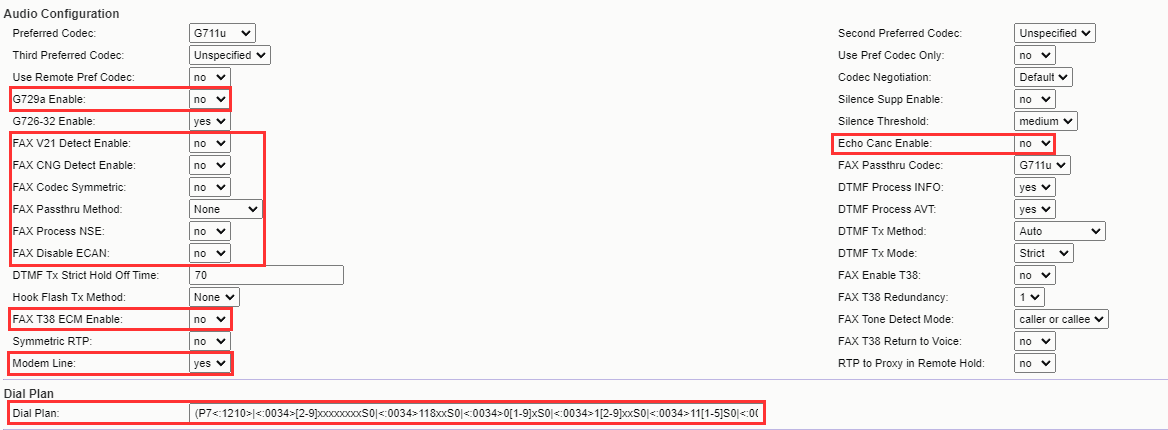
Under Voice > Line 1 (if using Line 1) > Audio Configuration:
- G729a Enable: No
- FAX V21 Detect Enable: No
- FAX CNG Detect Enable: No
- FAX Codec Symmetric: No
- FAX Passthru Method: NONE
- FAX Process NSE: No
- FAX T38 ECM Enable: No
- Modem Line: Yes
- Echo Canc Enable: No
Under Voice > Line 1 (if using Line 1) > Dial Plan:
(P7<:1210>|<:0034>[2-9]xxxxxxxxS0|<:0034>118xxS0|<:0034>0[1-9]xS0|<:0034>1[2-9]xxS0|<:0034>11[1-5]S0|<:0034>116xxxS0|<:0034>11[790]S0|<:0034>1[0]xxS0|xx.)Below you can see the screenshots taken from my SPA122 fully configured with the options above:

With the configuration done, we are ready to place and receive calls with an analog phone connected to the SPA122 ATA. We can verify the Line 1 (if using Line 1) at the Voice > Information menu on the SPA122:

Status information when on-call
Sources:
Configuración de cuenta sip en Cisco Spa 122
https://flashtelecom.es/configuracion-de-cuenta-sip-en-cisco-spa-112/
Flash Telecom - Línea IP
https://flashtelecom.es/telefonia-ip/linea-ip/
Configuring SPA122 ATA For Dial-Through
https://gekk.info/articles/ata-config.html
Guide to SIP Numbers (and How to Use Them)
https://www.globalcallforwarding.com/blog/guide-to-sip-numbers/