
Cisco SPA122 factory reset and initial setup
Introduction
For this lab I am using a Cisco SPA122 device I bought on Wallapop (the product is no longer on sale). I am assuming this ATA comes preconfigured so I won't bother verifying if it comes factory reset and just will go ahead and do the factory reset following the instructions on the Cisco docs for the device. Then, I will do the initial setup which will consist on defining the admin password and cabling it to my home network.
How to factory reset a Cisco SPA122
Connect the power adapter from the DC 5V POWER port to a power outlet.
-
RESET — Press the Reset button to restart the SPA122 device. To restore it to factory default settings, hold the button for 20 seconds.
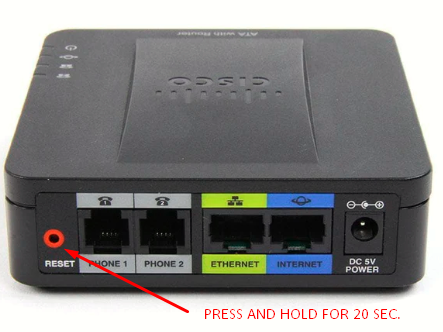
From the time the power adapter is connected to the DC 5V POWER port, you can begin the reset procedure (no need to wait).
Initial setup
After the SPA122 has been factory reset, we need to follow this guide for the initial setup. The resumed steps are as follows:
- Connect a computer to the ATA via the ETHERNET (yellow) port.
- Make sure the computer's Ethernet adapter is set to obtain an IP address via DHCP. The adapter should get an IP in the 192.168.15.0/24 range from the ATA's DHCP server.
- After we make sure the computer has an IP in this range, start a web browser an go to 192.168.15.1 which is the default local IP address of the ATA.
- To log in for the first time, enter the default username admin and the default password admin.
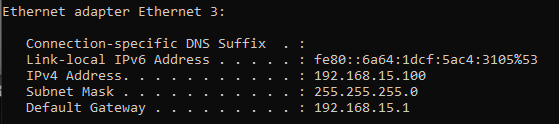 IP information on the adapter connected to the ATA
 Login page at 192.168.15.1 (use admin/admin)
Enabling remote access
In an ideal setup on a SOHO network, we would want to connect the ATA internet port to one of the edge router's LAN ports so it can obtain an access from the edge router's DHCP server. On my network it looks like this:

Enabling remote access would make the SPA122 accesible at 192.168.1.10 via web.
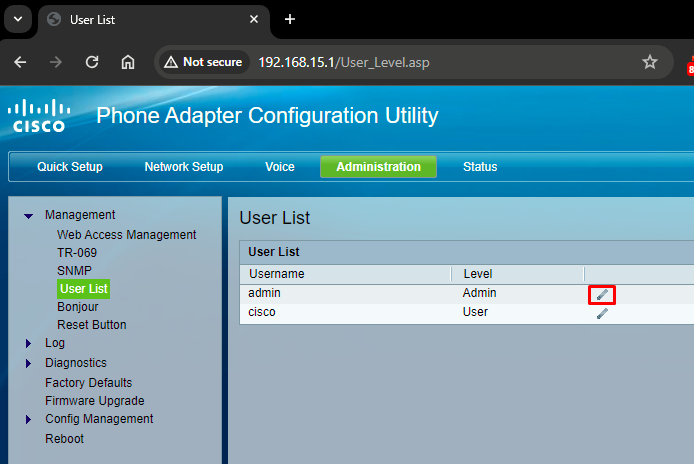
Before we can enable remote access, we have to change the default admin password for the admin user.
To change that password, go to Administration > Management > User List and click and edit the admin user
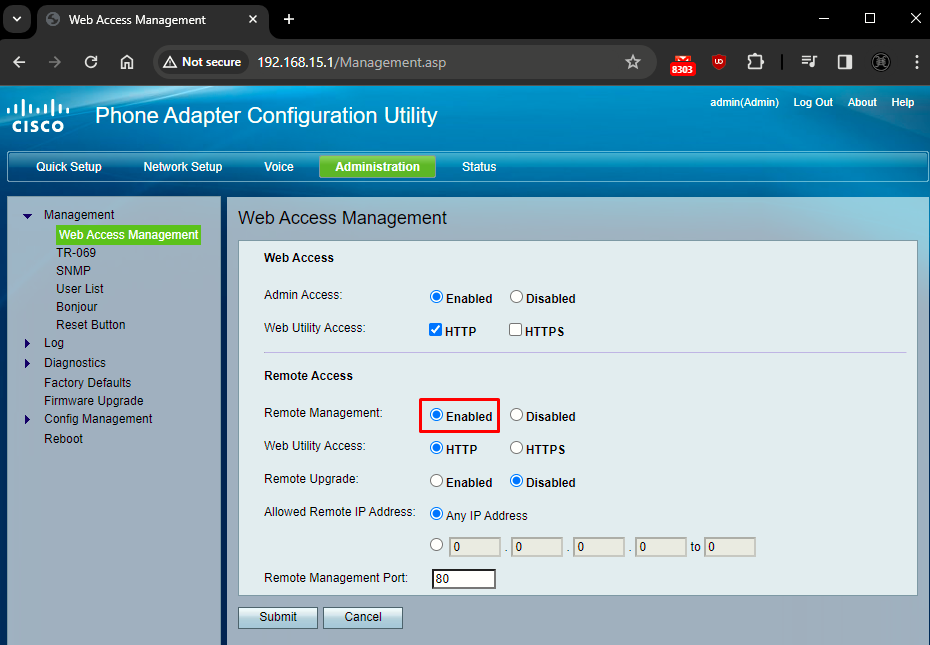
After the default password is changed, we can enable remote access on the Administration > Management > Web Access Management menu:
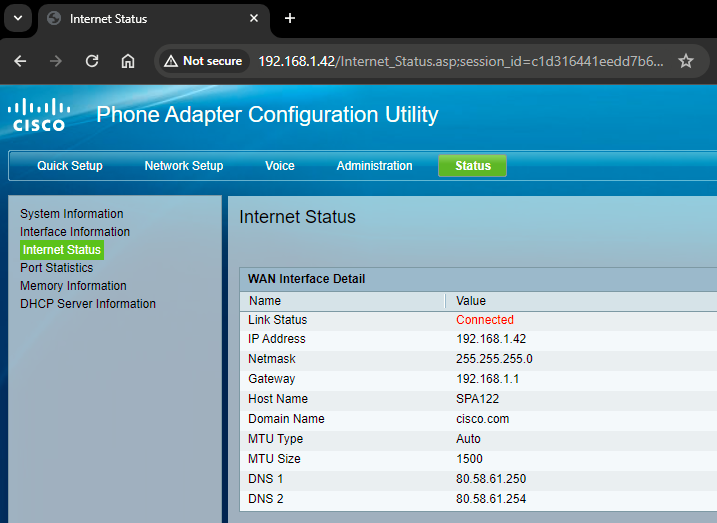
Finally, we can connect the INTERNET port on the ATA to the edge router. As we can see on the following image, the ATA has obtained the IP 192.168.1.42 (from which it is accesible):
Sources:
Access the Web Configuration Utility on the SPA122
https://www.cisco.com/c/en/us/support/docs/smb/unified-communications/cisco-small-business-voice-gateways-and-atas/smb2775-access-the-web-configuration-utility-on-the-spa122.html
Status Lights and Ports on the SPA112 and SPA122 - Cisco
https://www.cisco.com/c/en/us/support/docs/smb/unified-communications/cisco-small-business-voice-gateways-and-atas/smb2757-status-lights-and-ports-on-the-spa112-and-spa122.html
Configure Web Access Management on SPA122 - Cisco
https://www.cisco.com/c/en/us/support/docs/smb/unified-communications/cisco-small-business-voice-gateways-and-atas/smb2731-configure-web-access-management-on-spa122.html