2. GNS3 GUI installation on Windows / GNS3 VM installation on VMware Workstation
Download Link
The official download link for the lastest stable release as of 10 May 2026: https://www.gns3.com/software/download

This downloads the file GNS3-2.2.59-all-in-one-regular.exe
GNS3 GUI and VM Setup
On the installer, at the Choose Components steps:
|
|
|
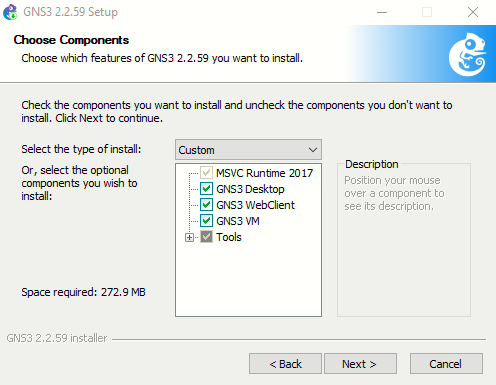
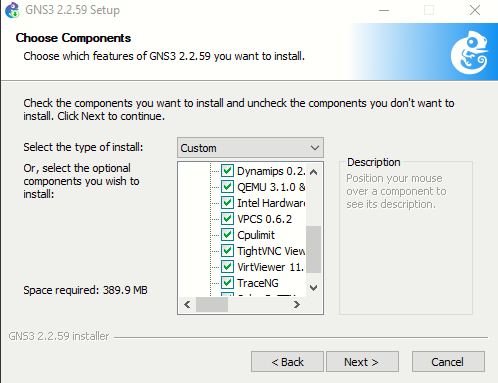
I have checked all the options available inside Tools, except Wireshark and WinPcap/Npcap (already installed).
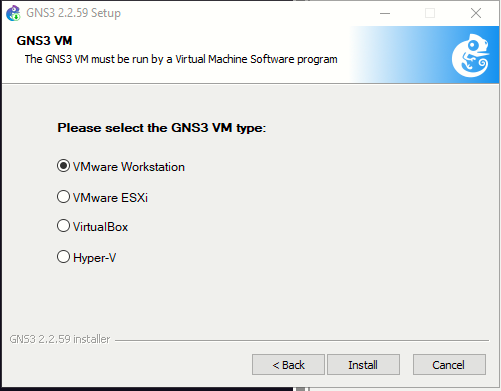
When asked for the GNS3 VM type, I'll choose VMware Workstation:
Starting GNS3
Leave the defaults here:
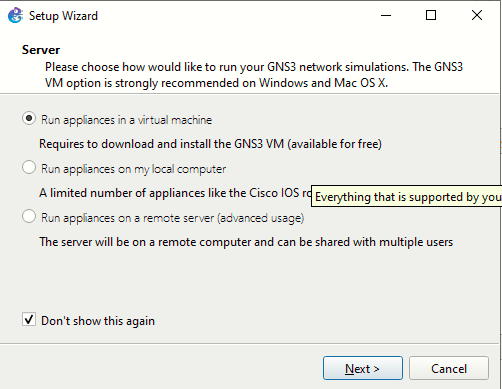
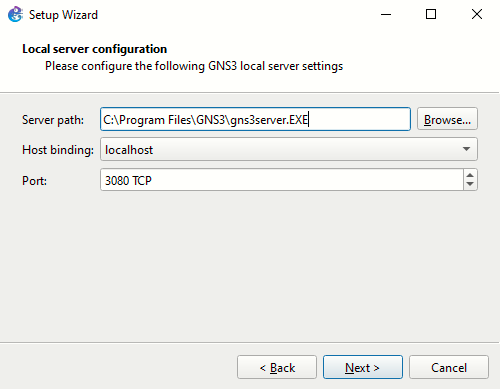
Then, once the GUI is launched, the Setup Wizard appears, I'll continue with the first option, and then click next on the Local server configuration screen.
Even though I'll be using the GNS3-VM to perform the “heavy lifting” of running the VMs/images/containers, it’s still necessary to configure the local server settings in GNS3 before proceeding with the remaining process of configuring the GNS3 VM.
|
|
|
At this point I will need to import the downloaded GNS3 VM OVA onto VMware Workstation (downloaded during the setup).
Just extract the ZIP file GNS3.VM.VMware.Workstation.2.2.59.zip and import the GNS3 VM.ova to VMware Workstation:
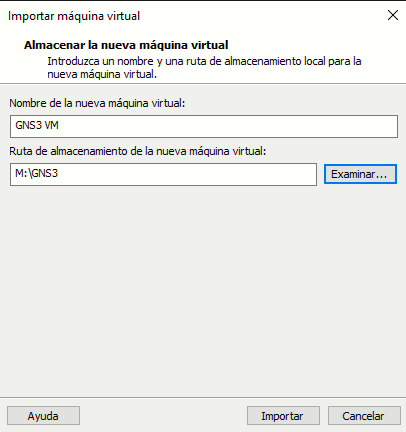
Once the import finishes, leave all settings at their defaults:
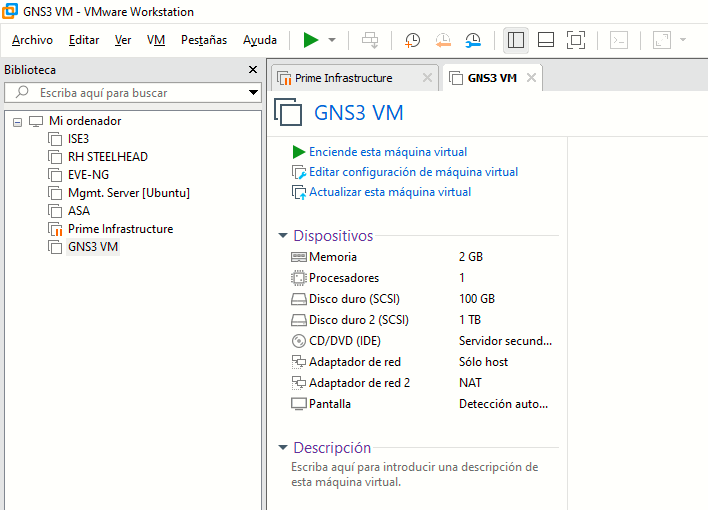
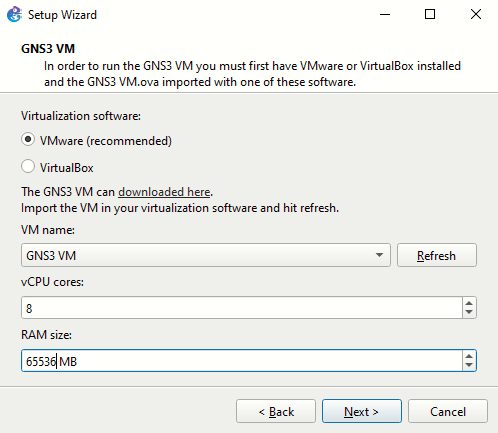
Back at the GNS3 GUI Setup Wizard, we can now select the GNS3 VM (click Refresh, the GNS3 VM is auto-detected).
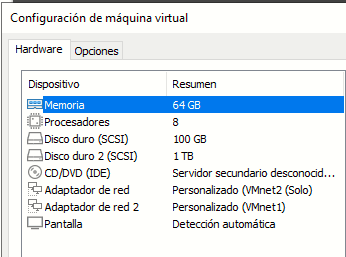
GNS3 recommends a minimum of 1 vCPU core and 2GB RAM. However, if you want to run large topologies with many devices, more CPU cores and RAM are recommended. A good rule of thumb is to assign it half the total amount of available vCPU cores and physical RAM available in your PC. I'll use 8 vCPUs (Ryzen 3700X) and 65536 MB of RAM (128 GB intalled).
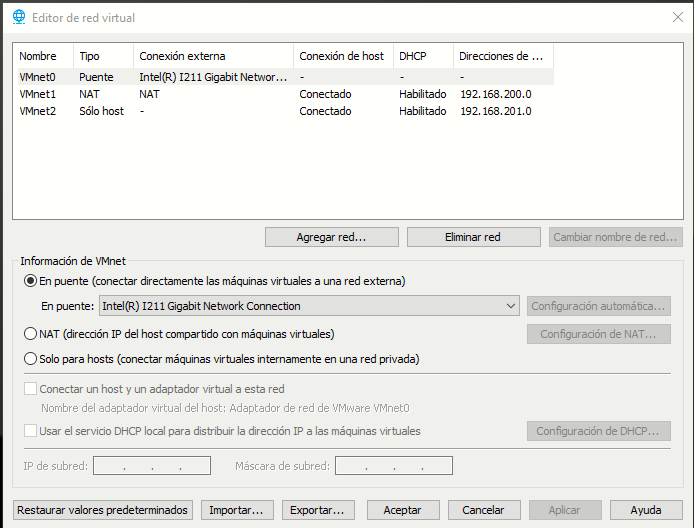
Tuning the GNS3 VM Network Interfaces
The standard GNS3 VM setup uses Adapter 1 (Host-only) for the "control plane"—allowing the GNS3 GUI on your desktop to talk to the VM—and Adapter 2 (NAT) for the "management plane"—giving the VM and its nested appliances internet access for updates or pulling Docker images.
Adding a third adapter (Bridged) serves as a "data plane" link to your actual physical environment. While not strictly necessary for basic labs, it offers several professional advantages for more complex topologies:
1. Integration with Physical Hardware
The most significant benefit is the ability to connect your virtual lab to real physical gear.
-
If you have physical Cisco switches, firewalls, or access points on your desk, you can bridge them into your GNS3 topology.
-
This allows you to test hybrid scenarios, such as using a virtualized controller to manage physical access points or testing site-to-site VPNs between a virtual appliance and a hardware router.
2. Multi-Device Accessibility
Because a Bridged adapter puts your virtual nodes directly on your home or office LAN:
-
You can access a virtual router’s Web GUI or SSH into a virtual switch from a different device (like a tablet or a second laptop) without needing to be on the host machine.
-
It makes the lab look like a collection of real devices on your physical router's client list.
3. Using External Network Services
If you have a dedicated server (like a Pi-hole, a Windows Domain Controller, or a specialized DHCP/TFTP server) running elsewhere on your physical network, a bridged adapter allows your GNS3 appliances to interact with those services as if they were plugged into the same rack.
When you add the third adapter in VMware, you must also drag a "Cloud" node into your GNS3 workspace and configure it to use that specific interface (usually eth2 inside the GNS3 VM). This creates the bridge between the virtual cables in your topology and your physical Ethernet port.
|
|
|