Cisco UC500 Lab #1-1: Introduction and initialization using CCA Telephony Setup Wizard
Introduction
On the previous pages of this chapter, the Cisco UC500 was introduced, factory reset, initialized and connected to Cisco CCA. At this point, the appliance is ready to be configured however we want.
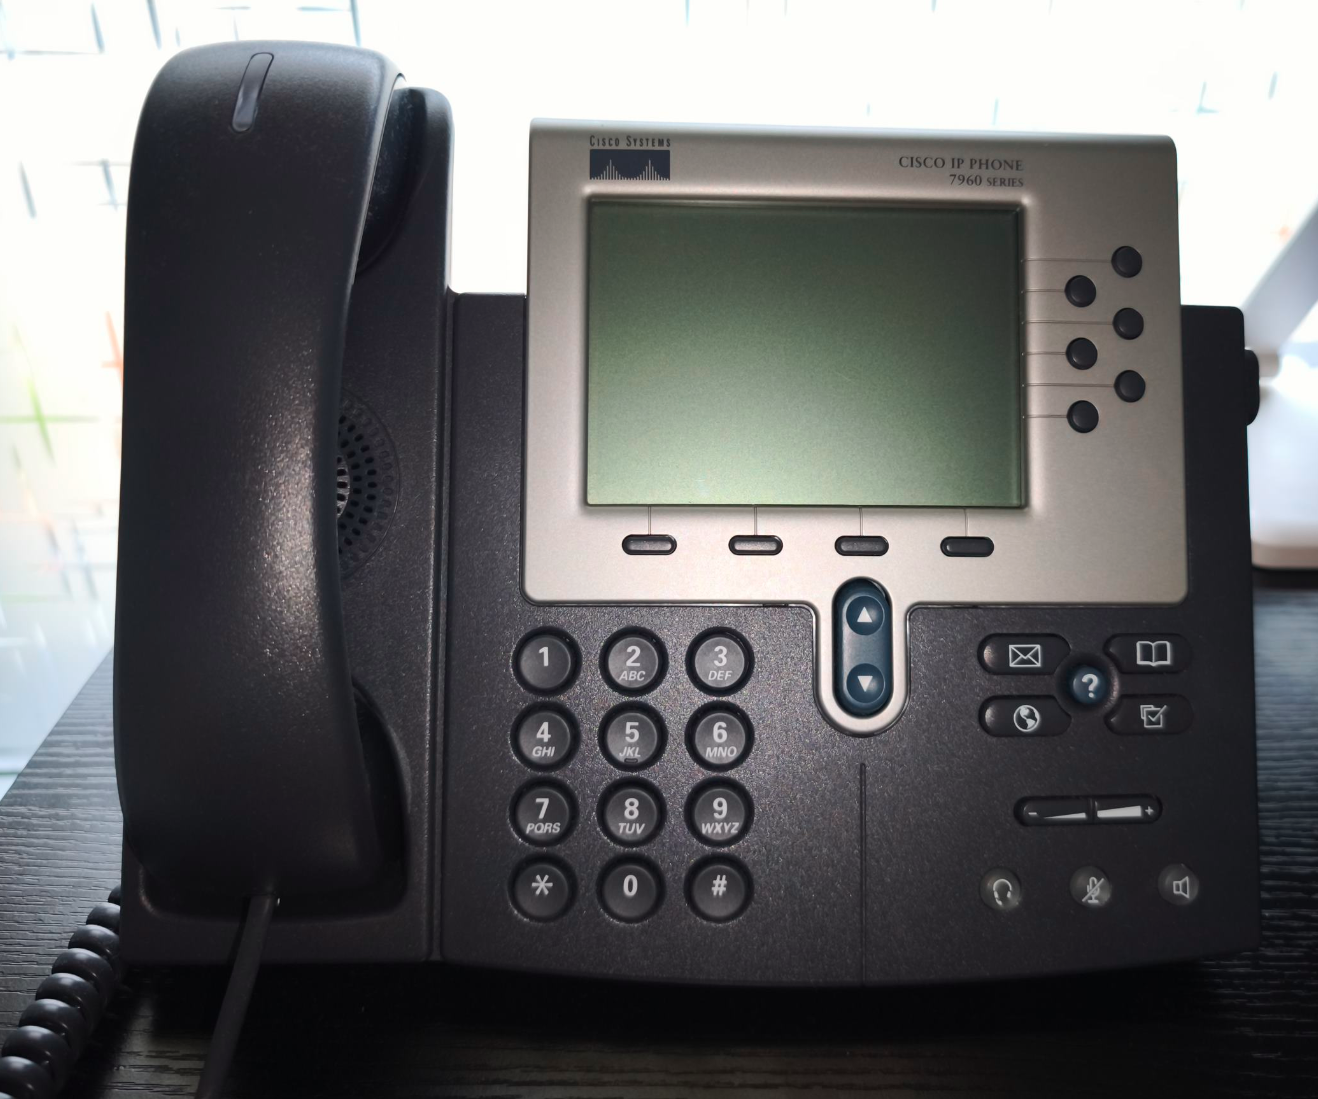
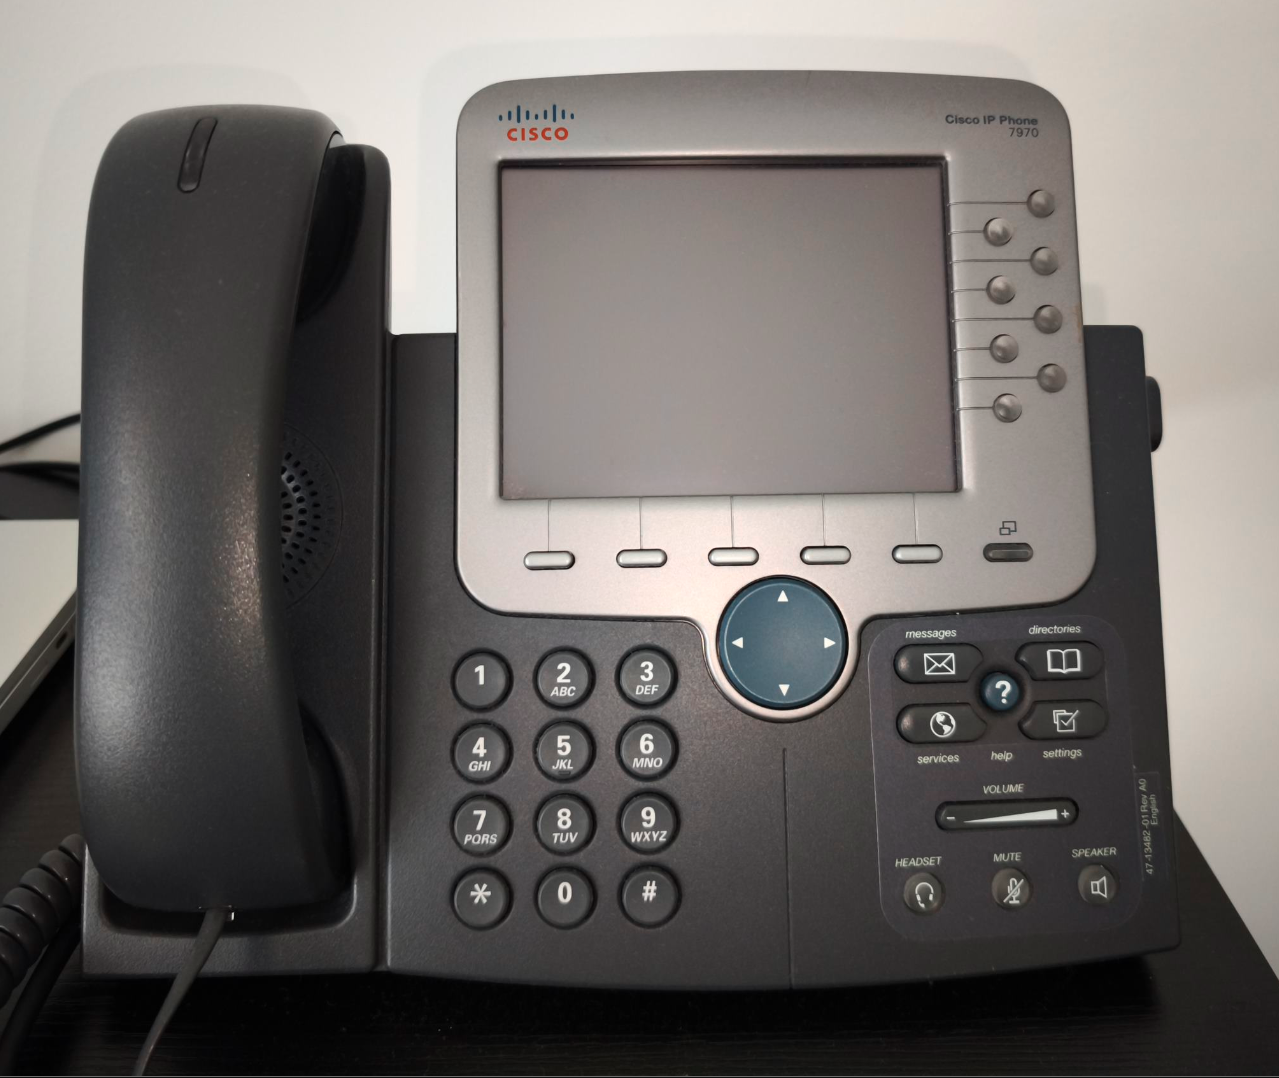
For this lab, I have purchased a used Cisco UC540 (UC540W-BRI-K9) appliance (there are two other versions of the UC500 Series, UC520 and UC560), a Cisco 7960G IP Phone and a Cisco 7970G IP Phone.
|
Cisco 7960G |
Cisco 7970G |
This and the following pages present a personal lab I have designed to explore the capabilities of the UC500 and both phones. I will be exploring:
- How to make & receive phone calls between the 7960 and the 7970 locally (via internal extensions).
- Configuring a SIP Trunk on the UC500
- Making calls through the PSTN to outside numbers using the SIP Trunk
- Receiving calls from the PSTN through the SIP Trunk
- Converting both phones to SIP and repeat the previous milestones.
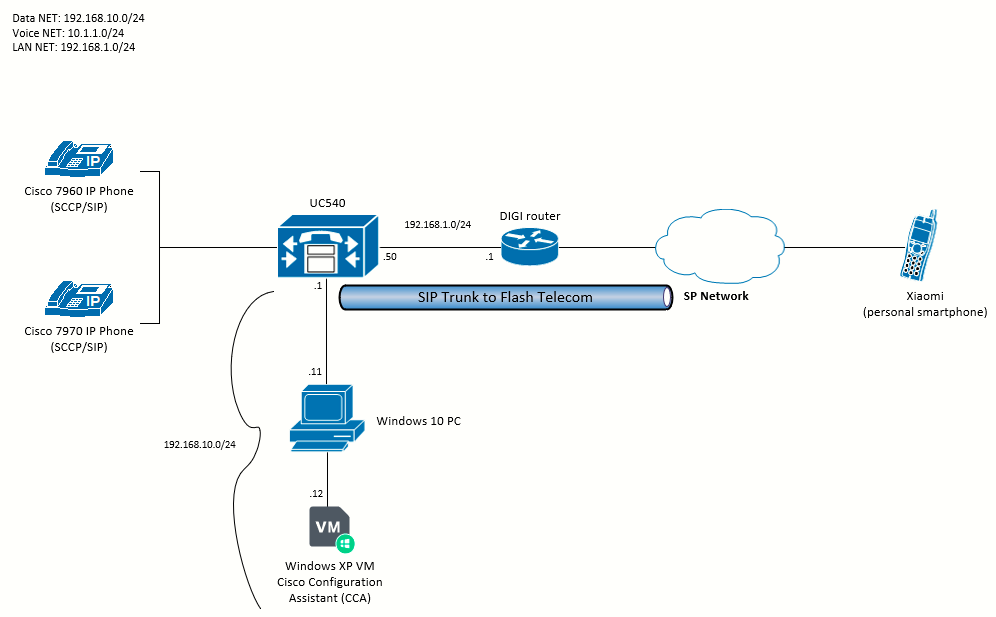
The topology I will be using looks like the following:
A note about the filesystems
These are the filesystems available on the UC500:
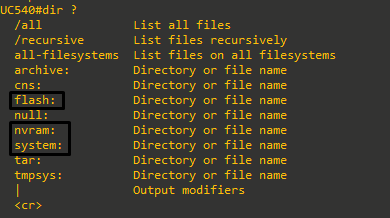
The ones we'll be working with are flash:, nvram: and system:.
Using the CCA Telephony Setup Wizard
The default username/password to access the device is cisco/cisco. The default enable password is cisco.
At this point, I will connect the two IP phones (Cisco 7960 / Cisco 7970) to the PoE ports of the Cisco UC500. The phones will boot and will join the UC500 as SCCP phones (default).
000087: Jan 2 12:56:32.234: %IPPHONE-6-REG_ALARM: 25: Name=SEP001646A8A77A Load=8.1(2.0) Last=Initialized
000088: Jan 2 12:56:32.238: %IPPHONE-6-REGISTER_NEW: ephone-5:SEP001646A8A77A IP:10.1.1.12 Socket:5 DeviceType:Phone has registered.
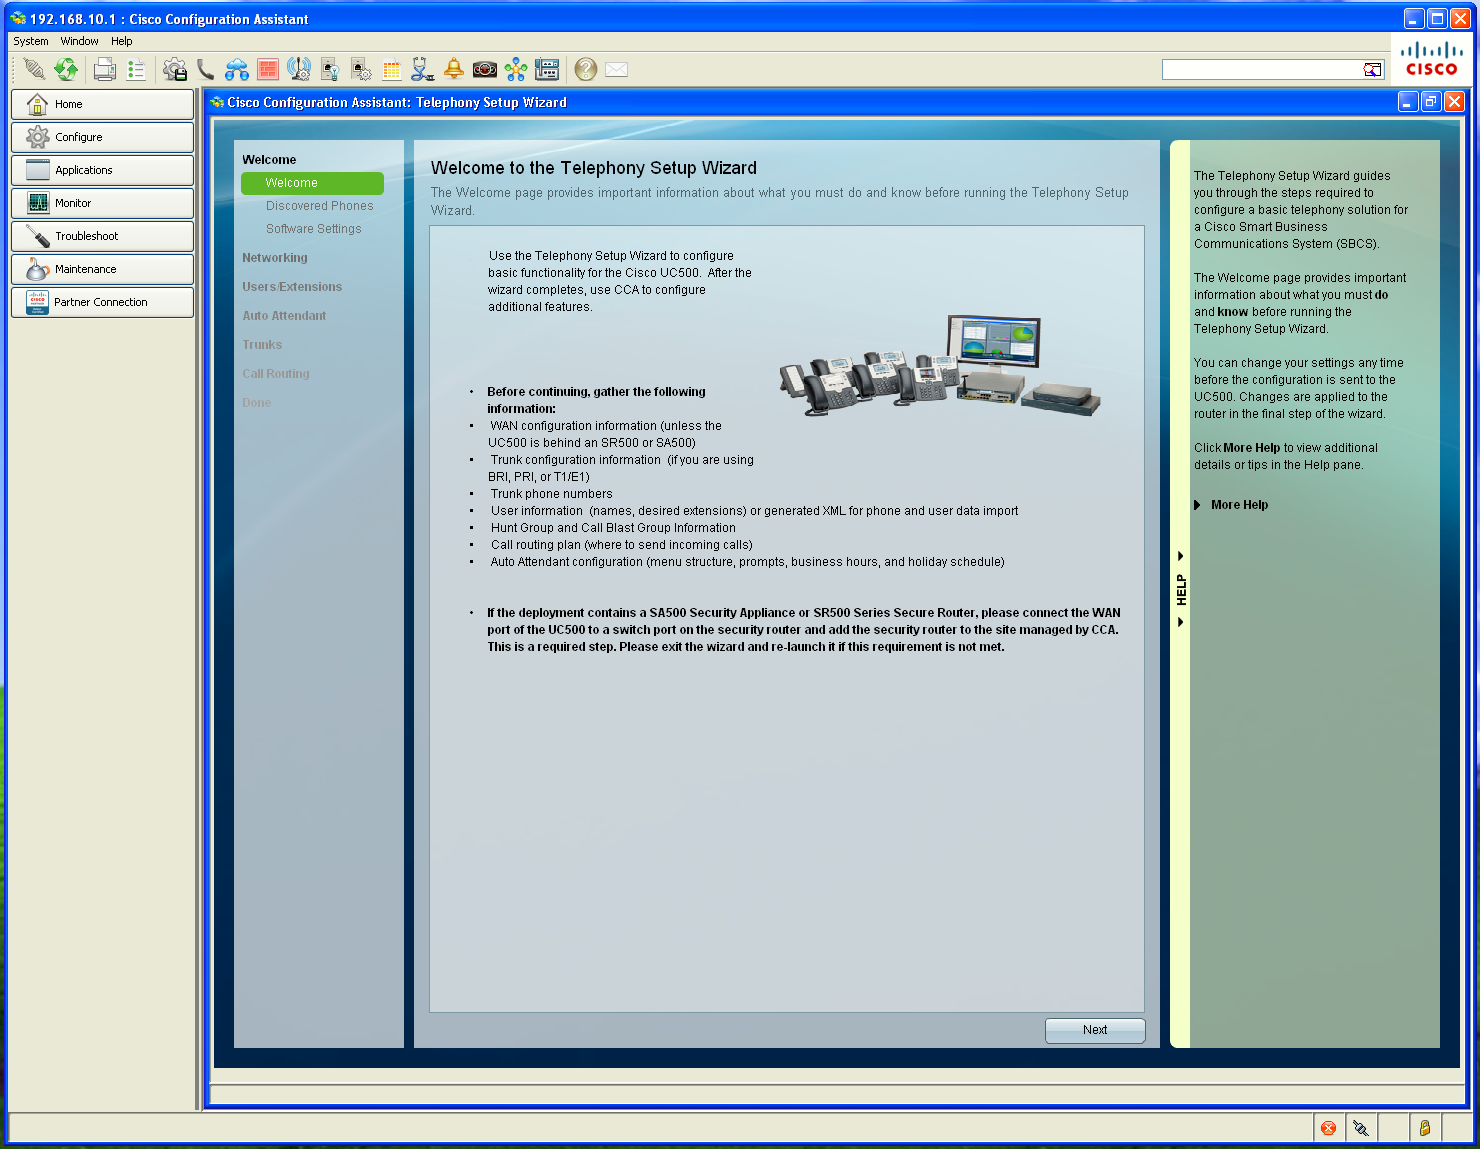
000544: Jan 2 13:03:16.243: %IPPHONE-6-REGISTER_NEW: ephone-6:SEP001B0CDB4FB6 IP:10.1.1.11 Socket:6 DeviceType:Phone has registered.When first connecting the device to Cisco Configuration Assistant (CCA), we are presented the Telephony Setup Wizard.
The wizard is intended for intial installations and for cases in which you want to reset the Cisco UC500 to factory defaults and completely replace the current configuration. These settings are configured through the wizard:
- Basic network settings such as WAN connection type
- Phones, users, and primary extensions
- Hunt groups and blast groups
- Trunk settings (ISDN BRI, ISDN PRI, and analog trunks) and phone numbers
- Locale-specific dial plan
- Inbound call routing
- Business schedules
- Auto Attendant actions and prompts
- The primary extension assigned to the phone will be enabled for the Auto Attendant Dial-by-Name service.
On the Discovered Phones sections, I can see the two phones I just connected:
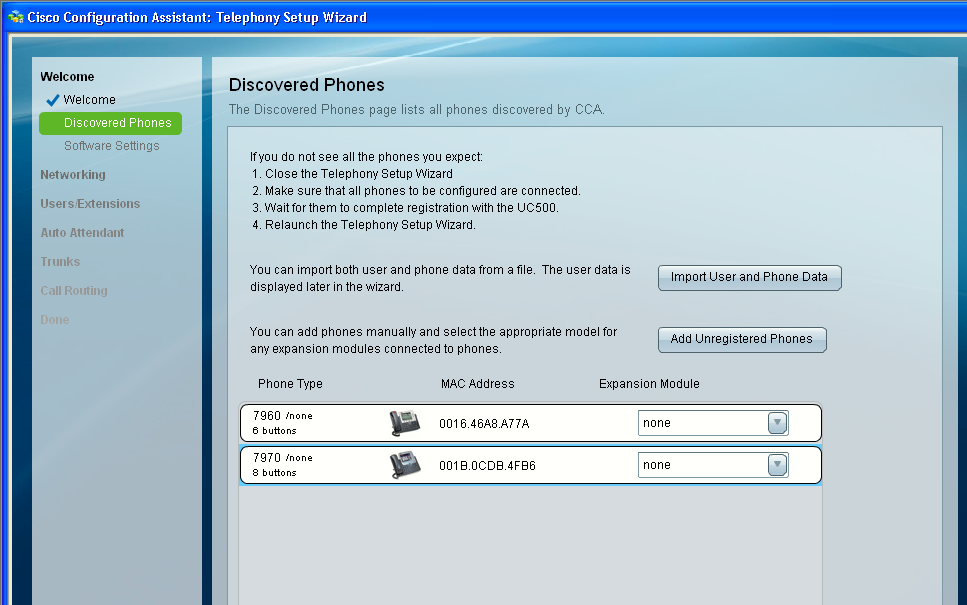 The phones do not have expansion modules so I'll just keep "none" selected.
Now, on the Networking > Choose Locale section, I can change system locale. I only have the US pack installed. However I previously installed the European Spanish (ES) pack for CUE (Voicemail) hence I will select the Custom radio button and change Voicemail Language to European Spanish. I will also change the Dial Plan Template and Call Progress Tone to Spain (where I live). The Time Zone will also be adjusted to Spain.
I will explain how to install a system locale pack later.

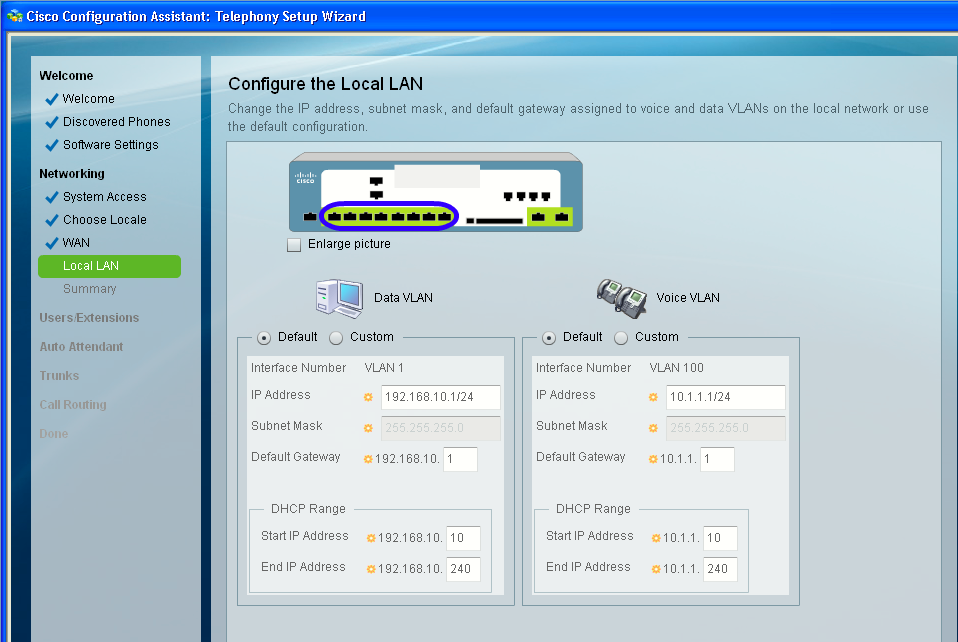
Next, on the WAN section, I will keep DHCP selected as the WAN IP configuration type.
000550: Jan 2 13:47:44.016: %DHCP-6-ADDRESS_ASSIGN: Interface FastEthernet0/0 assigned DHCP address 192.168.1.174, mask 255.255.255.0, hostname UC540For the data and voice VLANs, I will leave default configurations:
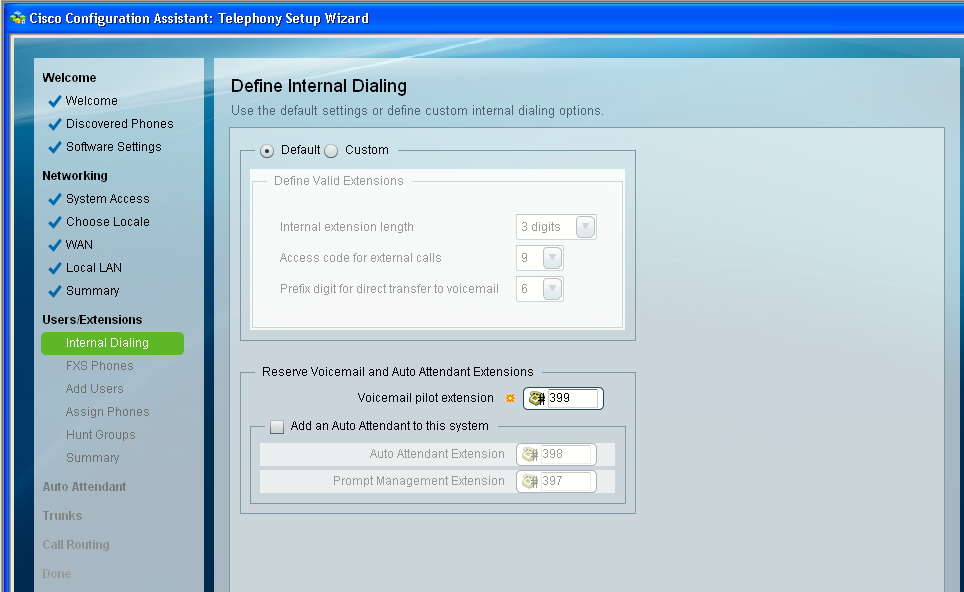
Once we enter the User/Extensions configuration menu, we are presented first with the Internal Dialing options, I will leave the defaults:
- Internal extension length: 3 digits
- Access code for external calls: 9
- Prefix digit for direct transfer to voicemail: 6
The voicemail extension will be the default #399.
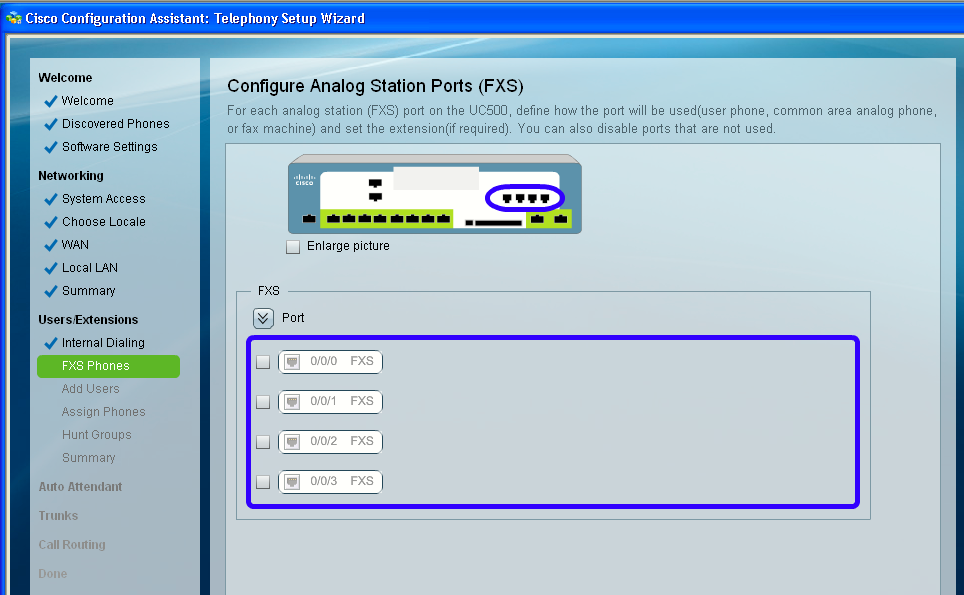
I will not be using any analog phones so I will disable (uncheck) all the FXS ports on the next section FXS Phones:
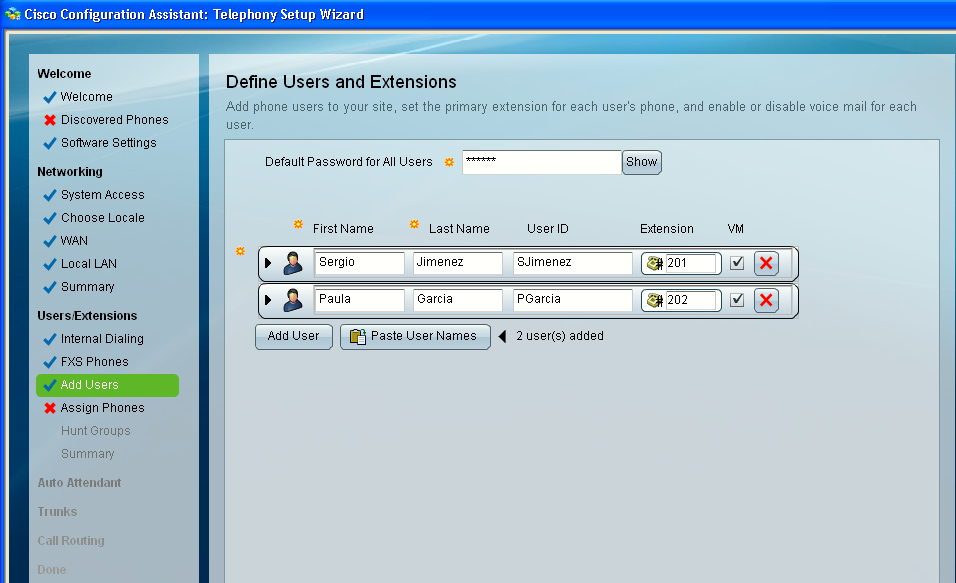
I will add two users for this lab (only two phones)º on next section Add Users and make sure that VM (VoiceMail) is enabled for the two:
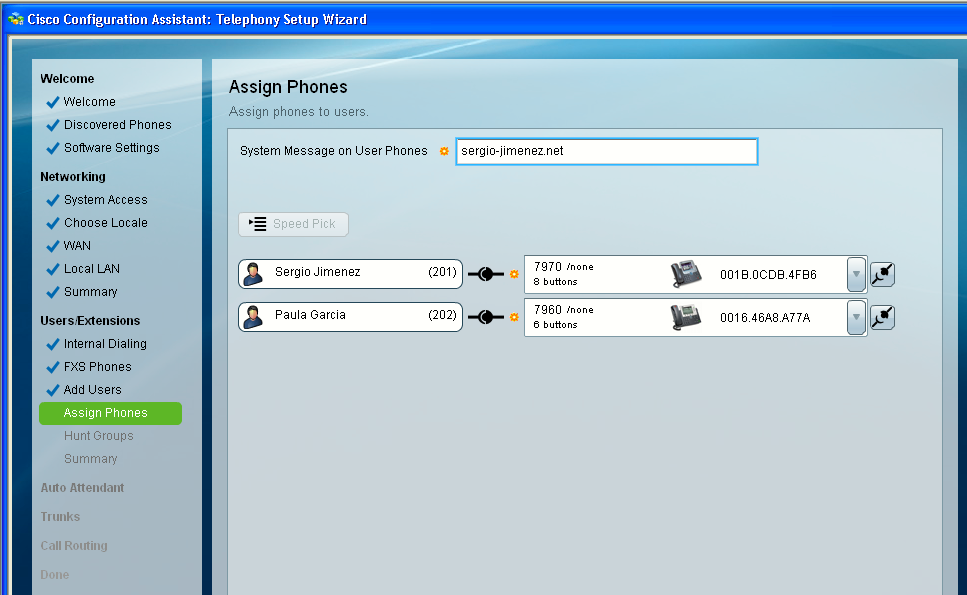
Next, I will assign phones to the users (I can only assign two at this point). I will also define the system message on the phones.
I won't define Hunt Groups right now so I will just skip this sections. Also I won't configure the Auto Attendant now.
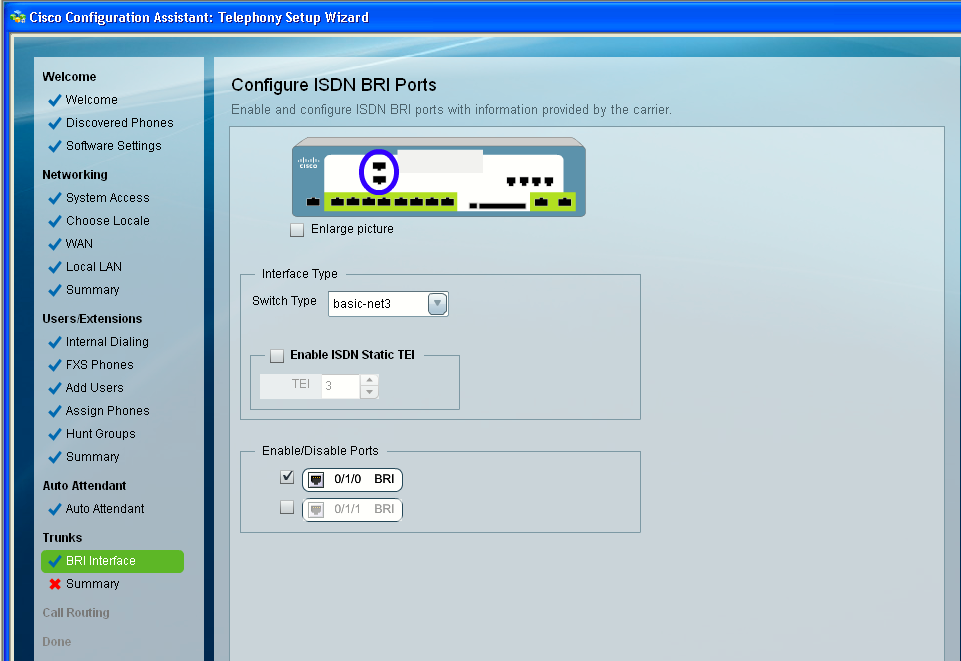
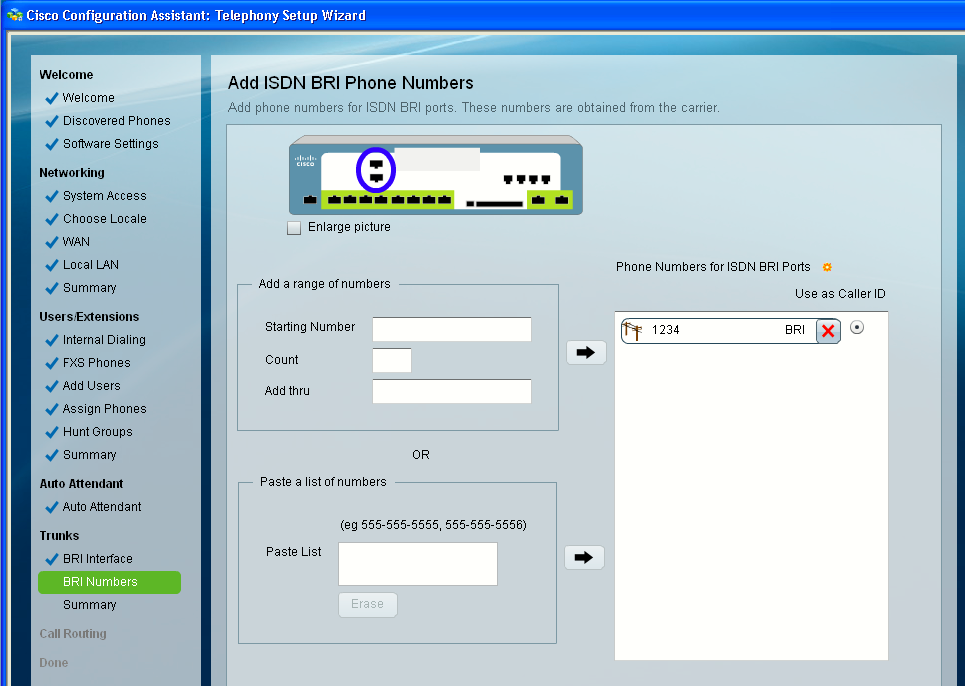
I won't be using the ISDN BRI ports, but I must leave at least one enabled so I can continue with the wizard (otherwise it shows an error). I must also add an ISDN BRI phone number (#1234 i.e).
Leave everything as default on the Call Routing section.
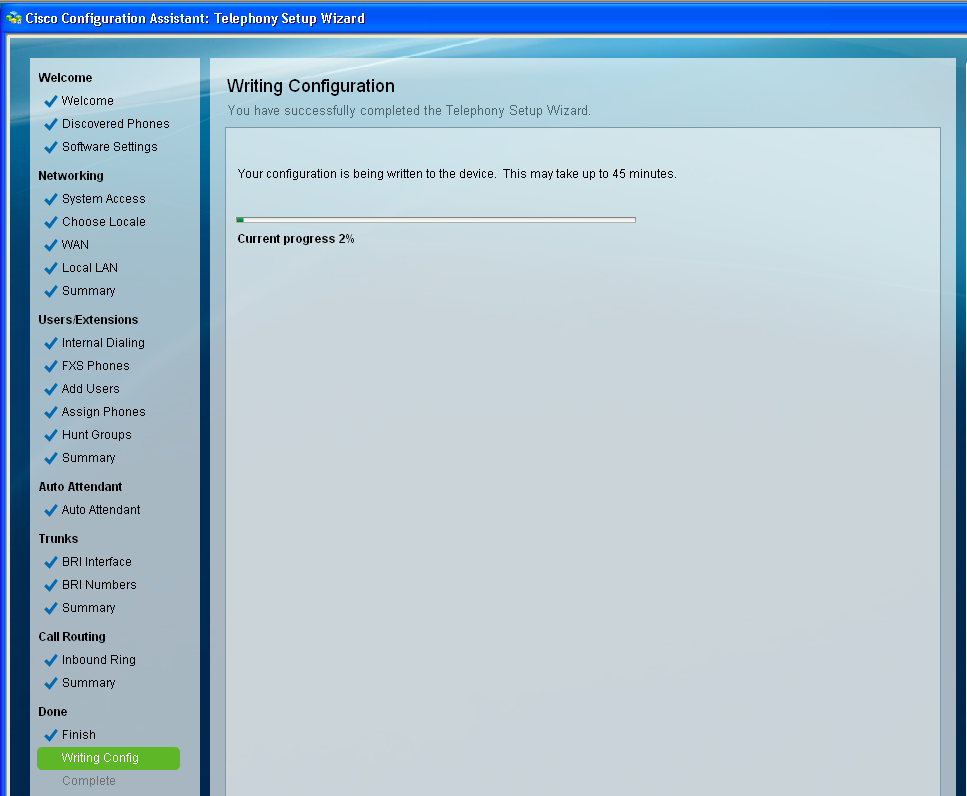
When reaching the end of the wizard hit Apply Configuration. The system will begin applying the configuration.
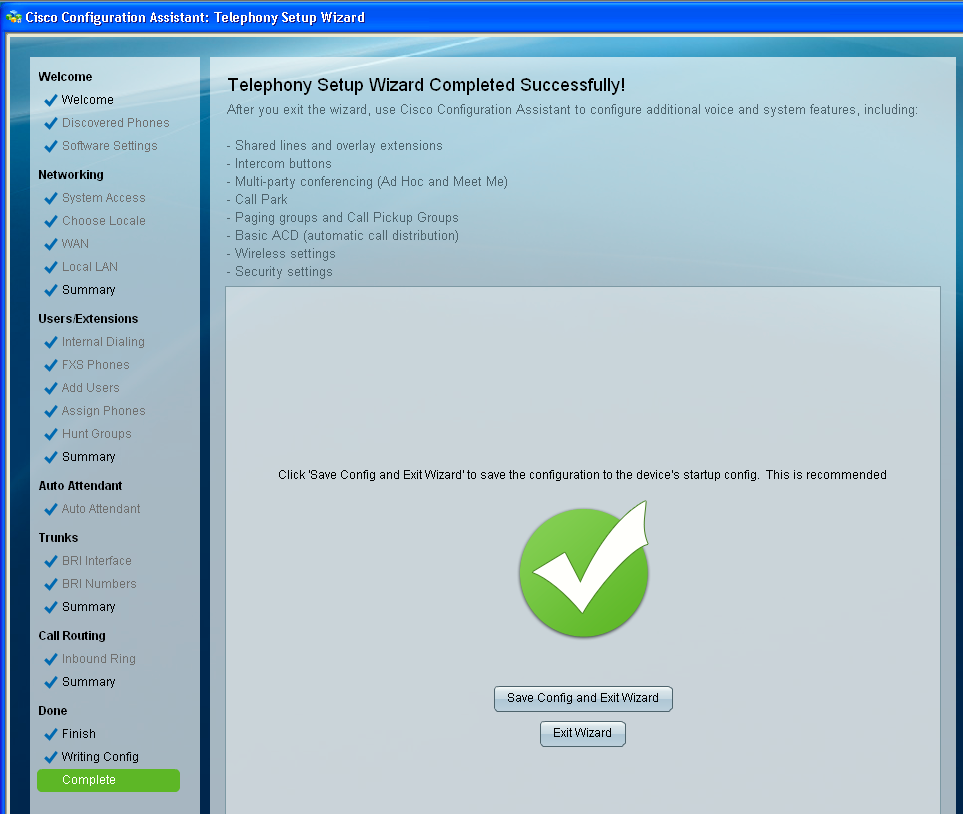
When the wizard has finished configuring the device a message will appear indicating so, like on the image below. Hit Save Config and Exit Wizard.
These telephony features are not configured through the Telephony Setup wizard:
- Calling permissions for individual phones (call permissions are unrestricted for phones added through the wizard)
- Call blocking for individual phones (call blocking is disabled for phones added through the wizard)
- Intercoms, shared lines, overlays, and octal lines
- Monitor mode and Watch mode lines
- SIP trunk interface
- Basic ACD (automatic call distribution)
- Multi-party conferencing (AdHoc/MeetMe)
- Night service
- Custom outgoing dial plan numbers
- Trunk groups and priorities
- System speed dials
- Paging groups
- Call Pickup groups
- Call Park extensions
- Conferencing
- Extension Mobility
- SIP Phone
These features can be configured in other CCA sections using expert mode.
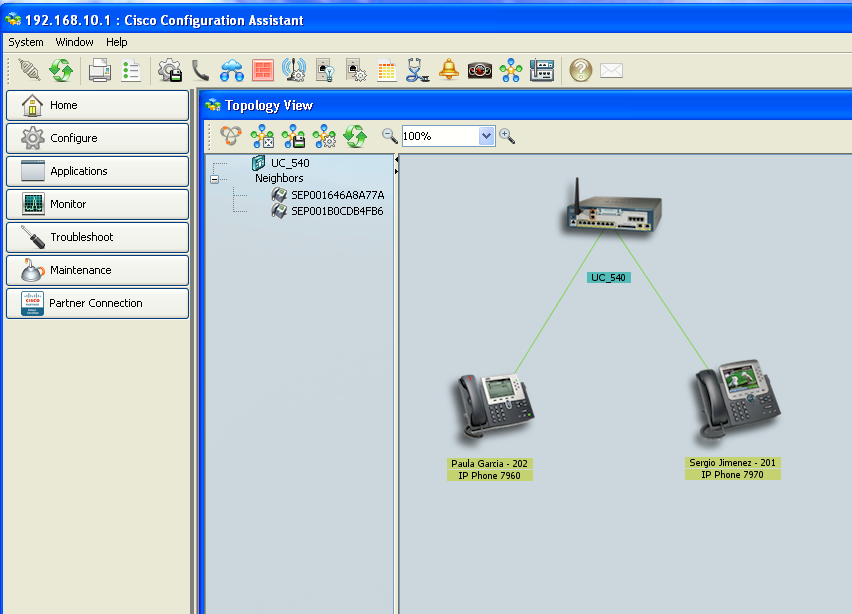
Topology View on CCA after initializing the telephony service on the UC500 using the Telephony Setup Wizard.