
Redmi A1 (ice): compile boedhack99's TWRP recovery (Windows)
This recovery is not really functional, but the method provided here to build/compile a TWRP recovery can be exported to other devices.
Setting up the environment
First step: create this folder C:\temp\twrp. We will use it later.
We need a virtual machine (VM) with at least 16GB of RAM and 100GB of disk capacity. I will bring up the VM on VirtualBox using Vagrant. You can read about Vagrant from this page on this very wiki.
Once VirtualBox is installed and Vagrant is setup, we need to install a Vagrant plugin to resize the default disk of the VM to 100GB (which by default for this one is 40GB. So from Git Bash I will issue the next command:
vagrant plugin install vagrant-disksizeWhen it is finished, enter the next command to generate a file called the Vagrantfile, for a Ubuntu Server 18.04 VM.
vagrant init ubuntu/bionic64This will create a Vagrantfile on the directory which we will have to edit to match the following:
# -*- mode: ruby -*-
# vi: set ft=ruby :

Vagrant.configure("2") do |config|

  config.vm.box = "ubuntu/bionic64"

  config.vm.synced_folder "C:/temp/twrp", "/opt/host"

  config.disksize.size = '100GB'

  config.vm.provider "virtualbox" do |vb|
	#Setting 18GB of RAM
	vb.memory = "18432"
	end

end
Save the Vagrantfile and bring up the VM with this command:
vagrant up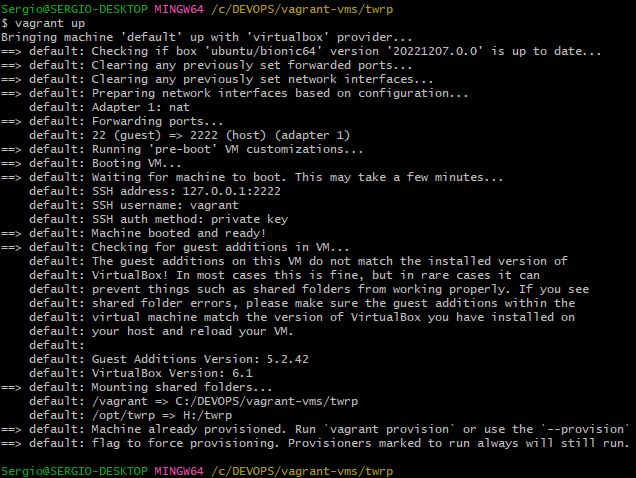
If the VM is brought up OK, you should see on VirtualBox the VM was added with the correct settings:
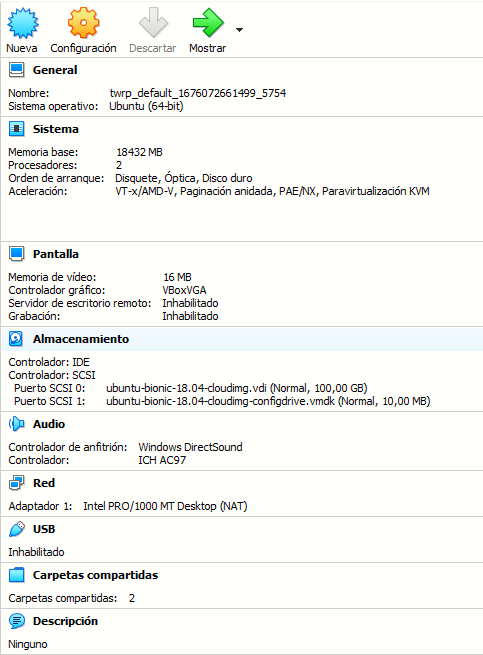
As you can see there is a 100GB vdi attached to the VM, and the VM itself has 18GB of RAM.
To access the VM CLI, issue the following command from Git Bash:
vagrant ssh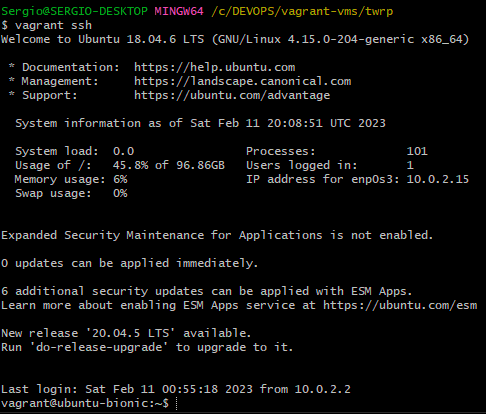
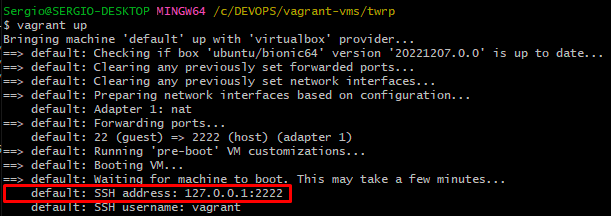
Alternatively if you want to access the CLI from another tool, take the IP and port shown here:
But first of all, before we can SSH to that IP:port, we need to enable password authentication to the VM. To edit the SSH config file:
sudo su
nano /etc/ssh/sshd_config
Then search for the PasswordAuthentication option and change its value to yes:

Ctrl+X to save the file from the nano editor. And then restart the sshd service with service sshd restart. Then we can SSH to the VM with the user vagrant and password vagrant with some other tool like PuTTY.
Building TWRP from source tree
Once the environment is set up, we have to install the needed tools before we can compile the recovery image. As a best practice do an update of the repository sources and then upgrade the packages:
apt update; apt upgradeThen install the following tools and download repo:
apt-get -qq install bc build-essential zip curl libstdc++6 git wget python gcc clang libssl-dev repo rsync flex curl bison aria2 python-lunch
curl --create-dirs -L -o /usr/local/bin/repo -O -L https://storage.googleapis.com/git-repo-downloads/repo
chmod a+rwx /usr/local/bin/repo
We have to configure Git username and email so we need a GitHub account (link to create one). Once the account is created we have to configure Git on the VM with our username and email:
git config --global user.name "username"
git config --global user.email "email"
Create a folder under /opt named twrp and cd to that directory:
mkdir /opt/twrp
cd /opt/twrp
chmod a+rwx -R .
Now that we are under /opt/twrp, we have to initialize our local repository using the AOSP trees to build TWRP (sync recovery source). Please note on the following command the -b parameter followed by twrp-12.1 which means we are initializing the repo for the Android 12.1 TWRP recovery branch.
repo init --depth=1 -u https://github.com/minimal-manifest-twrp/platform_manifest_twrp_aosp.git -b twrp-12.1Sync up the repo (this will take some time):
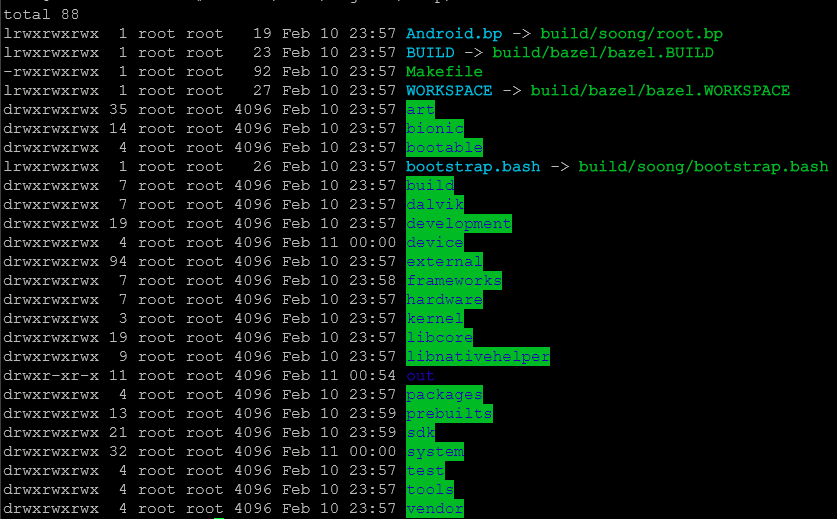
repo syncOnce the repo is synced up, we will have a folder structure on /opt/twrp similar to this:
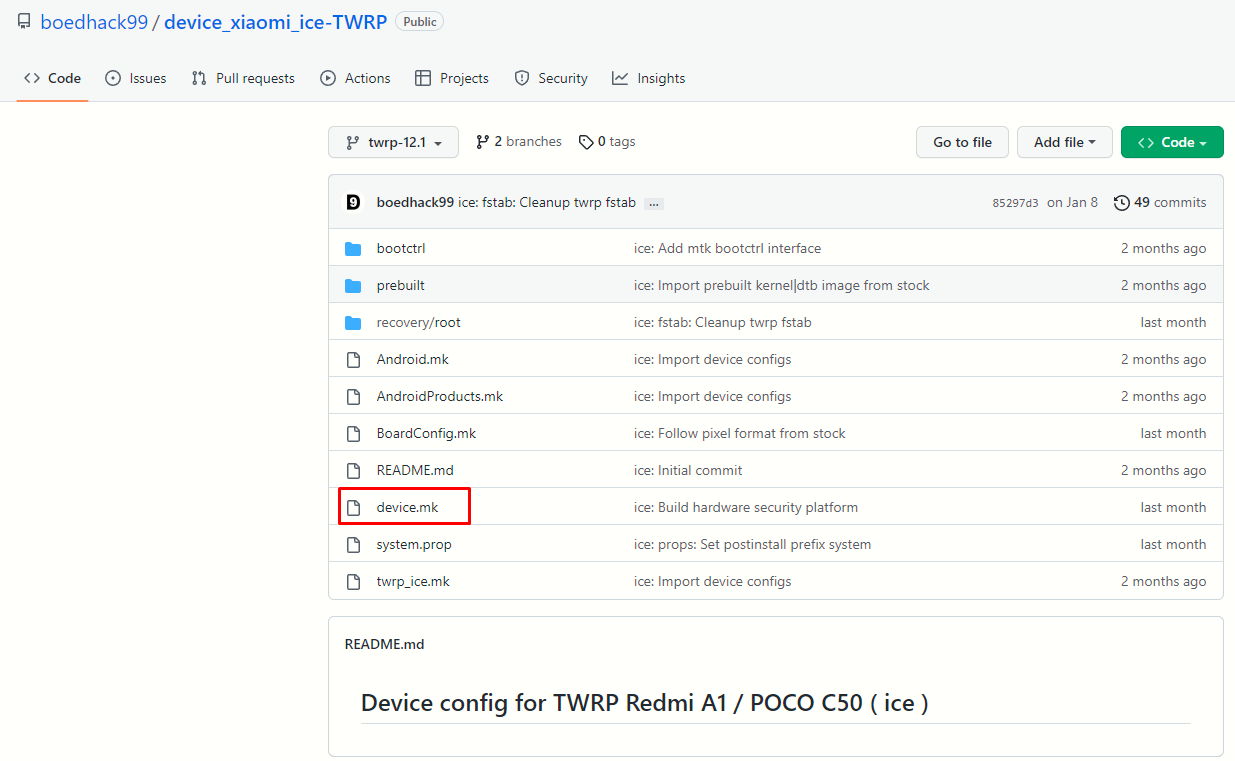
Now we have to download the custom TWRP source tree for our device. As stated in this page title, we are using boedhack99's TWRP recovery source tree for Redmi A1 (ice), so from his GitHub's we will download the source tree (link) and put the files under the folder device/xiaomi/ice.
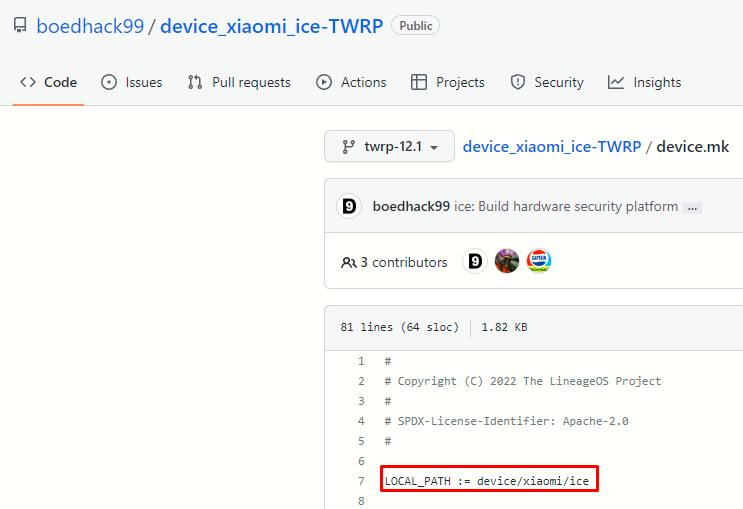
The folder structure needs to match the LOCAL_PATH variable value (on the device.mk file in the reposority). Please see images below.
To do this, from /opt/twrp folder:
mkdir device/xiaomi
cd device/xiaomi
git clone https://github.com/boedhack99/device_xiaomi_ice-TWRP.git
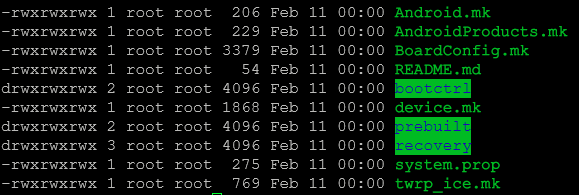
mv /device/xiaomi/device_xiaomi_ice-TWRP iceThe above commands create the folder structure device/xiaomi/ice and clone the repository from GitHub to the ice folder. As you can see below, the content of the ice folder is the same as the GitHub repository:
To set up the build:
cd /opt/twrp; export ALLOW_MISSING_DEPENDENCIES=true; . build/envsetup.sh; lunch twrp_ice-engAnd the final step to compile the flashable recovery img (this will take some time):
mka bootimageOnce the process is finished we will found a file boot.img under /opt/twrp/out/target/product/ice which is the TWRP recovery. To copy it to the Windows host user the command cp /opt/twrp/out/target/product/ice/boot.img /opt/host (the boot.img will we put under the folder we created at the beginning on C:\temp\twrp)
To flash the recovery:
fastboot flash boot_a boot.img
fastboot flash boot_b boot.img
Then, reboot to recovery with VolUp+Power and you will enter the TWRP recovery.
Sources:
Device config for TWRP Redmi A1 / POCO C50 ( ice )
https://github.com/boedhack99/device_xiaomi_ice-TWRP
How to Compile / Build twrp Recovery
https://unofficialtwrp.com/build-compile-twrp-recovery/
How can I get TWRP for my device? (how to compile TWRP)
https://twrp.me/faq/howtocompiletwrp.html
Minimal manifest for building TWRP for devices shipped with Android 10+
https://github.com/minimal-manifest-twrp/platform_manifest_twrp_aosp
How can I increase disk size on a Vagrant VM?
https://askubuntu.com/questions/317338/how-can-i-increase-disk-size-on-a-vagrant-vm
A/
https://source.android.com/docs/core/ota/ab#slots